Category: How To Decor

How To Decor

  • Small unfinished bathroom ideas maximizing space and style

    Small unfinished bathroom ideas maximizing space and style

    Transforming a small, unfinished bathroom into a functional and aesthetically pleasing space presents a unique challenge, demanding creative solutions and careful planning. This undertaking involves more than just slapping on paint; it requires a nuanced understanding of space optimization, budget-conscious material selection, and adherence to plumbing and electrical codes. From strategically placed mirrors to maximize light reflection and create the illusion of spaciousness, to the careful selection of low-flow fixtures to conserve water, every decision contributes to the final result.

    This exploration delves into practical techniques, budget-friendly options, and design considerations to guide you through the process of creating a stunning small bathroom, even from a raw, unfinished state.

    The journey begins with understanding the fundamental principles of space optimization. Built-in shelving, strategic use of mirrors, and clever storage solutions are key to maximizing functionality within limited square footage. Subsequently, we’ll explore budget-friendly materials, focusing on cost-effective yet stylish options for tiles, vanities, and lighting. Crucially, we’ll address the essential aspects of plumbing and electrical work, emphasizing code compliance and water conservation.

    Finally, the focus shifts to the visual appeal, examining various design styles and how to incorporate unique elements to create a personalized and inviting atmosphere. Through careful planning and execution, even the smallest unfinished bathroom can be transformed into a haven of comfort and style.

    Space Optimization Techniques for Small Bathrooms

    Bathroom small ideas design luxury hotel style meets minimalism european decorations homebnc

    Transforming a small, unfinished bathroom into a functional and aesthetically pleasing space requires strategic planning and the application of sound design principles. The limited square footage necessitates a focus on maximizing vertical space, employing clever storage solutions, and leveraging optical illusions to create a sense of spaciousness. This approach blends practicality with visual appeal, resulting in a bathroom that feels larger than its actual dimensions.

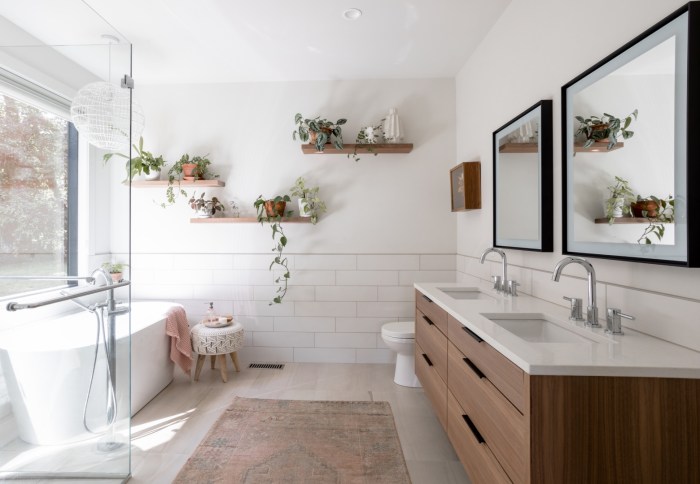
    Bathroom Layout with Built-in Shelving

    A well-designed layout is paramount in a small bathroom. Consider a 5′ x 6′ space. A vanity unit (2′ x 2′) positioned against one wall could incorporate a built-in sink and ample storage below. Opposite this, a shower enclosure (3′ x 3′) maximizes water efficiency and minimizes floor space. The remaining wall space can be dedicated to built-in shelving (1′ x 6′), constructed from moisture-resistant materials like melamine-coated MDF.

    These shelves provide storage for toiletries, towels, and other bathroom essentials. The shelves can be divided into sections of varying depths and heights to accommodate different items. A vertical medicine cabinet (1′ x 2′) above the vanity adds additional storage without encroaching on floor space. The color scheme should employ light and neutral tones to amplify the feeling of spaciousness.

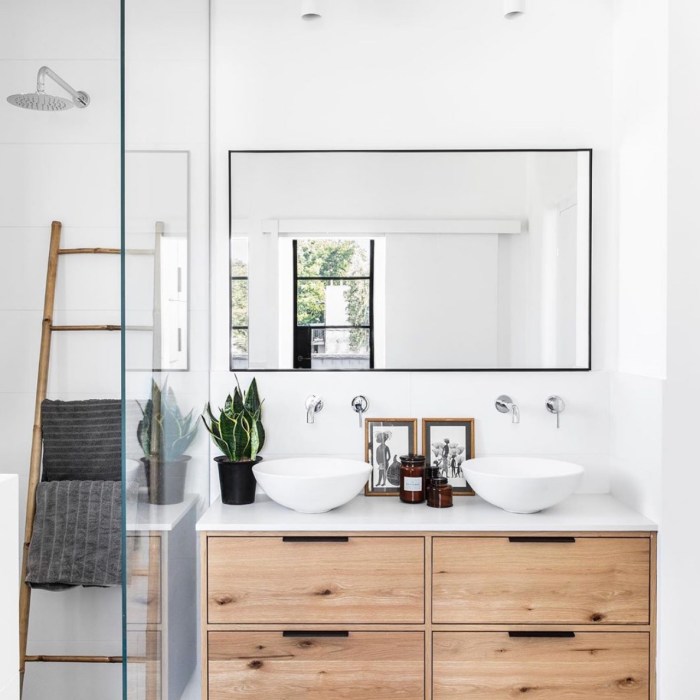
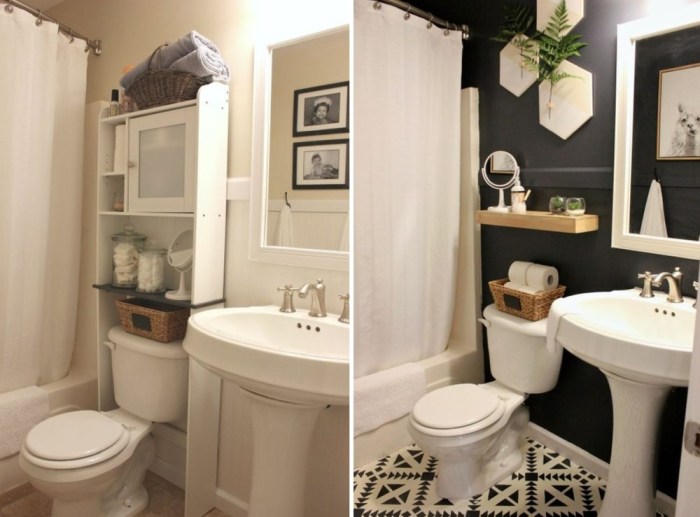
    Illusions of Space: Mirrors and Light Colors

    The strategic use of mirrors and light colors significantly impacts the perceived size of a small bathroom. Mirrors reflect light, creating the illusion of depth and expanding the visual space. Light colors, especially whites and pastels, also reflect light, further enhancing this effect. The following table summarizes the pros and cons of these techniques:

    Technique Description Pros Cons
    Large Mirrors Placement of a large mirror, ideally opposite a window or light source. Doubles the perceived size of the room, brightens the space. Can be expensive, requires careful placement to avoid distortions.
    Light Colors Painting walls and using light-colored fixtures and accessories. Reflect light, create an airy feel, make the space seem larger. May show dirt more easily, might require more frequent cleaning.

    Storage Improvement Strategies

    Effective storage solutions are crucial in small bathrooms. Three key strategies are:

    Implementing these strategies ensures maximum utilization of available space and keeps the bathroom organized and clutter-free.

    • Recessed shelving: Building shelves into the walls creates hidden storage without sacrificing floor space. This is especially effective in areas above the toilet or under the vanity. The depth of these shelves can be customized to fit the specific needs of the user.
    • Over-the-door organizers: These organizers hang on the back of the bathroom door, providing extra storage for toiletries and cleaning supplies without occupying valuable floor or wall space. They are readily available in various sizes and designs to match different bathroom aesthetics.
    • Vertical storage units: Tall, narrow cabinets or shelving units maximize vertical space. These units can be placed in corners or along walls, providing ample storage without overwhelming the small space. The units should be designed with adjustable shelves for flexible storage options.

    Utilizing Vertical Space

    Vertical space is often underutilized in small bathroom design. Think beyond standard shelving. Consider installing tall, narrow cabinets that reach the ceiling. These can house towels, toiletries, and cleaning supplies, freeing up valuable floor space. A visually appealing approach involves using a combination of open and closed storage.

    Open shelving can display decorative items while closed cabinets conceal less visually appealing items. For example, a tall, narrow cabinet with glass-fronted doors at the top could display decorative bottles and jars, while the lower section, with solid doors, could store cleaning supplies. Another example is using the space above the toilet for a narrow, floor-to-ceiling cabinet. This maximizes vertical space while keeping the floor clear.

    Visualize a sleek, white cabinet extending from floor to ceiling, seamlessly integrating with the overall bathroom design.

    Budget-Friendly Finishing Materials and Fixtures

    Transforming a small, unfinished bathroom into a stylish and functional space doesn’t require breaking the bank. Careful selection of materials and fixtures can achieve a high-impact renovation while remaining within a reasonable budget. This section details cost-effective options that balance affordability with aesthetic appeal and durability. We’ll explore budget-friendly tile choices, compare various vanity types, design a cost-effective lighting scheme, and Artikel the steps for installing a simple yet effective shower kit.

    Affordable and Stylish Bathroom Tile Options

    Selecting the right tiles is crucial for a small bathroom, as they significantly impact the visual perception of space. Lighter colors and smaller tiles generally create a feeling of spaciousness. Here are some budget-friendly options:

    • Ceramic Tiles: Ceramic tiles offer a wide range of colors, patterns, and finishes at a relatively low cost. Expect to pay between $1-$5 per square foot, depending on the quality and design. A classic white subway tile creates a clean, timeless look, while more textured options can add visual interest. Imagine a small bathroom brightened by glossy white ceramic tiles, reflecting light and enhancing the feeling of spaciousness.

    • Porcelain Tiles: Slightly more expensive than ceramic, porcelain tiles are more durable and water-resistant, making them ideal for bathrooms. Prices typically range from $2-$8 per square foot. A light grey porcelain tile with a subtle texture can add a touch of sophistication without overwhelming a small space. Think of a subtle, textured pattern that adds visual depth without being overly busy.

    • Glass Tiles: Glass tiles can add a modern and luxurious feel, reflecting light and creating a sense of spaciousness. Prices vary widely, but you can find budget-friendly options starting around $3-$10 per square foot. A small mosaic of clear or lightly tinted glass tiles as an accent wall can make a big impact. Visualize a shimmering accent wall behind a vanity, adding a touch of elegance.

    Comparison of Budget-Friendly Vanities

    The vanity is a focal point in any bathroom, and choosing the right one is essential for both functionality and aesthetics. Here’s a comparison of three budget-friendly options:

    Vanity Type Material Pros Cons
    Pre-fabricated Vanity Laminate, MDF Affordable, readily available, easy to install May not be as durable as solid wood, limited customization options
    DIY Vanity from repurposed materials (e.g., old dresser) Reclaimed wood, painted MDF Unique, eco-friendly, highly customizable Requires DIY skills, may require more time and effort
    Simple pedestal sink Ceramic or porcelain Space-saving, clean lines, easy to clean Limited storage, may not be suitable for all bathroom layouts

    Cost-Effective Lighting Plan for a Small Bathroom

    Proper lighting is essential for creating a functional and inviting atmosphere in a small bathroom. A layered approach using different types of lighting maximizes both functionality and ambiance.

    • Recessed Lighting: Recessed lights provide general illumination, evenly distributing light across the ceiling. Their unobtrusive design helps maintain a clean, uncluttered look, ideal for small spaces. Install 2-3 recessed lights, depending on the bathroom’s size, ensuring even coverage. The effect is a bright, evenly lit space, preventing dark corners.
    • Vanity Lighting: Vanity lights illuminate the sink area, providing task lighting for applying makeup or shaving. Consider LED vanity lights with adjustable brightness for optimal control. Two wall-mounted sconces flanking the mirror create a balanced and functional light source. The result is focused illumination on the vanity area, enhancing functionality and reducing shadows.
    • Accent Lighting: A small, waterproof LED strip light installed under the vanity cabinet adds a subtle, ambient glow. This creates a warm, inviting atmosphere and subtly illuminates the floor, making the space feel larger. The visual effect is a gentle, welcoming light, enhancing the overall ambiance.

    Installing a Budget-Friendly Shower Kit

    A pre-fabricated shower kit offers a simple and cost-effective solution for a small bathroom. These kits typically include a shower pan, walls, and a door, simplifying the installation process.

    1. Prepare the Shower Area: Ensure the floor is level and waterproofed. This may involve installing a waterproof membrane or tiling the shower floor.
    2. Assemble the Shower Pan: Follow the manufacturer’s instructions to assemble the shower pan, ensuring it is level and securely placed.
    3. Install the Shower Walls: Attach the shower walls to the shower pan, ensuring they are plumb and level. Use appropriate sealant to prevent water leaks.
    4. Install the Shower Door: Carefully install the shower door, following the manufacturer’s instructions. Ensure the door seals properly to prevent water leakage.
    5. Caulk and Finish: Apply caulk around the edges of the shower pan and walls to create a watertight seal. Finish with any necessary trim pieces.

    Plumbing and Electrical Considerations

    Small unfinished bathroom ideas

    Transforming an unfinished small bathroom into a functional and safe space necessitates careful planning and execution of plumbing and electrical work. Ignoring these crucial aspects can lead to costly repairs, safety hazards, and significant inconvenience. This section details essential considerations for ensuring a compliant and efficient bathroom installation.

    Rough-in Plumbing for Small Bathrooms

    Rough-in plumbing involves installing the water supply and drainage pipes before the walls and flooring are finished. Precise measurements and adherence to building codes are paramount. A typical small bathroom rough-in might include a toilet flange, supply lines for the sink and toilet, and drain lines for the sink, shower (if included), and toilet. These lines are typically made of PVC or ABS plastic for their durability and resistance to corrosion.

    Proper sloping of drain lines (typically 1/4 inch per foot) is critical to prevent clogs. The toilet flange, a metal ring bolted to the floor, provides a secure base for the toilet. Precise positioning of all components is essential to ensure proper fixture placement and efficient water flow. Imagine a diagram showing the toilet flange centrally located, with supply lines running from shut-off valves (located behind the wall) to the toilet and sink, and drain lines connecting the sink and toilet to the main drain stack.

    The drain lines slope gently downward towards the main drain. All connections should be carefully sealed with appropriate plumbing cement to prevent leaks. Specifications for pipe diameter and materials should adhere to local building codes.

    Potential Electrical Code Violations and Solutions

    Small bathrooms, due to their limited space, often present challenges in meeting electrical codes. Common violations include insufficient GFCI (Ground Fault Circuit Interrupter) protection, inadequate lighting, and improper wiring. GFCI outlets are mandatory within six feet of any water source to prevent electric shock. Lack of GFCI protection is a significant safety hazard. Solutions involve installing GFCI outlets in appropriate locations.

    Inadequate lighting can create unsafe conditions, particularly in smaller spaces. Solutions include installing appropriately rated and correctly wired lighting fixtures, potentially including exhaust fans with integrated lighting for ventilation and illumination. Improper wiring, such as using incorrect gauge wire or failing to properly ground fixtures, poses a fire hazard. Solutions require careful adherence to wiring diagrams and local electrical codes, potentially requiring professional electrical work to ensure safety and compliance.

    Low-Flow Toilet and Faucet Installation

    Installing low-flow fixtures is crucial for water conservation. A low-flow toilet typically uses 1.28 gallons or less per flush, significantly reducing water consumption compared to older models. Installation involves removing the old toilet, aligning the new toilet with the existing flange, and securing it with bolts. A wax ring creates a watertight seal between the toilet and the flange.

    Connecting the water supply line completes the installation. Low-flow faucets typically use 1.5 gallons per minute or less. Installation involves replacing the old faucet cartridges with low-flow cartridges and ensuring proper sealing to prevent leaks. A step-by-step process for a low-flow toilet might include: (1) Turning off the water supply, (2) disconnecting the water supply line, (3) removing the old toilet, (4) applying a new wax ring, (5) setting the new toilet in place, (6) securing the toilet with bolts, (7) reconnecting the water supply line, (8) testing for leaks.

    A similar process applies to low-flow faucets, with additional steps depending on the faucet type.

    Ventilation in Small Bathrooms

    Proper ventilation is essential to prevent mold and mildew growth, which are common in small, humid bathrooms. Insufficient ventilation can lead to respiratory problems and structural damage. A properly sized exhaust fan, typically rated for the bathroom’s cubic footage, should be installed to remove moisture-laden air. The fan should be vented to the outside to effectively remove moisture.

    Solutions for improving air quality include installing a high-efficiency exhaust fan with a timer or humidity sensor for automatic operation. Adequate natural ventilation, where possible, can supplement mechanical ventilation. Consider the size of the bathroom when selecting an exhaust fan; a larger bathroom requires a more powerful fan. For example, a 50-square-foot bathroom might need a fan with a CFM (cubic feet per minute) rating of 50 or higher.

    Regular cleaning of the exhaust fan and vent is crucial for maintaining optimal performance.

    Visual Appeal and Design Elements

    The visual appeal of a small bathroom is paramount; it dictates the overall mood and functionality of the space. Careful consideration of design elements, color palettes, and material choices can transform a cramped, unfinished room into a relaxing and efficient oasis. The following sections explore three distinct design styles, practical applications of unique design elements, and a detailed example of a small bathroom incorporating a walk-in shower.

    We will also examine how color and texture can contribute to a sense of spaciousness and calm.

    Mood Board: Three Small Bathroom Design Styles

    Three distinct design styles – modern, rustic, and minimalist – are presented below, each offering a unique aesthetic and approach to space optimization in a small bathroom. These styles demonstrate the versatility of design choices available even within a limited area.

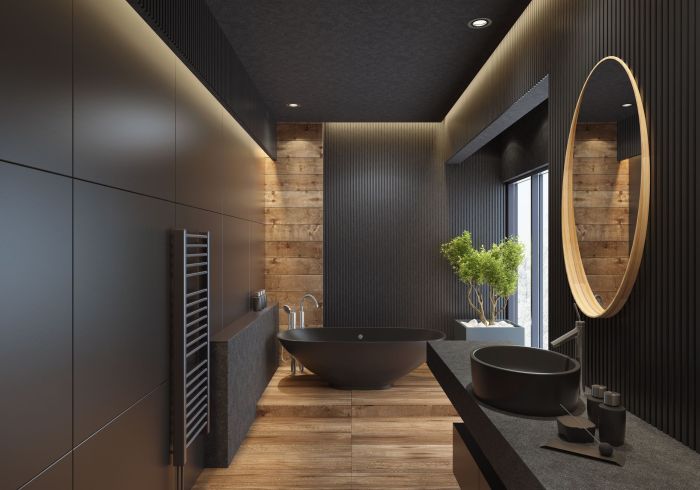
    • Modern: This style emphasizes clean lines, sleek fixtures, and a neutral color palette. Imagine a space dominated by crisp white walls, complemented by matte black accents in the faucets and shower fittings. The flooring could be large-format, light-grey porcelain tiles, creating a sense of spaciousness. A minimalist vanity with integrated sink and ample storage would complete the look.

      The overall feel would be sophisticated and uncluttered.

    • Rustic: This style embraces natural materials and warm tones. Picture exposed brick walls (or brick-effect tiles), a wooden vanity with a distressed finish, and a shower with pebble-like mosaic tiles. The color palette would include earthy browns, creams, and muted greens. Natural light would be maximized, and perhaps a single, strategically placed pendant light with a rustic metal finish would add character.

      The overall mood would be cozy and inviting.

    • Minimalist: This style prioritizes simplicity and functionality. Imagine a monochromatic scheme, perhaps using shades of grey and white. The walls would be smooth and unadorned, the flooring a simple, light-colored tile. A floating vanity with integrated storage would maximize floor space. The shower would be a simple, frameless enclosure with a single rainfall showerhead.

      The overall effect would be clean, serene, and unfussy.

    Incorporating Unique Design Elements

    The strategic use of unique design elements can dramatically enhance the visual interest of a small bathroom. Even subtle additions can create a significant impact.

    • Patterned Tiles: Using patterned tiles as a focal point on a single wall, such as the shower surround or behind the vanity, adds visual texture without overwhelming the space. A geometric pattern in a neutral color palette would work well in a modern bathroom, while a floral or arabesque pattern could enhance a rustic design.
    • Interesting Lighting Fixtures: A statement lighting fixture, such as a unique pendant light or a stylish wall sconce, can become a focal point and draw the eye upwards, making the ceiling appear higher. The light fixture’s style should complement the overall design scheme; for instance, a sleek, minimalist fixture would be suitable for a modern bathroom, while a wrought iron fixture might be appropriate for a rustic design.

    • Statement Mirrors: A large, uniquely framed mirror can not only be functional but also a striking design element. A mirror with an ornate frame can add elegance to a traditional design, while a simple, frameless mirror can enhance a minimalist space. Strategically placed mirrors can also create the illusion of more space by reflecting light and amplifying the perceived size of the room.

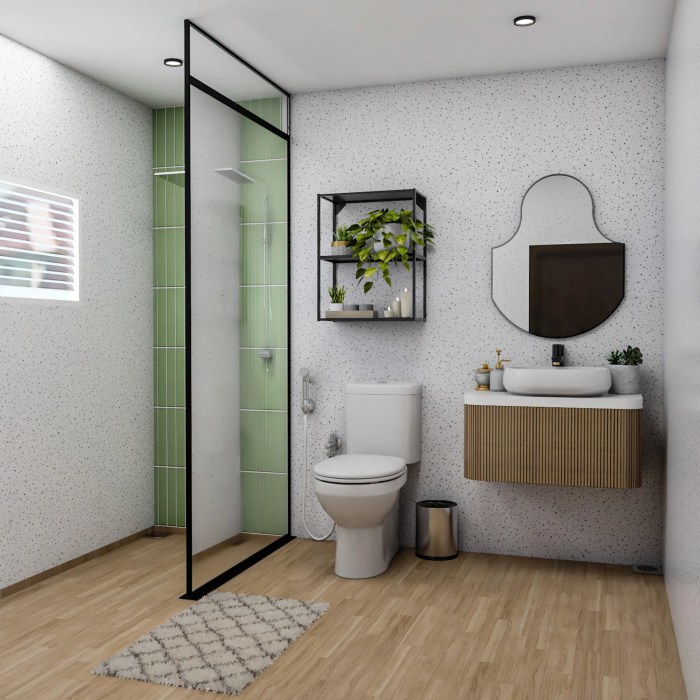
    Small Bathroom Design with Walk-in Shower

    This design features a small bathroom (approximately 4ft x 6ft) with a walk-in shower.Imagine a space with white subway tiles on the walls, creating a clean and bright atmosphere. The floor is composed of large, light grey porcelain tiles for a sense of spaciousness. A small, floating vanity with a white countertop and a vessel sink sits against one wall.

    The walk-in shower (3ft x 3ft) features clear glass walls and a rainfall showerhead, maximizing the sense of openness. The shower walls are clad in the same white subway tiles as the rest of the bathroom, creating a cohesive look. A small niche in the shower wall provides space for toiletries.

    Color and Texture for Spaciousness and Calm

    Element Description Effect Example
    Wall Color Light, neutral colors (white, light grey, pale blue) Reflects light, making the space feel larger and brighter. White subway tiles with grey grout.
    Floor Color Light-colored tiles or flooring (light grey, beige) Creates a sense of continuity with the walls, minimizing visual breaks. Large-format light grey porcelain tiles.
    Texture Smooth surfaces (polished tiles, glass shower enclosure) Minimizes visual clutter and creates a sense of calm. Frameless glass shower enclosure.
    Accents Subtle pops of color (towels, artwork) Adds visual interest without overwhelming the space. A set of sage green towels.

    Final Conclusion

    Renovating a small, unfinished bathroom is a rewarding endeavor that blends creativity, practicality, and technical expertise. By carefully considering space optimization techniques, selecting budget-friendly yet stylish materials, ensuring compliance with plumbing and electrical codes, and incorporating thoughtful design elements, the transformation from a raw space to a functional and aesthetically pleasing bathroom becomes achievable. Remember, the key lies in strategic planning, meticulous execution, and a keen eye for detail.

    The result? A small bathroom that punches far above its weight in style and functionality, a testament to the power of thoughtful design and careful craftsmanship.

    Detailed FAQs

    What are some common mistakes to avoid when renovating a small unfinished bathroom?

    Common mistakes include neglecting proper ventilation, overlooking electrical code requirements, using dark colors that make the space feel smaller, and insufficient planning for storage.

    How can I ensure proper ventilation in a small bathroom?

    Install an exhaust fan with a high CFM (cubic feet per minute) rating and ensure it vents directly to the outside. Consider adding a window if possible for natural ventilation.

    What are some eco-friendly options for a small bathroom renovation?

    Use reclaimed or recycled materials, choose low-VOC paints, install low-flow toilets and faucets, and opt for energy-efficient lighting.

    How much should I budget for a small unfinished bathroom renovation?

    Costs vary greatly depending on materials and fixtures chosen. A basic renovation might cost a few thousand dollars, while a high-end remodel could cost tens of thousands.

    Can I do some of the work myself to save money?

    Many tasks, like painting and installing shelving, can be DIY projects. However, plumbing and electrical work should generally be left to licensed professionals.

  • Scandinavian Bathroom Design with Marble

    Scandinavian Bathroom Design with Marble

    Imagine a sanctuary of serenity: a Scandinavian bathroom where the cool minimalism of Nordic design meets the luxurious warmth of marble. This harmonious blend creates a space that is both strikingly modern and deeply calming. We’ll explore the principles of Scandinavian design, the versatile applications of marble in this context, and the practical considerations of integrating these seemingly disparate elements into a cohesive and breathtaking whole.

    From selecting the perfect marble type to crafting a lighting scheme that enhances its natural beauty, we’ll delve into the art of creating a Scandinavian marble bathroom that transcends mere functionality, becoming a true haven of relaxation and style.

    This exploration will cover the spectrum of design choices, from color palettes and material selections to fixture styles and lighting strategies. We will analyze the unique properties of various marbles, their impact on the overall aesthetic, and how to effectively incorporate them into different bathroom layouts. Furthermore, we will address potential challenges associated with using marble in a Scandinavian setting and provide practical solutions to ensure both beauty and practicality.

    Defining Scandinavian Style in Bathrooms

    Scandinavian bathroom design, a branch of the broader Scandinavian design aesthetic, prioritizes functionality, minimalism, and a connection with nature. This approach translates into bathrooms that are both aesthetically pleasing and highly practical, emphasizing clean lines, natural light, and a calming atmosphere conducive to relaxation and self-care. The style’s core tenets are rooted in the region’s climate and cultural values, resulting in spaces that are both visually appealing and deeply functional.Scandinavian bathroom design emphasizes the use of light, airy spaces to counteract the long, dark winters common in Scandinavian countries.

    This is achieved through a combination of architectural features, color choices, and material selection, all working in harmony to create a bright and welcoming environment. The style’s inherent simplicity and functionality makes it adaptable to various bathroom sizes and layouts, making it a popular choice for homeowners globally.

    Color Palettes in Scandinavian Bathrooms

    The color palette in Scandinavian bathrooms typically features a restrained selection of neutral and pastel shades. White, off-white, light greys, and muted blues are frequently employed as base colors, providing a sense of spaciousness and cleanliness. These light tones are often complemented by natural wood accents, creating a warm and inviting contrast. The occasional pop of color, such as a deep teal or a soft blush pink, might be introduced through accessories or smaller elements, but these are used sparingly to avoid disrupting the overall sense of calm and serenity.

    This restrained palette reflects the Scandinavian emphasis on simplicity and functionality, allowing the natural light and materials to take center stage.

    Incorporation of Natural Light in Scandinavian Bathrooms

    Natural light is a crucial element in Scandinavian bathroom design. Large windows, skylights, and strategically placed mirrors are often used to maximize the amount of natural light entering the space. This is particularly important during the darker winter months, where natural light is limited. The design prioritizes maximizing the penetration and diffusion of natural light to create a bright and airy atmosphere.

    In situations where natural light is limited, artificial lighting is carefully selected to mimic the soft, diffused quality of natural light, avoiding harsh shadows and maintaining a consistent, comfortable ambiance. This attention to lighting enhances the overall feeling of spaciousness and wellbeing.

    Common Materials in Scandinavian Bathrooms (Besides Marble)

    Beyond marble, several other materials commonly feature in Scandinavian bathroom design. Light-colored wood, particularly oak and pine, is frequently used for vanities, shelving, and flooring, introducing warmth and texture. These natural wood choices often have a light, oiled finish to highlight the grain and maintain a sense of natural beauty. Ceramic tiles, often in white or light grey, are also a popular choice for flooring and wall coverings, offering durability and ease of maintenance.

    These are often selected for their matte finish to further enhance the overall understated elegance of the design. Finally, matte black fixtures and fittings can add a touch of sophistication, providing a subtle contrast against the lighter color palette. The selection of these materials is guided by their durability, ease of maintenance, and ability to contribute to the overall sense of understated elegance.

    Marble’s Role in Scandinavian Bathrooms

    Hygge deepinmummymatters

    The inherent elegance of marble harmoniously complements the minimalist aesthetic of Scandinavian bathroom design. Its natural beauty, durability, and versatility make it a coveted material for creating serene and sophisticated spaces that reflect the region’s appreciation for natural materials and functionality. The interplay of light and texture offered by marble adds a layer of visual interest, elevating the overall design beyond mere practicality.

    Marble Types Suitable for Scandinavian Bathrooms and Their Properties

    Several marble varieties lend themselves particularly well to the Scandinavian aesthetic. Carrara marble, with its characteristic white background and delicate grey veining, embodies the clean lines and understated luxury favoured in Scandinavian design. Its relatively soft texture allows for intricate detailing, while its porous nature requires sealing to maintain its pristine appearance. Calacatta marble, a close relative, offers a brighter white background with bolder, more dramatic veining, adding a touch of opulence without sacrificing the minimalist feel.

    Statuario marble, another popular choice, features a striking white background with subtle grey or gold veining, providing a luxurious yet understated look. Finally, darker marbles like Nero Marquina, with its dramatic black background and intricate white veining, can be used as an accent to create a sophisticated contrast against lighter elements, adding depth and visual interest to the space.

    The choice depends on the desired level of contrast and the overall color palette of the bathroom. Each marble type possesses unique properties regarding hardness, porosity, and maintenance requirements, which should be carefully considered during the selection process.

    Marble Texture and Veining’s Contribution to Aesthetic

    The texture and veining of marble are integral to its visual appeal and its integration into Scandinavian bathroom design. The smooth, cool surface of polished marble provides a tactile experience that enhances the sense of serenity, while honed marble offers a slightly less reflective, matte finish, adding a more rustic touch. The natural veining patterns, unique to each slab, inject a sense of organic artistry, counterbalancing the clean lines of Scandinavian design.

    These variations in color and pattern prevent monotony, adding a touch of personality without disrupting the overall minimalist aesthetic. The veining can be used to create visual interest in specific areas, such as a feature wall or a countertop, while the consistent texture of the material provides a sense of unity throughout the space. The interplay of light and shadow on the marble’s surface further enhances its textural depth, creating a dynamic and engaging visual experience.

    Three Distinct Bathroom Layouts Incorporating Marble in a Scandinavian Style

    The versatility of marble allows for diverse design approaches within a Scandinavian context. Below are three distinct layouts illustrating this versatility.

    Layout Material Dimension (approx.) Description
    Layout 1: Minimalist Serenity Carrara Marble (floor, shower walls, vanity top); White matte cabinetry; Chrome fixtures Floor: 10 sq m; Shower: 2 sq m; Vanity: 1.5 sq m Emphasizes clean lines and a calming atmosphere. The subtle veining of Carrara marble complements the overall minimalist aesthetic.
    Layout 2: Modern Contrast Nero Marquina Marble (feature wall); Calacatta Marble (vanity top); Light oak cabinetry; Black matte fixtures Feature Wall: 3 sq m; Vanity: 1.8 sq m Creates a striking contrast between dark and light elements. The dramatic veining of Nero Marquina adds visual interest, while the Calacatta marble provides a luxurious touch.
    Layout 3: Rustic Elegance Honed Calacatta Marble (floor); Whitewashed wood cabinetry; Brass fixtures; Statuario Marble (accent tiles) Floor: 12 sq m; Accent Tiles: 1 sq m Combines the rustic warmth of wood with the elegance of marble. The honed finish of the Calacatta marble provides a softer, more matte texture.

    Light and Dark Marble in Scandinavian Bathroom Settings: A Comparison

    Light marbles, such as Carrara and Calacatta, are commonly used in Scandinavian bathrooms to maximize natural light and create a sense of spaciousness. Their bright, reflective surfaces enhance the feeling of airiness, crucial in smaller bathrooms. They contribute to a clean, minimalist aesthetic, often complemented by light-colored wood and white fixtures. Dark marbles, like Nero Marquina, offer a stark contrast, adding a dramatic and sophisticated touch.

    Used sparingly, as a feature wall or vanity top, they can add depth and visual interest without overwhelming the space. The choice between light and dark marble depends on the desired ambiance and the size of the bathroom. Light marble is generally preferred for smaller bathrooms to enhance the sense of space, while dark marble can be effectively incorporated in larger spaces to create a more dramatic and luxurious feel.

    Integrating Marble and Scandinavian Elements

    Momooze downstairs

    The inherent elegance of marble presents a fascinating design challenge when paired with the minimalist aesthetic of Scandinavian interiors. Successfully integrating these two seemingly disparate styles requires a careful consideration of texture, color, and the strategic placement of marble elements within the overall design scheme. The goal is to create a space that feels both luxurious and serene, reflecting the core principles of both design philosophies.

    Marble, with its inherent natural variations in veining and color, offers a unique textural contrast to the often smooth, uncluttered surfaces favored in Scandinavian design. This contrast, when carefully managed, can elevate the overall aesthetic, adding depth and visual interest without sacrificing the clean lines and functionality that define Scandinavian style. The key lies in selecting marble types and utilizing design techniques that complement, rather than clash with, the core principles of Scandinavian minimalism.

    Design Ideas Harmonizing Marble and Scandinavian Minimalism

    The following design ideas illustrate the potential for creating a harmonious blend of marble’s luxurious presence and Scandinavian design’s understated elegance. These examples showcase how careful selection and placement can enhance, rather than overwhelm, the overall aesthetic.

    • A freestanding marble bathtub, featuring a simple, rectangular design, becomes a sculptural centerpiece within a minimalist bathroom. The clean lines of the tub are emphasized by the surrounding light-colored walls and simple fixtures.
    • A single, large-format marble tile used as a backsplash behind a minimalist sink creates a striking focal point. The subtle veining of the marble adds a touch of visual interest without overwhelming the space’s clean lines.
    • Marble flooring, in a light neutral shade with minimal veining, provides a luxurious yet understated base for the room. The flooring’s subtle texture adds a touch of warmth without detracting from the overall minimalist feel.
    • A marble countertop, with a honed or matte finish to reduce reflectivity, pairs beautifully with light wood cabinetry. This combination creates a balance between the cool elegance of marble and the warmth of natural wood, a hallmark of Scandinavian design.
    • A marble shower surround, with a simple, frameless glass enclosure, showcases the natural beauty of the stone while maintaining a sense of openness and airiness. The use of a single, large slab of marble minimizes grout lines, contributing to the overall clean aesthetic.

    Marble as a Feature Element in Scandinavian Bathrooms

    Marble’s versatility allows for its strategic use as a feature element in various ways, enhancing the bathroom’s overall design. Its natural beauty and durability make it an ideal choice for high-traffic areas.

    For example, a marble countertop provides a luxurious and durable surface for a bathroom vanity. The cool tones of marble complement the often light and airy color palettes of Scandinavian bathrooms. Similarly, marble flooring adds a touch of elegance while maintaining practicality. Its durability makes it suitable for high-moisture environments. Finally, a marble shower surround creates a spa-like atmosphere, enhancing the bathroom’s overall luxurious feel.

    Challenges and Solutions in Using Marble in Scandinavian Bathrooms

    While marble is a beautiful and durable material, its use in Scandinavian bathrooms presents some potential challenges. Understanding and addressing these challenges is crucial for a successful integration.

    One major challenge is the potential for marble’s inherent elegance to clash with the minimalist aesthetic. This can be mitigated by choosing marble with subtle veining and a light color palette. Additionally, using a honed or matte finish can reduce reflectivity, making the marble appear less ostentatious. Another challenge is the porosity of marble, which makes it susceptible to staining.

    This can be addressed by sealing the marble properly before installation and regularly cleaning it with a pH-neutral cleaner. Finally, the cost of marble can be a significant factor. Consider using marble strategically as a feature element, rather than covering entire surfaces, to manage costs effectively.

    Balancing Marble’s Elegance and Scandinavian Simplicity

    The key to successfully integrating marble into a Scandinavian bathroom lies in balancing its inherent elegance with the simplicity of the overall design. This involves careful selection of the marble itself – opting for lighter colors and subtle veining – and strategic placement within the room. By limiting the use of marble to key areas, such as the countertop or a single feature wall, the overall aesthetic remains clean and uncluttered, while still incorporating the luxurious touch of marble.

    The contrast between the cool tones of the marble and the warmth of natural wood elements, such as a vanity or shelving, further enhances the balance and creates a sophisticated and harmonious space.

    Lighting and Fixtures in a Marble Scandinavian Bathroom

    The interplay of light and material is paramount in a Scandinavian bathroom featuring marble. The cool, often subtly veined nature of marble demands a lighting scheme that both highlights its inherent beauty and complements the overall minimalist aesthetic. Careful fixture selection is crucial, ensuring functionality and design cohesion within the space.The ideal lighting scheme for a marble Scandinavian bathroom layers ambient, task, and accent lighting to create a balanced and inviting atmosphere.

    Ambient lighting provides overall illumination, preventing harsh shadows and creating a sense of spaciousness. Task lighting, focused on specific areas like the vanity and shower, ensures practicality. Accent lighting strategically highlights the marble’s texture and veining, adding depth and visual interest. The use of natural light, maximized through large windows and skylights, should be prioritized where possible, forming the foundation of the lighting design.

    This approach mirrors the Scandinavian emphasis on natural light and its positive effects on well-being.

    Ambient Lighting in Marble Scandinavian Bathrooms

    Ambient lighting should be soft and diffused, minimizing harsh contrasts. Recessed lighting, integrated into the ceiling, provides even illumination without visual clutter. Consider using LED panels with adjustable color temperature, allowing for a shift from warmer tones in the evening to cooler, brighter light during the day. This adaptability caters to the changing needs and moods throughout the day, enhancing the overall bathroom experience.

    The subtle glow from these fixtures will softly illuminate the marble, showcasing its subtle nuances without overpowering the material.

    Task Lighting Solutions for Marble Scandinavian Bathrooms

    Task lighting focuses functionality, primarily illuminating the vanity area and shower. For the vanity, consider wall-mounted sconces with adjustable arms, providing focused light for grooming and makeup application without casting shadows. These should be sleek and minimalist, echoing the Scandinavian design principles. In the shower, waterproof recessed lights or a combination of ceiling-mounted and showerhead-integrated lights ensure safe and effective illumination.

    The choice should be guided by the shower’s size and configuration, ensuring even light distribution across the space.

    Accent Lighting to Enhance Marble Features

    Accent lighting serves to highlight the unique character of the marble. This can be achieved using strategically placed LED strip lights behind or beneath marble shelves, vanity countertops, or within niches. The warm, subtle glow of these lights will accentuate the marble’s texture and veining, adding depth and visual interest. The color temperature of the accent lighting should complement the marble’s color palette; cooler tones work well with lighter marbles, while warmer tones might suit darker varieties.

    Suitable Bathroom Fixtures for a Scandinavian Marble Bathroom

    The fixtures selected should complement the marble’s elegance and the overall minimalist aesthetic. Undermounted sinks, crafted from materials like matte white ceramic or durable resin, create a seamless and uncluttered look, maximizing the visual impact of the marble countertop. Sleek, minimalist faucets, preferably in brushed nickel or matte black, provide a striking contrast against the marble’s lighter tones.

    Wall-mounted toilets further contribute to the clean lines and spacious feel of the Scandinavian design. These fixtures are chosen for their durability, ease of cleaning, and visual appeal, reflecting the practical yet sophisticated nature of Scandinavian design.

    Examples of Lighting Fixture Styles for a Marble Scandinavian Bathroom

    The selection of lighting fixtures is critical in achieving the desired atmosphere. The following styles exemplify appropriate choices:

    • Recessed LED Downlights: These provide even, diffused ambient lighting, ideal for general illumination.
    • Linear LED Strip Lights: Perfect for accent lighting, highlighting marble features and creating a sense of depth.
    • Wall-Mounted Sconces with Adjustable Arms: Offer focused task lighting for the vanity area.
    • Pendant Lights with Matte White or Black Shades: These provide a stylish focal point while maintaining the minimalist aesthetic.
    • Waterproof LED Shower Lights: Essential for safe and effective illumination within the shower enclosure.

    Selecting Lighting Fixtures to Enhance Marble Texture and Color

    The color temperature and intensity of the lighting should be carefully considered to enhance the marble’s inherent beauty. Warmer color temperatures (2700K-3000K) can create a cozy and inviting atmosphere, particularly suitable for darker marbles. Cooler color temperatures (4000K-5000K) provide a brighter, more invigorating feel, ideal for lighter marbles. The intensity of the light should be carefully balanced; too much light can wash out the marble’s subtle nuances, while too little can create an uninviting atmosphere.

    Experimentation with different color temperatures and intensities is crucial to find the optimal balance that best showcases the marble’s unique characteristics. Consider the size and scale of the bathroom as well, ensuring that the lighting is appropriately scaled to the space. For example, a smaller bathroom might benefit from fewer, more strategically placed fixtures, while a larger bathroom might require a more comprehensive lighting scheme.

    Visual Representation of Design Concepts

    The following sections provide detailed visual descriptions of Scandinavian bathroom designs incorporating marble, focusing on specific applications and the interplay of materials and textures. These descriptions aim to illustrate the aesthetic and practical considerations involved in integrating marble into a Scandinavian bathroom setting. Emphasis is placed on conveying the visual impact through detailed descriptions rather than relying on visual media.

    Scandinavian Bathroom with Marble Flooring

    This design envisions a bathroom measuring 4m x 3m (approximately 13ft x 10ft). The flooring consists of large-format, light-grey Calacatta marble slabs, each measuring 1.2m x 1.2m (approximately 4ft x 4ft). The slabs are laid in a simple, running bond pattern to emphasize the natural veining of the marble. The polished finish enhances the luminosity of the stone, reflecting light and creating a sense of spaciousness.

    The grout lines are minimal and a near-invisible off-white, minimizing visual disruption. Underfloor heating is incorporated for enhanced comfort and to mitigate the inherent coolness of marble. The walls are painted in a soft, warm white, creating a harmonious contrast with the cool tones of the marble.

    Scandinavian Bathroom with Marble Shower Surround

    A walk-in shower occupies one corner of the bathroom. The shower surround is crafted from honed Cararra marble, selected for its subtle veining and matte finish. The honed texture offers a tactile contrast to the polished marble floor, providing a sense of understated luxury. The marble tiles are smaller than the floor tiles, approximately 30cm x 30cm (approximately 12in x 12in), allowing for greater flexibility in layout and accommodating the shower’s corner placement.

    The shower walls are finished with a consistent, uninterrupted expanse of marble, contributing to a clean and minimalist aesthetic. The overall color palette remains light and airy, with the cool white of the Cararra marble complementing the warmer white of the bathroom walls.

    Visual Impact of Different Marble Finishes

    The choice of marble finish significantly impacts the overall visual perception of a Scandinavian bathroom. A polished finish, as seen in the flooring example, maximizes light reflection, creating a brighter and more expansive feel. This is particularly beneficial in smaller bathrooms. In contrast, a honed finish, as in the shower surround example, offers a softer, more subdued aesthetic.

    The matte surface reduces glare and creates a more tactile experience, lending a sense of calmness and serenity. A leather-finished marble would introduce a more textured and rustic element, potentially contrasting with the sleek lines of Scandinavian design, though it could be successfully incorporated with careful consideration of other design choices. The subtle variations in light reflection and texture significantly influence the room’s mood and atmosphere.

    Scandinavian Bathroom with Marble Vanity Tops and Wooden Cabinetry

    The bathroom features a floating vanity with a countertop crafted from a creamy, light-beige marble, such as Crema Marfil. The marble’s warm tones provide a gentle contrast to the cool grey of the flooring. The vanity unit itself is constructed from light oak wood, its natural grain adding warmth and texture. The combination of the smooth, cool marble and the warm, textured wood creates a visually appealing interplay of materials.

    The contrast between the smooth surface of the marble and the subtle grain of the wood creates a balanced and sophisticated aesthetic. The matte finish of the marble complements the natural finish of the wood, avoiding any visual competition. The overall effect is one of understated elegance and harmonious contrast, reflective of Scandinavian design principles.

    Closing Summary

    Wohnung twee soorten patroontegels badkamer nordic fliesen roohome badezimmer voorbeelden badkamers shade white

    The marriage of Scandinavian design’s clean lines and natural light with the opulent elegance of marble results in a bathroom that is both sophisticated and inviting. By carefully considering the interplay of textures, colors, and lighting, one can achieve a space that is uniquely personal and reflects the tranquility and simplicity inherent in Scandinavian aesthetics. The key lies in balancing the inherent luxury of marble with the understated elegance of the Nordic style, creating a bathroom that is both functional and a true expression of refined taste.

    Remember, the details—from the subtle veining of the marble to the carefully chosen fixtures—contribute to the overall harmony and create a space that is both visually stunning and profoundly relaxing.

    FAQ Guide

    What are the typical costs associated with a marble Scandinavian bathroom?

    Costs vary greatly depending on the type and quantity of marble used, the size of the bathroom, and the complexity of the design. High-end marble and custom installations can significantly increase the overall expense.

    How do I maintain a marble Scandinavian bathroom?

    Regular cleaning with a pH-neutral cleaner is crucial. Avoid acidic cleaners that can etch the marble’s surface. Sealing the marble periodically helps protect it from stains and water damage.

    Is marble suitable for all Scandinavian bathroom styles?

    While marble complements many Scandinavian styles, its suitability depends on the specific design aesthetic. It might be less appropriate for extremely minimalist or rustic interpretations.

    Are there eco-friendly marble options for a sustainable Scandinavian bathroom?

    Yes, sourcing marble from companies with sustainable practices and choosing locally sourced materials can minimize the environmental impact. Recycled or reclaimed marble is also an option.

    Can I use marble in a small Scandinavian bathroom?

    Yes, but careful consideration of color and layout is essential. Lighter-colored marbles can create an illusion of spaciousness. Avoid overly busy veining patterns in smaller spaces.

  • Scandinavian Bathroom with Green Plants

    Scandinavian Bathroom with Green Plants

    Imagine stepping into a sanctuary of serenity: a Scandinavian bathroom, where minimalist design meets the vibrant life of lush greenery. This harmonious blend creates a space that is both aesthetically pleasing and scientifically beneficial. The crisp, clean lines characteristic of Scandinavian design provide the perfect backdrop for the calming presence of strategically placed plants, transforming a functional space into a tranquil oasis.

    We will explore how the principles of Scandinavian aesthetics, coupled with the careful selection and placement of plants, can cultivate a bathroom environment that is both beautiful and invigorating.

    This exploration delves into the specifics of plant selection, considering factors such as light requirements, water needs, and toxicity levels to ensure both aesthetic appeal and safety. We’ll examine the role of natural and artificial lighting in enhancing the ambiance, and the importance of material choices—from durable, water-resistant surfaces to the tactile appeal of natural wood and stone—in completing this tranquil design.

    Furthermore, we’ll address practical considerations, offering tips for maintaining a thriving indoor garden in the unique environment of a bathroom.

    Defining the Scandinavian Bathroom Aesthetic

    The Scandinavian bathroom aesthetic, a prominent design trend globally, transcends mere functionality; it embodies a philosophy of minimalist living intertwined with a deep appreciation for nature’s calming influence. This design style prioritizes functionality, simplicity, and the strategic use of natural light and materials to create a space that feels both serene and invigorating. It’s a style that prioritizes well-being and creates a haven for relaxation and rejuvenation.

    Scandinavian design, originating in the Nordic countries, emphasizes practicality and functionality alongside aesthetic appeal. This translates to bathrooms characterized by clean lines, uncluttered surfaces, and a focus on quality materials that age gracefully. The overall effect is a space that feels both sophisticated and effortlessly simple, fostering a sense of calm and tranquility. The inclusion of green plants further enhances this connection to nature, improving air quality and adding a vibrant touch to the minimalist palette.

    Key Characteristics of Scandinavian Bathroom Design

    Scandinavian bathroom design is characterized by several key elements that contribute to its unique aesthetic. These include the prevalent use of light, neutral colors; the incorporation of natural materials like wood and stone; the strategic placement of plants to bring the outdoors in; and a focus on clean lines and minimalist functionality. The absence of clutter is paramount, ensuring a sense of spaciousness and tranquility, even in smaller bathrooms.

    Every element serves a purpose, reflecting a design philosophy rooted in practicality and efficiency.

    Color Palettes in Scandinavian Bathrooms

    The color palettes employed in Scandinavian bathrooms typically feature a range of light and neutral tones, often incorporating shades of white, beige, gray, and soft pastels. These light colors maximize the perception of space and reflect natural light, contributing to the overall feeling of airiness and openness. While white is a dominant color, it’s often paired with subtle accents of other natural hues, such as soft greens, blues, or muted earth tones, to add depth and visual interest without overwhelming the minimalist aesthetic.

    The use of these colors creates a calming and inviting atmosphere, reflecting the Scandinavian emphasis on creating spaces conducive to relaxation and well-being. A deep teal or a muted olive green, for instance, might be used as an accent color on a single wall or in the choice of towels and accessories.

    The Role of Natural Light and Minimalism

    Natural light plays a crucial role in the Scandinavian bathroom aesthetic. Large windows, if possible, are highly desirable, allowing ample sunlight to flood the space. This abundance of natural light not only brightens the room but also enhances the feeling of spaciousness and connection to the outdoors. When natural light is limited, artificial lighting is carefully chosen to mimic the soft, diffused light of a Nordic day.

    This might involve using multiple smaller light sources rather than a single overhead fixture, creating a more ambient and welcoming atmosphere.

    Minimalism is central to the Scandinavian design philosophy. This translates to a focus on essential items only, eliminating unnecessary clutter and maximizing the feeling of spaciousness. Storage solutions are often built-in and discreet, keeping toiletries and other items neatly organized and out of sight. The overall effect is a clean, uncluttered space that feels both serene and functional, promoting a sense of calm and relaxation.

    This approach is not about austerity but about carefully curating a space that promotes well-being and reflects a mindful approach to living.

    Integrating Green Plants into the Design

    The incorporation of green plants within a Scandinavian bathroom design not only enhances its aesthetic appeal but also contributes to a healthier and more invigorating atmosphere. The minimalist ethos of Scandinavian design, characterized by its clean lines and natural materials, finds a harmonious partner in the introduction of carefully selected flora. This symbiotic relationship leverages the inherent benefits of plants while maintaining the design’s core principles.Plant selection for a bathroom environment requires consideration of factors such as light availability, humidity levels, and the potential for toxicity.

    Bathrooms, often lacking in direct sunlight and characterized by high humidity, present a unique set of challenges and opportunities for plant cultivation.

    Suitable Plant Species for Scandinavian Bathrooms

    The following table Artikels several plant species well-suited to the specific conditions of a Scandinavian bathroom, balancing aesthetic appeal with practical considerations of light, water requirements, and toxicity.

    Plant Name Light Requirements Water Needs Toxicity Level
    ZZ Plant (Zamioculcas zamiifolia) Low to medium indirect light Infrequent watering; tolerates drought Non-toxic to humans and pets
    Snake Plant (Sansevieria trifasciata) Low to medium indirect light; tolerates low light Infrequent watering; tolerates drought Non-toxic to humans, but mildly toxic to pets
    Peace Lily (Spathiphyllum wallisii) Low to medium indirect light Regular watering; prefers moist soil Toxic to humans and pets if ingested
    Cast Iron Plant (Aspidistra elatior) Low light; tolerates very low light conditions Infrequent watering; tolerates drought Non-toxic to humans and pets

    Benefits of Incorporating Plants in Bathroom Design

    The inclusion of plants in a bathroom offers several significant advantages. Beyond the obvious aesthetic enhancements, plants contribute to improved air quality. Many species, such as snake plants and ZZ plants, possess the remarkable ability to filter certain airborne toxins, contributing to a cleaner and healthier breathing environment. This air purification process is primarily achieved through the plants’ uptake of volatile organic compounds (VOCs) during photosynthesis.

    Furthermore, the presence of greenery fosters a sense of tranquility and well-being, transforming the bathroom into a more relaxing and spa-like sanctuary. The visual appeal of plants complements the clean lines and natural materials of Scandinavian design, enhancing the overall atmosphere.

    Displaying Plants in a Scandinavian Bathroom

    Several methods exist for seamlessly integrating plants into a Scandinavian bathroom’s design. Hanging planters, suspended from the ceiling or walls, offer a space-saving solution, particularly beneficial in smaller bathrooms. They create a sense of verticality and add visual interest without cluttering floor space. Strategically placed shelves, perhaps made of light-colored wood to complement the overall aesthetic, provide another excellent option for showcasing plants of varying sizes and types.

    Floor plants, chosen for their size and hardiness, can act as focal points, anchoring the design and adding a touch of natural grandeur. For instance, a large, healthy ZZ plant positioned in a corner could serve as a striking centerpiece. The key is to maintain a balance between the plants’ presence and the clean, minimalist design ethos of the Scandinavian style.

    Material Selection and Texture

    Scandinavian bathroom with green plants

    The careful selection of materials is paramount in achieving the serene and functional aesthetic of a Scandinavian bathroom incorporating lush greenery. The chosen materials must not only complement the minimalist design principles but also withstand the humid environment and frequent cleaning associated with a bathroom setting. A successful material palette will balance durability, water resistance, and the tactile appeal of natural textures, creating a harmonious space that feels both luxurious and practical.The inherent characteristics of different materials significantly impact their suitability for a Scandinavian bathroom.

    Porosity, density, and the presence of natural oils or resins all influence a material’s resistance to water damage and mold growth. Furthermore, the aesthetic qualities – color, grain, and texture – contribute to the overall atmosphere, reflecting the principles of Scandinavian design which prioritize natural light and a sense of calm.

    Material Properties and Water Resistance

    A range of materials offer distinct advantages and disadvantages in a high-humidity environment. Natural stone, such as marble or slate, possesses inherent beauty and durability. However, its porosity necessitates sealing to prevent water absorption and staining. Conversely, porcelain tiles offer superior water resistance and are exceptionally durable, capable of withstanding daily wear and tear. Their versatility in terms of color and texture allows for significant design flexibility, mimicking the appearance of natural stone or wood.

    Wood, while undeniably beautiful and contributing to the Scandinavian aesthetic, requires careful selection and treatment. Hardwoods like teak or oak, known for their density and natural oils, offer better water resistance than softer woods. However, even treated hardwoods benefit from the application of water-resistant sealants to minimize the risk of damage. The use of waterproof sealant, in all cases where necessary, is crucial to maintain the longevity and integrity of materials in a bathroom setting.

    Texture and its Contribution to the Scandinavian Aesthetic

    Texture plays a crucial role in creating the calming and inviting atmosphere characteristic of Scandinavian design. The smooth, cool surface of polished stone contrasts beautifully with the warm, organic texture of untreated wood. The subtle grain of a lightly oiled oak countertop or the rough, natural cleft of a slate floor tile creates visual interest and tactile appeal.

    These textural contrasts enhance the overall sensory experience, adding depth and dimension to the space. The incorporation of plants further adds to the textural complexity, with the soft, velvety leaves of some plants providing a counterpoint to the harder surfaces. The careful juxtaposition of materials with varying textures creates a harmonious and visually engaging environment. For instance, the smooth, cool surface of a concrete sink could be balanced by the rough texture of a woven linen towel rack and the soft, rounded forms of potted plants.

    Lighting and Ambiance

    The interplay of light and shadow is paramount in establishing the serene atmosphere of a Scandinavian bathroom, especially when incorporating the vibrancy of green plants. Effective lighting not only illuminates the space but also enhances the textures and colors, creating a calming and invigorating environment. Careful consideration of both natural and artificial light sources is crucial to achieving this balance.Natural light, abundant in Scandinavian design, should be maximized.

    Large windows, if available, should be left unobstructed to allow ample daylight to flood the space. The inherent brightness of natural light complements the minimalist aesthetic and enhances the photosynthetic processes of the plants, promoting their healthy growth. However, reliance solely on natural light is impractical; therefore, a well-thought-out artificial lighting plan is essential.

    Artificial Lighting Strategies for a Scandinavian Bathroom

    A layered lighting approach is recommended, combining ambient, task, and accent lighting to create depth and visual interest. Ambient lighting provides overall illumination, typically achieved through recessed ceiling lights or softly diffused pendant lights. These should emit a warm, soft white light (around 2700-3000 Kelvin) to mimic natural daylight and create a relaxing atmosphere. Task lighting, such as waterproof vanity lights, provides focused illumination for activities like applying makeup or shaving.

    These should be brighter (around 4000 Kelvin) and positioned to avoid harsh shadows. Finally, accent lighting strategically highlights key features, such as the plants or a unique piece of artwork. This can be achieved with small spotlights or LED strip lights subtly integrated into shelving or behind plants. The intensity and color temperature of accent lighting can be adjusted to create different moods, from a vibrant, energizing atmosphere to a calm, spa-like setting.

    Highlighting Plants and Design through Lighting

    The strategic placement of lighting can dramatically enhance the visual impact of the plants and the overall design. Backlighting plants, using LED strip lights positioned behind them, creates a dramatic silhouette effect, highlighting their form and texture against the wall. Downlighting, using spotlights directed downwards, emphasizes the lush greenery, showcasing the details of the leaves and stems. Using warm-toned lighting accentuates the natural colors of the plants, enhancing their vibrancy.

    Conversely, cooler-toned lighting can create a more modern and sophisticated feel. By carefully considering the angle and intensity of the light, the interplay of light and shadow can create a sense of depth and dimension, adding visual interest to the space. The reflection of light on polished surfaces, such as a marble countertop or a chrome faucet, further enhances the overall ambiance.

    Ambient Mood Created by Scandinavian Design and Greenery

    The combination of Scandinavian design principles and the introduction of indoor plants cultivates a unique and calming ambiance. The minimalist aesthetic of Scandinavian design, characterized by clean lines, light colors, and natural materials, provides a serene backdrop for the plants. The plants themselves introduce a sense of life and vitality, softening the starkness of the minimalist style and adding a touch of nature to the otherwise sterile environment.

    The soft, diffused lighting complements this combination, creating a peaceful and inviting space. The overall effect is a bathroom that feels both modern and tranquil, promoting relaxation and well-being. Studies have shown that exposure to natural elements, such as plants and natural light, can reduce stress levels and improve mood, making this design particularly conducive to a calming and rejuvenating bathroom experience.

    Visual Representation

    Scandinavian bathroom with green plants

    A Scandinavian bathroom, infused with the vibrancy of green plants, presents a unique interplay of light and shadow, creating a serene and invigorating space. The design leverages the principles of biophilic design, seamlessly integrating nature into the minimalist aesthetic. The careful selection of materials and the strategic placement of plants amplify the natural light, casting soft shadows that add depth and texture to the overall design.The interplay of light and shadow is crucial in highlighting the textures and colors within the space.

    Natural light, diffused through sheer curtains or a frosted glass window, creates a soft, even illumination. This soft light accentuates the subtle textures of the materials, such as the smooth surface of a matte white tile, the grainy texture of light wood, and the velvety leaves of the plants. Conversely, strategically placed spotlights or pendant lights cast focused beams, highlighting specific features, such as a potted fern or a sculptural piece, and creating dramatic shadows that add visual interest.

    The contrast between light and shadow enhances the three-dimensionality of the space, making it feel more dynamic and alive.

    Plant Placement and Size

    The strategic placement of plants is paramount to achieving the desired aesthetic and maximizing their visual impact. The size and type of plant are chosen to complement the scale of the space and the surrounding elements. Larger plants, such as a fiddle-leaf fig or a snake plant, can act as focal points, drawing the eye and anchoring the design.

    Smaller plants, like succulents or air plants, can be used to fill in gaps and add texture to shelves or windowsills. The following list details the plant placement within a typical Scandinavian bathroom design:

    • A large fiddle-leaf fig ( Ficus lyrata) placed in a corner, receiving indirect sunlight from a nearby window. Its large leaves provide a significant visual impact.
    • Two smaller snake plants ( Sansevieria trifasciata) positioned on a floating shelf above the vanity, adding verticality to the design and introducing a textural contrast to the smooth surfaces.
    • A collection of assorted succulents in various small pots arranged on the windowsill, basking in the natural light. Their diverse shapes and colors add visual interest.
    • A hanging pothos ( Epipremnum aureum) cascading from a ceiling-mounted hook, softening the hard lines of the architecture and adding a touch of elegance.

    Bathroom Floor Plan

    The following floor plan illustrates the layout of a Scandinavian bathroom, highlighting the placement of plants and other key features. The dimensions are approximate and can be adjusted to suit individual needs and space constraints.

    Imagine a rectangular bathroom approximately 10ft x 8ft. The entrance is on the short wall. The shower is on the long wall to the left of the entrance, followed by a toilet. The vanity is situated on the opposite long wall, with a mirror above it. The window is positioned above the vanity on the short wall opposite the entrance.

    The plants are strategically placed as follows:

    1. Fiddle-leaf fig in the corner between the shower and the long wall opposite the entrance.
    2. Snake plants on the shelf above the vanity, centered on the wall.
    3. Succulents on the windowsill.
    4. Hanging pothos from the ceiling above the vanity, slightly offset from the center.

    Texture and Color Palette

    The color palette is predominantly light and neutral, with white or light gray walls serving as a backdrop to the rich textures and colors of the plants and other materials. The use of natural materials such as light oak wood for the vanity and shelving introduces warmth and visual interest. The matte white tiles on the floor and shower walls provide a clean and minimalist aesthetic, while the textured linen curtains add a touch of softness.

    The green hues of the plants provide a refreshing contrast against the neutral tones, injecting life and vibrancy into the space. The combination of smooth and textured surfaces, along with the varied shades of green, creates a visually appealing and cohesive design. The overall effect is one of calm, serenity, and natural beauty.

    Practical Considerations

    Successfully integrating plants into a Scandinavian bathroom, while aesthetically pleasing, requires careful consideration of the unique environmental challenges this space presents. High humidity levels, fluctuating light conditions, and limited space all impact plant health and longevity. Understanding these factors is crucial for selecting and maintaining thriving greenery.The bathroom environment, while visually appealing with its clean lines and natural light, presents a unique set of challenges for plant life.

    High humidity, often exceeding 60%, can lead to fungal diseases like root rot if not properly managed. Conversely, many bathrooms lack sufficient natural light, particularly those without windows or with limited sunlight exposure. Furthermore, the space available for plants might be limited, necessitating the selection of compact species.

    Challenges of Maintaining Plants in Bathrooms

    High humidity levels, a characteristic feature of most bathrooms, create a breeding ground for fungal pathogens. These pathogens thrive in moist conditions, attacking plant roots and stems, leading to root rot and other diseases. Symptoms often include wilting, yellowing leaves, and a general decline in plant health. Conversely, insufficient light, especially in bathrooms lacking windows or with limited sun exposure, hinders photosynthesis.

    This process, vital for plant growth, is significantly reduced under low-light conditions, resulting in weak, leggy growth and potentially plant death. Finally, limited space restricts the choice of plant species, necessitating careful selection of compact and slow-growing varieties. For instance, a large fern may not thrive in a small, windowless bathroom.

    Choosing Low-Maintenance Plants for Bathrooms

    Selecting low-maintenance plants is crucial for success in a bathroom environment. Species tolerant of low light and high humidity are ideal. Examples include the ZZ plant (Zamioculcas zamiifolia), known for its drought tolerance and ability to survive in low-light conditions; snake plants (Sansevieria trifasciata), similarly resilient to neglect and low light; and peace lilies (Spathiphyllum wallisii), which thrive in humid environments and indicate their water needs through drooping leaves.

    These plants are all relatively compact, suitable for smaller bathroom spaces. Careful consideration of the available light and humidity levels is key to selecting the most appropriate species.

    Necessary Tools and Supplies for Bathroom Plant Care

    Proper plant care necessitates the right tools and supplies. This includes a watering can with a long spout for easy access to plants in tight spaces, a small spray bottle for increasing humidity around plants if needed, and a moisture meter to monitor soil moisture levels, preventing overwatering and root rot. Potting mix specifically designed for indoor plants, providing good drainage and aeration, is also essential.

    Additionally, small pebbles or gravel can be placed at the bottom of pots to improve drainage. Finally, a cleaning solution suitable for plant leaves will help remove dust and maintain healthy foliage. Regularly checking for pests and diseases, and having appropriate treatment options readily available, will also contribute to the long-term health of your bathroom plants.

    Concluding Remarks

    Scandinavian bathroom with green plants

    Creating a Scandinavian bathroom with green plants is a journey of thoughtful design and careful execution. By understanding the principles of Scandinavian minimalism, selecting appropriate plant species, and paying attention to lighting and material choices, one can transform a bathroom into a haven of calm and vitality. The interplay of light and shadow, the texture of natural materials, and the vibrant green hues of healthy plants combine to create a space that is both aesthetically stunning and scientifically sound, improving air quality and enhancing overall well-being.

    The result is a bathroom that is not just functional, but a true reflection of a mindful and harmonious lifestyle.

    FAQ Guide

    What are the best ways to increase humidity for plants in a bathroom with poor ventilation?

    Consider using a humidifier specifically designed for bathrooms, grouping plants together to create a microclimate, or placing a tray of water near the plants to increase evaporative humidity. Regular misting can also help.

    How often should I water plants in a Scandinavian bathroom?

    Watering frequency depends on the plant species and the bathroom’s humidity levels. Check the soil moisture before watering; water thoroughly when the top inch of soil feels dry. Avoid overwatering, which can lead to root rot.

    Are there any plants to avoid in a bathroom due to potential mold issues?

    Plants that prefer very dry conditions are generally not suitable for bathrooms due to the high humidity. Choose plants that tolerate humidity well to prevent mold growth. Proper ventilation is also crucial.

    How can I prevent pests in my bathroom plants?

    Regularly inspect plants for signs of pests. Use insecticidal soap or neem oil for treatment if necessary. Maintaining good air circulation can help prevent pest infestations.

    What are some low-maintenance, air-purifying plants suitable for a Scandinavian bathroom?

    Snake plants, ZZ plants, and peace lilies are excellent choices. They tolerate low light and infrequent watering, and are known for their air-purifying qualities.

  • Scandinavian Bathroom Lighting A Design Guide

    Scandinavian Bathroom Lighting A Design Guide

    Imagine stepping into a sanctuary bathed in the soft, diffused glow of natural light, where minimalist fixtures crafted from natural materials create a haven of tranquility. This is the essence of Scandinavian bathroom lighting, a design philosophy that prioritizes functionality, simplicity, and a harmonious connection with nature. More than mere illumination, Scandinavian bathroom lighting carefully considers the interplay of light temperature, fixture placement, and overall ambiance to create a space that is both aesthetically pleasing and deeply relaxing.

    The core principles, rooted in the Nordic design tradition, emphasize clean lines, natural materials like wood and metal, and a palette of muted colors that reflect the region’s characteristic landscapes.

    This design approach isn’t simply about aesthetics; it’s about leveraging the power of light to enhance well-being. The integration of natural light, coupled with thoughtfully chosen artificial sources, aims to mimic the gentle shifts in light experienced throughout the Scandinavian seasons. This careful manipulation of light and shadow contributes to a sense of calm and serenity, transforming the bathroom into a personal refuge from the outside world.

    The use of dimmers and smart lighting technology further refines this control, allowing for personalized adjustments to suit individual preferences and moods.

    Defining Scandinavian Bathroom Lighting Style

    Scandinavian bathroom lighting

    Scandinavian bathroom lighting embodies the principles of minimalist design, prioritizing functionality, natural light, and a sense of calm. This style seamlessly integrates lighting into the overall aesthetic, creating a space that is both practical and aesthetically pleasing, reflecting the region’s long winters and appreciation for natural light. The goal is to create a bright, airy, and inviting atmosphere that promotes relaxation and well-being.

    Scandinavian design philosophy emphasizes simplicity, functionality, and natural materials. Translated into bathroom lighting, this means fixtures are often uncluttered, efficient, and made from materials that complement the overall design aesthetic. The emphasis is on creating a clean and unfussy look that allows the light to be the focal point, rather than the fixture itself.

    Key Materials in Scandinavian Bathroom Lighting

    The choice of materials reflects the core values of Scandinavian design. Durability and sustainability are key considerations. Common materials include wood, often light-colored woods like birch or pine, lending a warm and natural feel. Metal, particularly matte finishes in brass, nickel, or chrome, provides a modern and sophisticated touch. Glass, frequently frosted or textured, diffuses light softly, avoiding harsh shadows.

    These materials are chosen not only for their aesthetic appeal but also for their ability to withstand the humid environment of a bathroom.

    Natural Light Integration in Scandinavian Bathrooms

    Natural light is paramount in Scandinavian bathroom design, reflecting the region’s emphasis on maximizing daylight hours during the short winter months. Large windows are often incorporated, and lighting fixtures are designed to complement, rather than compete with, natural light sources. This often involves using soft, diffused light sources that enhance the natural light rather than overpowering it. Strategically placed mirrors can also maximize the effect of both natural and artificial light, creating a bright and airy feel.

    For example, a bathroom with a north-facing window might utilize a combination of large windows and strategically placed LED strip lighting to compensate for lower light levels.

    Color Palettes in Scandinavian Bathroom Lighting

    The color palette of Scandinavian bathroom lighting typically mirrors the overall design scheme. Neutral tones such as white, beige, and gray are prevalent, creating a clean and minimalist aesthetic. These colors reflect and diffuse light effectively, maximizing brightness. Subtle pops of color, such as soft blues, greens, or pastels, might be incorporated through accessories or accent lighting, but generally, the overall scheme remains light and airy.

    The goal is to create a calming and soothing atmosphere, conducive to relaxation. For instance, a white bathroom might feature brushed nickel fixtures and soft white LED lighting, while a grey bathroom might use warm white LEDs and brass accents.

    Types of Scandinavian Bathroom Lighting Fixtures

    Proper する ボード 選択

    Scandinavian bathroom lighting design prioritizes functionality and a sense of calm, achieved through a thoughtful selection of fixture types and a minimalist aesthetic. The interplay of natural light and carefully chosen artificial illumination creates a spa-like atmosphere, enhancing the overall experience of the bathroom. This section details the common types of fixtures used, their design features, and their comparative functionalities within the Scandinavian style.

    Pendant Lights in Scandinavian Bathrooms

    Pendant lights offer a versatile and visually striking option for Scandinavian bathrooms. Their placement, often above a freestanding bathtub or a vanity area, allows for focused illumination. The design typically features simple, geometric shapes – think cylindrical or conical shades – crafted from materials like matte white or light wood. The light source is often soft and diffused, minimizing harsh shadows and creating a relaxing ambiance.

    Many Scandinavian pendant lights incorporate dimmable features, allowing users to adjust the brightness according to their needs and mood. The functionality is primarily ambient lighting, but with strategic placement, they can also provide task lighting.

    Vanity Lighting in Scandinavian Design

    Vanity lighting is crucial for applying makeup or shaving, demanding bright, even illumination without glare. Scandinavian vanity lights often take the form of sleek, minimalist wall sconces or linear fixtures positioned on either side of the mirror. Materials frequently include brushed nickel, matte black, or white metal, reflecting the overall color scheme of the bathroom. The light emitted is usually bright, but diffused to prevent harsh reflections.

    This ensures optimal visibility while maintaining a calming atmosphere. Integrated LED technology is common, providing energy efficiency and long lifespan. The functionality is primarily task lighting, but also contributes to the overall ambient lighting of the space.

    Recessed Lighting in Scandinavian Bathrooms

    Recessed lighting provides subtle, even illumination, ideal for creating a soft, ambient glow in Scandinavian bathrooms. These fixtures are seamlessly integrated into the ceiling, minimizing visual clutter and maintaining the clean lines characteristic of the style. The light emitted is generally diffused, avoiding harsh shadows and creating a comfortable environment. Materials are usually unobtrusive, such as white or brushed aluminum, blending seamlessly with the ceiling.

    The functionality is predominantly ambient, providing a general illumination that complements other light sources. Dimming capabilities are often incorporated for greater control over the ambiance.

    Table of Scandinavian Bathroom Lighting Fixtures

    Fixture Type Material Color Palette Key Features
    Pendant Light Matte white metal, light wood, glass White, off-white, light grey, natural wood tones Simple geometric shapes, diffused light, dimmable options, ambient and task lighting
    Vanity Light Brushed nickel, matte black, white metal White, black, silver, brass Sleek design, even illumination, minimal glare, LED technology, task lighting
    Recessed Light White, brushed aluminum White, neutral tones Seamless integration, diffused light, ambient lighting, dimmable options

    Impact of Lighting on Scandinavian Bathroom Ambiance

    Scandinavian

    The interplay of light and shadow is paramount in shaping the atmosphere of a Scandinavian bathroom, a space traditionally designed to prioritize both functionality and a sense of calm. The careful selection and placement of lighting fixtures directly influence the overall mood, impacting how we perceive the room’s size, cleanliness, and even our emotional state within it. Understanding the principles of light temperature and layering is crucial for achieving the desired ambiance.

    Influence of Lighting Temperature on Mood

    Different color temperatures of light evoke distinct emotional responses. Cool-toned lighting (5000K-6500K), often associated with daylight, creates a bright, clean, and energizing feel. This is ideal for functional tasks like applying makeup or shaving, enhancing visibility and precision. However, excessive cool lighting can feel sterile or harsh, potentially detracting from the intended serenity of a Scandinavian bathroom. Conversely, warm-toned lighting (2700K-3000K) produces a cozy, inviting atmosphere, reminiscent of candlelight.

    It promotes relaxation and a sense of warmth, perfect for unwinding after a long day. Neutral-toned lighting (3500K-4100K) strikes a balance, offering a more versatile option suitable for both functional tasks and creating a calm yet bright environment. The choice ultimately depends on the desired mood and the specific function of the bathroom space. For instance, a makeup vanity might benefit from cooler lighting, while a soaking tub area would be better served by warmer tones.

    Implementation of Ambient, Task, and Accent Lighting

    Scandinavian design emphasizes the importance of layered lighting to create a balanced and functional space. Ambient lighting provides general illumination, setting the overall tone. Task lighting focuses on specific areas, enhancing visibility for tasks like showering or brushing teeth. Accent lighting highlights architectural features or decorative elements, adding depth and visual interest. In a Scandinavian bathroom, ambient lighting could be achieved through a recessed ceiling fixture emitting a soft, neutral light.

    Task lighting might involve strategically placed wall sconces near the mirror, providing bright, cool-toned illumination. Accent lighting could be incorporated with LED strip lighting under a floating vanity or behind a glass shower enclosure, subtly highlighting the space’s unique features. This layered approach ensures both functionality and a visually appealing atmosphere.

    Lighting Scheme Design for a Scandinavian Bathroom

    Consider a bathroom with a minimalist design featuring light wood tones, white walls, and natural materials. A practical lighting scheme would incorporate the following:

    • Ambient Lighting: A centrally located, recessed LED panel emitting 3500K light for overall illumination. This provides a balanced, bright yet calming ambiance.
    • Task Lighting: Two wall-mounted LED sconces with adjustable heads positioned on either side of a large mirror, providing 5000K light for detailed tasks like applying makeup or shaving. The adjustable heads allow for precise light direction, minimizing shadows.
    • Accent Lighting: LED strip lights concealed beneath the floating vanity, emitting a warm 2700K light. This softly illuminates the countertop and adds a subtle, welcoming glow. Additionally, waterproof LED strip lights could be installed along the back wall of a glass shower enclosure, creating a visually appealing and functional backlight.

    Enhancing Ambiance with Dimmers and Smart Lighting

    Dimmers and smart lighting technologies offer further control over the bathroom’s ambiance. Dimmers allow for adjusting the intensity of the lighting, creating a flexible atmosphere suitable for various moods and activities. A dimmer on the ambient lighting allows for transitioning from a bright, functional space to a dimly lit, relaxing sanctuary. Smart lighting systems, such as those utilizing Philips Hue or similar technologies, offer even greater control.

    These systems allow for pre-programmed lighting scenes, enabling the user to instantly switch between different moods with a simple voice command or app control. For example, a “relaxing bath” scene might dim the ambient lighting to a low level and activate the warm accent lighting, while a “morning routine” scene could brighten the task lighting and increase the intensity of the ambient light.

    This level of customization elevates the user experience and contributes significantly to the overall ambiance.

    Integrating Scandinavian Lighting with Bathroom Decor

    Scandinavian design, known for its minimalist aesthetic and emphasis on natural light, necessitates a thoughtful approach to artificial lighting. The goal is to seamlessly blend illumination with the overall design, enhancing the space’s functionality and ambiance without disrupting the clean lines and natural materials characteristic of the style. Successful integration hinges on understanding how different lighting fixtures interact with various decor elements and materials.

    The inherent simplicity of Scandinavian design makes it surprisingly versatile. Its focus on functionality and natural materials allows for easy integration with a range of decor styles, from the stark minimalism of a modern bathroom to the warmer, more textured feel of a rustic space. The key is to maintain the core principles of Scandinavian design: simplicity, functionality, and a connection to nature.

    This translates to lighting choices that are both practical and aesthetically pleasing, reflecting and enhancing the existing decor.

    Scandinavian Lighting in Minimalist Bathrooms

    Minimalist bathrooms, characterized by clean lines, neutral color palettes, and a lack of clutter, benefit from lighting that reinforces this simplicity. Recessed lighting, often combined with a single, statement pendant light above a vanity, provides ample illumination without visual distraction. The light fixtures themselves should be understated, perhaps featuring simple geometric shapes or brushed metal finishes. This approach avoids visual competition with the bathroom’s streamlined design, allowing the overall aesthetic to remain uncluttered and serene.

    The absence of ornamentation on the fixtures mirrors the minimalist philosophy of “less is more.”

    Scandinavian Lighting in Rustic Bathrooms

    Rustic Scandinavian bathrooms often incorporate natural materials like wood and stone, creating a warmer, more textured atmosphere. Lighting choices should complement this warmth. Pendant lights crafted from natural materials like wood or woven rattan can create a cozy ambiance. Wall sconces with a slightly more textured finish, perhaps featuring a matte black or brass metal, can add a touch of elegance without overwhelming the space.

    The interplay of light and shadow on the natural textures enhances the overall warmth and inviting character of the room.

    Harmonizing Textures, Patterns, and Materials

    The success of integrating Scandinavian lighting relies heavily on the thoughtful selection of materials and finishes. Natural materials like wood, stone, and linen are frequently used in Scandinavian bathrooms. Lighting fixtures with similar materials or finishes create a cohesive look. For instance, a wooden pendant light would complement a wooden vanity, while a stone-like base for a floor lamp would harmonize with stone countertops.

    Conversely, metal finishes, such as matte black or brushed nickel, provide a sleek counterpoint to the warmth of natural materials. Patterns should be minimal or absent in both the lighting and the overall decor to maintain the clean aesthetic.

    Creating Cohesive Design with Bathroom Elements

    Strategic placement of lighting fixtures is crucial for a cohesive design. Lighting should enhance the functionality of key bathroom elements. For example, well-lit mirrors are essential for practical use and can be achieved through integrated LED strips or flanking wall sconces. Pendant lights positioned above vanities provide task lighting while simultaneously adding a design element. The lighting should also highlight architectural features or interesting textures within the bathroom.

    A strategically placed spotlight could accentuate a unique tile pattern or a beautiful piece of artwork.

    Tips for Selecting Scandinavian Bathroom Lighting Fixtures

    Careful consideration of several factors ensures the lighting complements the existing decor. The following points are crucial for achieving a harmonious and functional lighting scheme.

    • Prioritize natural light: Maximize natural light sources by using sheer curtains or blinds that allow ample sunlight to enter the bathroom.
    • Choose energy-efficient options: LED lighting is ideal for Scandinavian bathrooms due to its energy efficiency and long lifespan, aligning with the sustainable ethos of the style.
    • Opt for simple designs: Avoid overly ornate or complex fixtures; simple, geometric shapes are more consistent with the minimalist aesthetic.
    • Consider the color temperature: Warm white light (2700-3000K) creates a cozy ambiance, while cool white light (5000-6500K) offers a more modern, crisp feel.
    • Balance ambient, task, and accent lighting: Combine different types of lighting to create a layered and functional lighting scheme. Ambient lighting sets the overall mood, task lighting illuminates specific areas (like the mirror), and accent lighting highlights features.

    Illustrative Examples of Scandinavian Bathroom Lighting

    Updating whittney parkinson mydomaine

    Scandinavian design prioritizes functionality, simplicity, and natural light. These principles are beautifully reflected in the lighting choices for Scandinavian bathrooms, creating spaces that are both aesthetically pleasing and highly practical. The following examples demonstrate the diverse applications of lighting within this design aesthetic, showcasing how different approaches achieve distinct moods and functionalities.

    Modern Scandinavian Bathroom with Minimalist Pendant Lights

    Imagine a spacious bathroom, clad in crisp white tiles and featuring a freestanding bathtub positioned centrally. Above the tub, three minimalist pendant lights hang from a high ceiling. These lights are crafted from brushed nickel, their simple cylindrical forms emitting a soft, diffused light. The overall palette is restrained, with the cool tones of the nickel contrasting subtly against the warm, natural wood of the bathroom floor.

    The clean lines of the fixtures complement the minimalist aesthetic, enhancing the feeling of spaciousness and serenity. The light, bouncing softly off the white tiles and the smooth surface of the tub, creates a calming atmosphere ideal for relaxation. The subtle interplay of light and shadow adds depth without disrupting the overall sense of calm. This design exemplifies the Scandinavian emphasis on functionality, using light to highlight the central feature of the room while maintaining a sense of airy simplicity.

    Traditional Scandinavian Bathroom with Warm-Toned Vanity Lights

    In contrast to the modern example, a traditional Scandinavian bathroom might feature a vanity area illuminated by warm-toned wall-mounted lights flanking a mirror with a rustic wooden frame. These lights, perhaps made of brass or copper with frosted glass shades, cast a gentle, inviting glow. The warm light complements the rich tones of the wood, creating a cozy and inviting atmosphere.

    The wooden mirror frame, possibly reclaimed or showing signs of natural wear, adds texture and a sense of history. The overall color palette is warm and inviting, featuring natural wood tones, muted greens, and soft whites. The lighting plays a crucial role in emphasizing the natural materials and creating a sense of warmth and comfort, typical of traditional Scandinavian design.

    The soft, diffused light minimizes harsh shadows, enhancing the overall feeling of serenity and relaxation.

    Contemporary Scandinavian Bathroom with Integrated LED Strip Lighting

    A contemporary Scandinavian bathroom might incorporate integrated LED strip lighting within a custom-designed vanity unit. This sleek, minimalist vanity, perhaps constructed from lacquered wood or high-gloss white, features a recessed area along its lower edge. Within this recess, energy-efficient LED strip lights provide both ambient and task lighting. The light emitted is cool and bright, ideal for applying makeup or performing other tasks requiring precise visibility.

    The integration of the lighting within the vanity unit maintains the clean lines and minimalist aesthetic of the design. The customizable color temperature of the LEDs allows for flexibility, enabling the user to adjust the light to suit their preferences and mood. This demonstrates a sophisticated approach to lighting design, showcasing how functionality and aesthetics can be seamlessly combined within a contemporary Scandinavian setting.

    The seamless integration ensures the lighting remains unobtrusive, while simultaneously providing efficient and effective illumination.

    Final Wrap-Up

    From minimalist pendant lights suspended above a freestanding tub to the warm glow of vanity lights illuminating a rustic wooden mirror, Scandinavian bathroom lighting offers a versatile and adaptable approach to interior design. The key lies in understanding the interplay between light temperature, fixture type, and the overall decor. By carefully considering these elements, you can create a bathroom that is not only beautifully lit but also reflects your personal style and fosters a sense of calm and well-being.

    The result is a space that transcends mere functionality, becoming a true sanctuary where the restorative power of light and design converge.

    Question & Answer Hub

    What is the best lighting temperature for a Scandinavian bathroom?

    A combination of warm (2700-3000K) and neutral (4000-4500K) light temperatures is ideal. Warm light creates a cozy atmosphere, while neutral light provides sufficient brightness for tasks like applying makeup.

    How many light sources should I use in a Scandinavian bathroom?

    At least three layers are recommended: ambient (general illumination), task (focused lighting for mirrors and vanities), and accent (highlighting features like artwork or plants).

    Are LED lights suitable for Scandinavian bathroom design?

    Yes, LEDs are highly energy-efficient and offer excellent color rendering, making them a perfect choice for Scandinavian bathrooms. Their long lifespan also aligns with the sustainable ethos of the design style.

    Can I use smart lighting in a Scandinavian bathroom?

    Absolutely! Smart lighting allows for customized control over brightness, color temperature, and even scheduling, enhancing the ambiance and functionality of the space.

    How do I maintain Scandinavian bathroom lighting fixtures?

    Regular dusting and gentle cleaning with a soft cloth are usually sufficient. For specific cleaning instructions, refer to the manufacturer’s guidelines for your chosen fixtures.

  • Industrial garden with recycled materials A sustainable design guide

    Industrial garden with recycled materials A sustainable design guide

    Imagine a garden where the raw beauty of reclaimed materials intertwines with the vibrant life of thriving plants. This isn’t just a garden; it’s a testament to sustainable design, a fusion of industrial aesthetics and ecological consciousness. An industrial garden built with recycled materials offers a unique opportunity to create a visually striking and environmentally responsible outdoor space. This exploration delves into the art and science of transforming discarded objects into flourishing green havens, showcasing the creative potential of repurposing and the rewarding experience of building a sustainable ecosystem.

    The core principles revolve around selecting robust, weather-resistant recycled materials like reclaimed wood, repurposed metal containers, and recycled glass. Careful consideration is given to plant selection, ensuring species thrive in the chosen containers and complement the industrial aesthetic. The design process emphasizes functionality, incorporating raised beds, vertical gardens, and potentially even water features, all crafted from recycled elements.

    Finally, strategic lighting enhances the ambiance, transforming the space into a captivating nighttime spectacle. This journey will equip you with the knowledge and inspiration to create your own unique industrial garden.

    Defining the “Industrial Garden” Aesthetic

    The industrial garden aesthetic is a captivating blend of contrasting elements: the raw, utilitarian nature of industrial design and the organic, life-affirming beauty of a flourishing garden. It’s a style that embraces repurposed materials and celebrates the juxtaposition of textures and colors, creating a space that is both visually striking and environmentally conscious. This unique aesthetic achieves a balance between the sleek, often metallic, feel of industrial spaces and the softness and vibrancy of nature.

    The core visual elements of an industrial garden aesthetic revolve around the strategic integration of raw, unfinished materials with lush vegetation. This creates a dynamic interplay between the man-made and the natural world, resulting in a space that feels both functional and aesthetically pleasing. The overall effect is one of controlled chaos, where carefully placed elements of nature are allowed to thrive within a structured, industrial framework.

    Color Palettes in Industrial Garden Design

    The color palettes commonly used in industrial garden design often reflect the materials employed. Earthy tones, such as deep browns, muted greens, and rusty oranges, are frequently used to represent the natural elements and aged metals. These are often contrasted with cooler tones, like greys, blacks, and metallic silvers, to emphasize the industrial aspects of the design. For instance, a weathered steel planter filled with vibrant green ferns would exemplify this contrast, blending the rough texture of the metal with the delicate softness of the foliage.

    The inclusion of pops of brighter colors, such as vibrant yellows or blues from flowering plants, can add visual interest and prevent the palette from becoming too monotone.

    Materials Used in Industrial Garden Design

    Traditional industrial design frequently utilizes materials like steel, iron, concrete, and wood – often in their raw or reclaimed forms. In an industrial garden, these materials find new life as planters, trellises, pathways, and even structural elements. Reclaimed wood, with its visible grain and imperfections, adds a rustic charm. Corten steel, known for its rust-like patina, provides a naturally aged aesthetic.

    Concrete, whether polished or left in its raw state, adds a robust and modern feel. These materials, often showing signs of wear and tear, contribute to the overall aged and textured look.

    Textural Elements in Industrial Garden Design

    Texture plays a crucial role in the success of an industrial garden. The rough texture of concrete is contrasted with the smooth surfaces of polished metal, while the soft foliage of plants provides a welcome counterpoint to the hardness of the industrial materials. The juxtaposition of these diverse textures creates visual interest and adds depth to the space.

    For example, the coarse texture of a brick wall might be softened by the trailing vines of a climbing plant, creating a dynamic and layered visual effect. The use of rusted metal, with its uneven surface, adds another layer of textural complexity, enhancing the overall aesthetic appeal.

    Sourcing and Utilizing Recycled Materials

    The creation of an industrial garden thrives on the principles of sustainability and resourcefulness. By repurposing discarded materials, we not only reduce waste but also inject unique character into our green spaces. The following sections detail the sourcing and utilization of common recycled materials, transforming them from refuse into functional and aesthetically pleasing garden elements.

    Five Common Recycled Materials for Industrial Gardens

    Several materials readily lend themselves to repurposing in an industrial garden setting. Their durability, aesthetic appeal, and availability make them ideal choices for various applications. Careful selection and preparation are key to ensuring longevity and safety.

    • Old Pallets: These ubiquitous wooden structures, often composed of pressure-treated pine or other durable woods, offer immense potential for garden projects. Their inherent strength makes them suitable for raised beds, trellises, and seating.
    • Rusty Metal: While seemingly undesirable, rusty metal objects, such as discarded pipes, sheets, and containers, can be transformed into striking garden features. The patina of rust adds a unique textural element to the industrial aesthetic.
    • Recycled Glass Bottles: Glass bottles, readily available from recycling centers or household collections, are versatile elements that can be incorporated in various creative ways within the garden setting. Their transparency and reflective qualities can add a touch of elegance.
    • Reclaimed Bricks: Bricks, often salvaged from demolition sites, can be used to create pathways, retaining walls, or even decorative borders. Their earthy tones and rugged texture complement the industrial aesthetic.
    • Used Tires: Though requiring careful cleaning and preparation, old tires can be repurposed into raised garden beds or unique planters. The robust nature of tires allows them to withstand weathering and provide sturdy support for plants.

    Repurposing Old Pallets into Garden Features

    Old pallets, after thorough cleaning and inspection for any hazardous materials (such as chemical treatments), can be disassembled and reassembled into various garden structures. For example, individual planks can be used to create raised beds, supported by sturdy posts or other recycled materials. Alternatively, whole pallets can be used as trellises for climbing plants, or as the base for a rustic bench by adding a comfortable seat made from other recycled materials.

    Safety precautions should always be taken when handling wood, including wearing appropriate safety gear.

    Cleaning and Preparing Rusty Metal for Garden Use

    Rusty metal, while visually appealing in an industrial setting, requires careful preparation to ensure its safe integration into the garden. The rust itself can be toxic to plants if not properly managed. A wire brush can remove loose rust, followed by a thorough cleaning with a pressure washer. Applying a rust converter helps to stabilize the remaining rust and prevent further corrosion.

    A protective sealant or paint can then be applied to enhance durability and prevent further rust formation. Always wear appropriate safety gear, including gloves and eye protection, during this process.

    Creative Uses for Recycled Glass Bottles in a Garden Setting

    Recycled glass bottles offer a multitude of creative applications within an industrial garden. They can be used as miniature planters, hanging from wires or arranged in decorative patterns. Their transparent nature allows light to reach the roots of smaller plants. They can also be used as decorative elements, strategically placed along pathways or incorporated into mosaics. Larger bottles can be cut and repurposed into unique hanging planters.

    Safety precautions should be taken when cutting glass, including the use of appropriate safety gear.

    Vertical Garden Design Using Repurposed Materials

    A small vertical garden can be constructed using readily available recycled materials. This design maximizes space utilization while showcasing the industrial aesthetic.

    Material Source Function Image Description
    Old Wooden Pallet Construction Site/Recycling Center Base Structure/Support A weathered wooden pallet, showing signs of previous use, is securely mounted to a wall.
    Recycled Plastic Bottles (cut in half) Household Recycling Planters Several clear plastic bottles, cut cleanly in half, are affixed to the pallet, forming individual planting pockets.
    Rusty Metal Wire Mesh Salvaged from discarded objects Reinforcement and Drainage A piece of rusty metal wire mesh, showing signs of weathering, is used to reinforce the structure and provide drainage for the plants.
    Reclaimed Fabric Scraps Household scraps Plant Support Small scraps of sturdy fabric are used to support delicate plants within the plastic bottle planters.

    Plant Selection and Arrangement

    Recycled garden ideas diy gardening items creative design backyard designrulz decorations into

    The success of an industrial garden, aesthetically and biologically, hinges on careful plant selection and strategic arrangement. Choosing species that tolerate the often harsh conditions associated with recycled containers and the sometimes-exposed locations favoured by this style, while simultaneously complementing the raw, utilitarian aesthetic, is crucial. The plants themselves become integral design elements, softening the hard lines and adding bursts of life to the otherwise metallic and concrete landscape.Plant selection for an industrial garden must consider several factors, including light exposure, water retention capabilities of the chosen containers, and the plants’ tolerance for temperature fluctuations.

    The overall goal is to create a thriving, visually appealing ecosystem that seamlessly integrates with the industrial theme.

    Plant Species Suitable for Recycled Containers

    The choice of plant species is heavily influenced by the material and size of the recycled containers. Metal containers, for instance, can heat up significantly in direct sunlight, requiring drought-tolerant plants with good heat reflection. Conversely, plastic containers might retain moisture longer, necessitating plants that can tolerate consistently moist soil and are less susceptible to root rot. Wooden containers offer a middle ground, requiring a balance between moisture retention and drainage.

    • Succulents and Cacti: These are ideal for metal containers due to their exceptional drought tolerance and ability to withstand high temperatures. Their architectural forms also complement the angular lines of industrial design. Examples include
      -Sedum*,
      -Echeveria*, and various
      -Opuntia* species.
    • Sedum (Stonecrop): A highly versatile genus, many Sedum species are incredibly hardy, thriving in full sun and poor soil, making them perfect for a variety of recycled containers. Their drought tolerance and ability to withstand temperature fluctuations make them ideal for industrial settings.
    • Lavender: This fragrant herb thrives in well-drained soil and full sun, tolerating heat well and adding a lovely scent to the garden. It can be successfully grown in metal, plastic, or wooden containers, provided adequate drainage is ensured.
    • Salvia: Many Salvia species offer drought tolerance and attractive blooms, adding color and texture. Their adaptability makes them suitable for a range of recycled container materials.
    • Grasses: Ornamental grasses, such as
      -Festuca* or
      -Pennisetum*, bring movement and texture. They are relatively low-maintenance and can tolerate a variety of conditions, thriving in many types of recycled containers.

    Principles of Plant Arrangement for Industrial Aesthetics

    Successful plant arrangement in an industrial garden balances the juxtaposition of nature’s softness against the harshness of industrial materials. The goal is to create visual interest and depth, softening the hard lines of the recycled containers and other industrial elements. This can be achieved through careful consideration of height, texture, color, and form.

    • Varying Heights: Combine plants of different heights to create visual interest and depth. Tall grasses or flowering plants can be paired with low-growing succulents or groundcovers.
    • Textural Contrast: Contrast the smooth surfaces of metal containers with the rough textures of certain plants. For instance, the spiky leaves of succulents contrast beautifully with the smooth surfaces of metal drums.
    • Color Palette: Use a limited color palette to maintain a cohesive aesthetic. Neutral tones like greens, grays, and browns can be complemented with pops of color from strategically placed flowering plants.
    • Grouping and Repetition: Group similar plants together to create a sense of rhythm and repetition. This visually strengthens the design and emphasizes the chosen plant species.
    • Strategic Placement: Consider the placement of plants in relation to the overall design. Taller plants can be used to screen unattractive areas, while smaller plants can be used to fill gaps and add detail.

    Planting Scheme for a Small Industrial Garden

    This scheme utilizes readily available recycled materials and plants that thrive in diverse conditions.

    • Container 1 (Large metal drum): Three
      -Agave americana* plants (for their dramatic form) surrounded by smaller
      -Sedum* varieties in varying shades of green.
    • Container 2 (Wooden pallet): A mix of trailing succulents (*Sedum morganianum*) spilling over the sides, complemented by upright lavender plants in the center.
    • Container 3 (Upcycled metal watering cans): Small succulents (*Echeveria*) and drought-tolerant herbs, such as rosemary, planted in each watering can, creating a vertical element.
    • Ground Cover: A low-growing groundcover such as
      -Thyme* planted between the containers to unify the space and prevent soil erosion.

    Construction and Design Techniques

    Garden recycled ideas diy recycle mini indoor gardens items decoration gardening plastic bottles jardin out using vertical plants idea plant

    Creating an industrial garden from recycled materials requires careful consideration of construction and design techniques to ensure both aesthetic appeal and structural integrity. The following sections detail methods for building key elements of your upcycled garden space, emphasizing durability and functionality.

    Building Raised Garden Beds from Recycled Wood Pallets

    Repurposed wood pallets offer a readily available and cost-effective material for constructing raised garden beds. However, careful preparation is crucial. Before use, pallets should be thoroughly inspected for any signs of rot, pest infestation (especially termites), or chemical treatments. Pallets treated with chemical preservatives, such as chromated copper arsenate (CCA), should be avoided for food production unless thoroughly cleaned and tested.

    Non-CCA treated pallets are preferable. Construction involves disassembling the pallet, removing any unwanted nails or staples, and then reassembling the wood planks into a desired bed shape and size. The use of galvanized screws or exterior-grade wood glue enhances structural stability. The resulting structure can be further enhanced with a lining of landscape fabric to prevent soil from escaping and to deter weeds.

    Adding a layer of compost and topsoil completes the raised bed.

    Creating a Vertical Garden Using Repurposed Metal Containers

    Vertical gardening maximizes space and adds a visually striking element to an industrial garden. Repurposed metal containers, such as old cans, buckets, or even discarded metal sheets, can be easily transformed into vertical planters. Cleaning the containers thoroughly is the first step, followed by ensuring any sharp edges are smoothed or covered to prevent injury. Drainage holes are essential to prevent waterlogging and root rot.

    These holes can be drilled or punched into the metal, depending on the container’s thickness and material. Mounting the containers can be achieved using various methods; attaching them to a wall with sturdy brackets or creating a freestanding structure using metal pipes or reclaimed wood provides support. The choice of plants should be tailored to the container size and sun exposure.

    Integrating Recycled Materials into Pathways and Borders

    Pathways and borders define the garden’s structure and offer opportunities to further showcase the industrial aesthetic. Recycled materials such as broken bricks, reclaimed stones, or even repurposed concrete slabs can be used to create durable and visually interesting pathways. These materials should be cleaned and leveled to create a stable and even surface. Similarly, recycled metal edging, repurposed railroad ties (ensure they are not CCA-treated), or even large stones can create defined borders, adding visual texture and structure to the garden layout.

    Consider using gravel or crushed stone as a filler between larger materials to provide stability and weed suppression.

    Designing a Water Feature Using Recycled Materials

    A water feature adds a dynamic element to the industrial garden. A simple yet effective water feature can be created using a large, repurposed metal container, such as an old galvanized tub or a discarded metal trough. Ensure it is thoroughly cleaned and any rust or sharp edges are addressed. A submersible pump, readily available at most garden centers, is crucial for circulating the water.

    Adding smooth river stones or recycled glass to the container’s bottom adds visual interest and helps to muffle the pump’s noise. Plants that thrive in moist environments, such as aquatic plants or moisture-loving ferns, can be added to complete the feature. The placement of the water feature should consider sun exposure and proximity to power sources for the pump.

    Consider using solar-powered pumps for a truly sustainable approach.

    Lighting and Ambiance

    Diy recycled garden ideas gardening creative items design stuff materials using con designrulz decorations

    The strategic use of lighting is paramount in transforming an industrial garden from a daytime haven into a captivating nighttime spectacle. Proper illumination not only enhances the aesthetic appeal but also creates a specific mood, highlighting the unique textures and features of recycled materials and carefully chosen plants. The interplay of light and shadow can dramatically alter the perceived space, emphasizing the rugged charm of the industrial design.The selection of light sources directly impacts the overall ambiance.

    Different light sources possess distinct qualities, affecting both the visual appearance and the emotional response of the viewer. The intensity, color temperature, and direction of the light all contribute to the final effect. Understanding these factors is key to creating a successful lighting scheme.

    Light Source Selection and Placement for Industrial Garden Aesthetics

    Careful consideration of light source type and placement is crucial for achieving the desired industrial garden ambiance. String lights, for instance, evoke a sense of warmth and intimacy, reminiscent of older factory spaces illuminated by simpler means. Spotlights, on the other hand, can be used to highlight specific focal points, such as a sculptural element crafted from recycled metal or a particularly vibrant plant.

    Using a combination of these, along with other options, creates depth and visual interest.

    Mood Creation Through Lighting

    Lighting significantly influences the mood of an industrial garden. Warm-toned lighting (around 2700K-3000K) creates a cozy and inviting atmosphere, while cooler tones (5000K and above) produce a more modern and stark feeling. Dimmable lights offer greater control, allowing for adjustments to suit different occasions and times of day. Strategic shadow play can also enhance the drama and intrigue of the space, drawing attention to specific textures and shapes.

    For example, backlighting certain plants can create a dramatic silhouette effect against a wall.

    Lighting Plan Example for an Industrial Garden

    A well-thought-out lighting plan ensures that each area of the industrial garden receives appropriate illumination. The following plan provides an example, illustrating the strategic use of different light sources:

    • Pathway Lighting: Low-voltage LED pathway lights embedded in the ground, providing soft, ambient illumination along walkways and preventing tripping hazards. These should be spaced approximately every 3-4 feet for even coverage.
    • Feature Lighting: Adjustable spotlights directed at key features such as a rusted metal sculpture or a particularly interesting plant arrangement. These spotlights should be positioned to minimize glare and maximize the impact of the highlighted feature.
    • Ambient Lighting: String lights woven through repurposed scaffolding or draped across the area, offering a warm and inviting glow. The warm light complements the industrial aesthetic while adding a touch of whimsy.
    • Accent Lighting: Small LED strip lights concealed within upcycled containers or planters, highlighting the textures and shapes of the containers and plants. The subtle glow from within these elements adds a unique touch to the overall design.

    Maintenance and Sustainability

    The longevity and ecological impact of an industrial garden constructed from recycled materials hinge on a proactive and informed maintenance strategy. Understanding the inherent properties of reclaimed materials and implementing sustainable practices are crucial for minimizing environmental footprint and maximizing the garden’s lifespan. This necessitates a shift from traditional gardening approaches to ones that prioritize resource efficiency and material resilience.Protecting recycled materials from the relentless forces of weathering is paramount.

    The specific approach depends on the material itself. For instance, rusted metal components, a hallmark of the industrial aesthetic, can be treated with a rust-inhibiting primer followed by a weather-resistant paint, extending their lifespan significantly. Similarly, weathered wood, often a key element in industrial gardens, benefits from periodic applications of a high-quality wood sealant or preservative to prevent rot and insect infestation.

    Plastic components, while generally durable, may degrade over time under UV exposure; using UV-resistant plastics or applying UV-blocking coatings can mitigate this.

    Material Protection Strategies

    The selection of appropriate protective coatings is vital. For metal, alkyd-based paints offer excellent weather resistance and durability. For wood, linseed oil or tung oil provide a natural, protective finish that allows the wood’s character to show through. Regular inspection is key; addressing minor damage promptly prevents escalation into more extensive repairs. A simple yearly inspection can identify issues like loose screws, cracking paint, or wood rot, allowing for timely intervention.

    For example, repainting a small section of a rusted metal fence post is significantly less time-consuming and costly than replacing the entire post later.

    Sustainable Water and Fertilizer Management

    Water conservation is essential, particularly in arid or semi-arid climates. Implementing water-wise irrigation systems, such as drip irrigation or soaker hoses, significantly reduces water waste compared to traditional overhead sprinklers. Employing drought-tolerant plant species further minimizes water needs. Examples of such plants include succulents, lavender, and certain types of grasses, all suitable for industrial garden aesthetics. Furthermore, the use of rainwater harvesting systems, such as rain barrels, provides a sustainable source of irrigation water, reducing reliance on municipal water supplies.

    Regarding fertilizers, prioritizing organic options reduces the environmental impact associated with synthetic fertilizers. Composting kitchen and garden waste generates nutrient-rich compost, providing a natural and sustainable fertilizer source. Regular soil testing helps determine nutrient deficiencies, enabling targeted fertilization rather than blanket application, thereby minimizing waste and improving efficiency. For example, a soil test revealing a lack of nitrogen would indicate the need to add nitrogen-rich compost, rather than applying a general-purpose fertilizer containing unnecessary phosphorus or potassium.

    Pest Control in Industrial Garden Settings

    Integrated pest management (IPM) is a sustainable approach to pest control. IPM emphasizes prevention through practices like proper plant spacing to improve air circulation and reduce humidity, which minimizes the risk of fungal diseases and pest infestations. Biological controls, such as introducing beneficial insects like ladybugs to control aphids, provide a natural and environmentally friendly alternative to chemical pesticides.

    When chemical interventions are necessary, opting for organic pesticides with minimal environmental impact is crucial. For instance, neem oil is a naturally derived insecticide effective against a wide range of garden pests. Monitoring pest populations regularly allows for early detection and intervention, preventing infestations from becoming overwhelming.

    Closing Summary

    Creating an industrial garden with recycled materials is more than just a landscaping project; it’s a statement of sustainable living and creative ingenuity. By embracing repurposed materials, we not only reduce waste but also craft a unique and visually compelling outdoor space. The process, while requiring careful planning and execution, is immensely rewarding, resulting in a garden that reflects both aesthetic sensibilities and environmental responsibility.

    The combination of robust plant life, carefully chosen recycled materials, and thoughtful lighting design creates a vibrant and dynamic environment, a living testament to the transformative power of sustainable practices. The beauty of this approach lies not only in the final result but also in the journey of discovery and creation involved in bringing this unique garden to life.

    Question Bank

    What types of plants are best suited for metal containers?

    Drought-tolerant plants are ideal for metal containers which can heat up quickly in sunlight. Succulents, herbs, and certain types of grasses are excellent choices.

    How do I prevent rust on recycled metal components?

    Thoroughly clean and prepare the metal by removing loose rust. Apply a rust-inhibiting primer followed by a weather-resistant paint specifically designed for outdoor use.

    What are some alternatives to pallets for raised garden beds?

    Reclaimed lumber, concrete blocks, or even large, sturdy plastic containers can be used to create raised garden beds.

    How can I deal with pests in my recycled material garden?

    Employ integrated pest management techniques including companion planting, beneficial insects, and organic pest control methods to minimize the need for harsh chemicals.

    How often should I water my industrial garden?

    Watering frequency depends on factors like plant type, container material, and weather conditions. Monitor soil moisture regularly and adjust watering accordingly, aiming for consistent moisture without overwatering.

  • Industrial Style Garden with Wood A Design Guide

    Industrial Style Garden with Wood A Design Guide

    The industrial style garden, a captivating blend of raw materials and refined design, finds a unique expression through the strategic incorporation of wood. This aesthetic, born from the repurposing of factory elements, embraces a palette of rugged textures and muted tones, creating an environment that is both strikingly modern and surprisingly inviting. The juxtaposition of weathered wood against sleek metal accents, punctuated by carefully chosen plants, generates a space that resonates with a sense of history and carefully curated artistry.

    This exploration delves into the specifics of creating such a garden, examining material selection, structural design, landscaping techniques, and the overall aesthetic principles involved.

    From selecting durable wood species resistant to the elements to designing functional structures like pergolas and planter boxes, we will navigate the intricacies of constructing a thriving industrial-style garden. We’ll explore the complementary use of various metal finishes, the strategic placement of plants to soften the hard edges, and the incorporation of lighting and accessories to create a space that is both visually stunning and functionally sound.

    The goal is to provide a comprehensive guide, enabling readers to translate the principles of this unique style into their own outdoor spaces, regardless of size or location.

    Defining the “Industrial Style Garden with Wood” Aesthetic

    The industrial style garden with wood blends the raw, utilitarian elements of industrial design with the natural warmth and texture of wood. This aesthetic draws inspiration from factories and warehouses, incorporating repurposed materials and a sense of rugged functionality, but softens the harshness with the organic beauty of wood. The result is a space that is both stylish and inviting, showcasing a unique contrast between the man-made and the natural.The incorporation of wood in this style is crucial.

    It acts as a counterpoint to the typically cold, metallic tones associated with industrial design, introducing a sense of comfort and grounding the overall aesthetic. The choice of wood type significantly impacts the garden’s overall feel.

    Wood Selection and Application in Industrial Gardens

    The selection of wood for an industrial-style garden should consider both aesthetic and practical factors. Durability and weather resistance are paramount given the outdoor setting. Hardwoods such as reclaimed oak, chestnut, or teak are excellent choices due to their inherent strength and resistance to rot and insect damage. These woods, often showing signs of age and weathering, contribute to the authentic industrial feel.

    Softer woods like pine, while less durable, can be used for smaller projects or structures if treated appropriately with preservatives. Reclaimed wood, salvaged from old buildings or structures, is particularly popular in this style. Its unique character, including knots, cracks, and variations in color, adds to the overall rustic charm and aligns perfectly with the industrial aesthetic’s appreciation for history and repurposing.

    Applications range from constructing raised garden beds and trellises to building fences and creating unique seating areas. For example, weathered pallet wood can be repurposed to create charming planters, while thicker reclaimed beams might form the structure of a pergola.

    Color Palettes in Industrial Gardens with Wood

    The color palette in an industrial-style garden with wood typically features a muted and earthy tone. Neutral shades such as charcoal grey, deep browns, and various shades of green are commonly used to create a sense of balance and harmony. The wood itself, often left in its natural state or stained in dark browns or greys, acts as a grounding element, anchoring the other colors.

    Metallic accents, such as galvanized steel or aged copper, are often incorporated to reinforce the industrial theme. These metallics can be found in planters, watering cans, or even incorporated into the garden structures themselves. For example, a dark grey-stained wooden fence might be complemented by galvanized steel plant supports, while a rusted metal sculpture could provide a focal point amidst the greenery.

    The overall effect is a sophisticated yet rugged aesthetic, reflecting the blend of natural and man-made elements inherent to the style.

    Materials and Structures

    Penda tower timber toronto tree architecture modular building design precht habitat studio beanstalk parametric architects wood designs canada green sustainable

    The successful integration of wood and metal in an industrial-style garden hinges on selecting appropriate materials that can withstand the elements and aesthetically complement each other. Careful consideration of wood species, their inherent properties, and the chosen metal finishes is crucial for creating a durable and visually appealing space. This section details suitable materials and provides design examples.

    Suitable Wood Types for Outdoor Use

    The longevity and appearance of wooden structures in an outdoor environment are directly influenced by the wood’s natural resistance to decay and its response to weathering. Hardwoods, generally, exhibit superior durability compared to softwoods due to their higher density and natural chemical composition. However, even within hardwood species, variations exist.

    • Ipe (Brazilian Walnut): Exceptionally dense and durable, offering high resistance to rot, insects, and weathering. Requires minimal maintenance but can be expensive.
    • Teak: Naturally weather-resistant and contains oils that repel water and insects. Develops a beautiful silver-gray patina over time. Relatively high cost.
    • Cedar: A softer wood compared to Ipe or Teak, but still offers good resistance to decay and insects, particularly when treated with preservatives. More affordable than tropical hardwoods.
    • Redwood: Similar to cedar in terms of durability and cost, known for its natural reddish hue and resistance to rot. Requires minimal maintenance.

    Maintenance requirements vary depending on the chosen wood. Tropical hardwoods like Ipe and Teak often require only occasional cleaning, while cedar and redwood may benefit from periodic applications of a clear wood sealant to prolong their lifespan and enhance their appearance. Regular inspection for any signs of damage or insect infestation is recommended for all wood types.

    Design of a Small Pergola

    This design Artikels a small pergola, approximately 2m wide x 1.5m deep x 2.5m high, suitable for a small industrial garden. Materials: 4×4″ pressure-treated cedar posts (4), 2×4″ pressure-treated cedar beams (4 for the top, 2 for each side support), 1×2″ pressure-treated cedar slats (for the roof, quantity depending on spacing). Blackened steel brackets (8) to connect beams to posts.

    Construction: The four cedar posts are anchored into the ground using concrete footings. Horizontal beams are attached to the posts using blackened steel brackets. The roof is constructed using 1×2″ cedar slats spaced evenly to allow sunlight and rain to filter through.

    Comparison of Metal Finishes

    The choice of metal finish significantly impacts the overall aesthetic of the industrial-style garden. The following table compares three popular options:

    Metal Finish Pros Cons
    Rusted Steel Unique, naturally occurring patina; adds a rustic, aged look; low maintenance after initial rust development. Rust can continue to spread if not properly controlled initially; may stain surrounding materials.
    Galvanized Steel Highly durable and corrosion-resistant; long lifespan; readily available. Can have a shiny, less aesthetically pleasing appearance; requires careful handling to avoid scratching the protective zinc coating.
    Blackened Steel Sleek, modern look; complements wood well; relatively durable. Can chip or scratch, revealing the underlying metal; requires occasional touch-ups to maintain the finish.

    Planting and Landscaping

    Aesthetic cozy brown autumn wallpapers tumblr nature beige simple wood wallpaper ideas rise shine board colors ˏˋ neutral wide wallpaperaccess

    The successful integration of flora within an industrial-style garden hinges on careful selection of plant species that complement the robust, often metallic, aesthetic. The goal is to create a juxtaposition – a harmonious contrast between the raw, industrial elements and the organic beauty of carefully chosen plants. This requires considering factors like sunlight exposure, soil type, and the overall design to ensure the plants thrive and enhance, rather than detract from, the intended atmosphere.The use of plants in an industrial garden should be strategic, mirroring the functionality and purposeful design principles of industrial aesthetics.

    Rather than a profusion of blooms, a curated selection of hardy, structural plants often works best. This approach emphasizes form and texture, complementing the sharp lines and metallic tones of the hardscaping. The following sections detail suitable plant choices and landscaping techniques for achieving this balance.

    Plant Species Selection for Industrial Gardens

    Several plant species, due to their resilience, architectural forms, and textural qualities, are particularly well-suited for industrial-style gardens. These plants are chosen not just for their beauty, but also for their ability to withstand potentially harsh conditions, such as limited soil and exposure to the elements, often found in urban or industrial settings. Examples include drought-tolerant succulents like

    • Sedum* species (stonecrop), offering textural interest with their fleshy leaves and varied colors; grasses such as
    • Stipa tenuissima* (Mexican feather grass), providing a soft contrast to the hard surfaces; and robust perennials like
    • Salvia* (sage), adding bursts of color with minimal maintenance. The selection should consider the garden’s microclimate and the overall design scheme.

    Hardscaping Elements: Gravel, Stones, and More

    Gravel, stones, and other hardscaping materials are crucial in establishing the industrial aesthetic. Their use is not merely decorative; it reflects the utilitarian nature of industrial design. Gravel pathways, for instance, evoke the feeling of a factory floor or railway ballast, adding a sense of texture and movement. Different sized stones, perhaps reclaimed from demolition projects, can be used to create borders, pathways, or even focal points.

    The use of rusted metal edging or containers further reinforces the industrial theme. The color palette of the hardscaping materials should complement the chosen plants, creating a cohesive visual narrative. For example, dark grey or charcoal gravel can contrast beautifully with silvery-leaved plants, while lighter-colored stones might be used to highlight brighter blooms. The strategic placement of larger rocks or boulders can also create visual anchors and define different areas within the garden.

    Planting Scheme for a 10×10 Meter Industrial Garden

    This scheme prioritizes structural plants and hardscaping to achieve a balanced industrial aesthetic. The arrangement focuses on creating visual interest through contrasting textures and forms, rather than overwhelming the space with a multitude of plants.

    • Plant A:
      -Sedum spectabile* (Autumn Joy Sedum)

      -Location: Center back border – Quantity: 6 – Description: Provides late-season color and texture with its large pink flower heads and fleshy blue-green foliage. Chosen for its drought tolerance and ability to withstand harsh conditions.
    • Plant B:
      -Stipa tenuissima* (Mexican Feather Grass)

      -Location: Distributed throughout the garden, particularly in front of the Sedum – Quantity: 12 clumps – Description: Adds movement and a soft, airy texture, contrasting the harshness of the hardscaping. Its delicate plumes sway in the breeze, creating a dynamic element.
    • Plant C:
      -Salvia nemorosa* (Russian Sage)

      -Location: Interspersed amongst the grasses, particularly near the edges – Quantity: 8 – Description: Offers vertical accents with its spiky flower stalks and silvery foliage. Its long blooming period provides sustained color. Chosen for its low maintenance and drought tolerance.
    • Hardscaping: Gravel Pathways
      -Location: Two intersecting pathways, creating a grid pattern – Description: Dark grey gravel pathways create a sense of movement and define the garden’s areas, mimicking industrial spaces.
    • Hardscaping: Reclaimed Metal Planters
      -Location: Strategically placed along the edges and potentially within the gravel pathways – Quantity: 4-6 – Description: Used to contain smaller succulents or other plants, adding to the industrial aesthetic with their rugged texture and potentially rusted surfaces.

    Lighting and Accessories

    Illumination and carefully chosen accessories are crucial in translating the raw, industrial aesthetic into a welcoming and functional outdoor space. The interplay of light and shadow, coupled with strategically placed elements, will define the mood and character of the garden, highlighting its unique features and creating a visually stimulating environment. A well-designed lighting plan should consider both functionality and ambiance, ensuring the garden is safe and enjoyable at all times of day.The strategic use of lighting in an industrial-style garden with wood creates depth, texture, and visual interest.

    Ambient lighting establishes a foundational level of illumination, while accent lighting focuses on specific features, highlighting the unique character of the space. The principles of photometry—the science of light measurement—guide the placement and intensity of light sources to achieve the desired effect. For instance, understanding lumens (a measure of luminous flux) and lux (a measure of illuminance) allows for precise control over brightness and distribution.

    Ambient and Accent Lighting Plan

    Ambient lighting, provided by sources like strategically placed bollard lights with a warm, industrial-style finish (e.g., cast iron or powder-coated steel), will create a welcoming and safe atmosphere throughout the garden. These lights, positioned along pathways or borders, should emit a soft, diffused light to avoid harsh shadows. Accent lighting, on the other hand, will focus on specific elements.

    For example, spotlights directed at a reclaimed wood pergola or uplighting on a metal water feature will dramatically enhance these features. String lights, reminiscent of factory settings, woven through the wooden structures or draped along the walls, add a touch of whimsical charm. Consider using LED lights for energy efficiency and long-term durability.

    Suitable Accessories for an Industrial Garden

    Accessories play a pivotal role in shaping the overall aesthetic. Metal planters, particularly those with a rusted or aged patina, offer a rugged counterpoint to the warmth of the wood. Reclaimed wood signs, perhaps displaying the garden’s name or a relevant industrial-inspired phrase, add a personal touch. Industrial-style water features, such as a repurposed metal trough or a cascading fountain with a metallic frame, introduce both visual and auditory elements, adding dynamism to the otherwise static landscape.

    The careful selection and placement of these elements ensure a harmonious blend of form and function.

    Unique Decorative Elements

    The following five decorative elements offer unique opportunities to enhance the industrial-wood garden aesthetic:

    1. Repurposed Metal Gears as Wall Art: Large, rusted gears mounted on a reclaimed wood backdrop create a striking focal point, directly referencing the industrial theme while highlighting the juxtaposition of materials. The gears’ intricate details add a layer of visual complexity.
    2. Vintage Industrial Lamps as Garden Lights: Refurbished factory lamps, perhaps with exposed bulbs and metal shades, provide both functional lighting and a strong industrial aesthetic. These lamps, strategically placed among the plants, contribute to the overall atmosphere.
    3. Metal Tool Storage as Planter: An old metal toolbox or tool caddy, perhaps with a distressed finish, can be repurposed as a unique planter, adding a layer of industrial charm and showcasing the garden’s blend of functionality and aesthetics.
    4. Railway Sleeper Planter Boxes: Reclaimed railway sleepers, robust and weather-resistant, form visually striking and durable planter boxes, seamlessly integrating the industrial aesthetic with the organic elements of the garden.
    5. Metal Sculptures with Geometric Shapes: Simple, geometric metal sculptures, perhaps fabricated from steel pipes or sheets, provide a modern counterpoint to the organic forms of the plants and wood, emphasizing the industrial theme while adding visual interest and a sense of order.

    Illustrative Examples

    The following examples showcase the versatility of the industrial-style garden with wood, demonstrating its adaptability to diverse spaces and design preferences. Each scenario highlights the interplay of materials, textures, and planting schemes to create unique and captivating outdoor environments. The focus remains on the integration of reclaimed wood and the strategic use of contrasting textures to achieve the desired aesthetic.

    Small Urban Industrial Garden Design with Reclaimed Wood

    This design envisions a compact urban garden, approximately 6ft x 8ft, nestled on a city balcony or small patio. Reclaimed scaffold boards, exhibiting a weathered grey patina, form the basis of the raised planting beds. These beds, measuring 2ft x 4ft each, are constructed using simple butt-joint techniques, reinforced with galvanized steel brackets at the corners for added durability.

    The inherent imperfections of the reclaimed wood – knots, cracks, and variations in colour – contribute to the authentic industrial aesthetic. A single, repurposed metal water tank, approximately 3ft tall and 2ft in diameter, serves as a focal point, painted in a muted industrial green. This tank is used as a planter for drought-tolerant succulents and cacti, complementing the rugged texture of the wood.

    The overall palette emphasizes muted greens, greys, and browns, enhancing the sense of aged industrial charm. The ground is covered with a layer of gravel, providing drainage and a textural contrast to the wood and metal elements.

    Final Summary

    Industrial style garden with wood

    Creating an industrial-style garden with wood is a journey of careful selection and thoughtful design. By understanding the interplay of raw materials, the importance of durable wood species, and the strategic integration of planting and hardscaping elements, one can achieve a space that is both aesthetically pleasing and environmentally responsible. The result is a garden that transcends mere functionality, becoming a testament to the beauty of repurposed materials and the harmonious blend of nature and industrial design.

    This guide serves as a foundation for further exploration, encouraging experimentation and the creation of unique, personalized outdoor sanctuaries.

    User Queries

    What are some common wood pests and how can I protect my wooden structures?

    Common pests include termites, carpenter ants, and wood-boring beetles. Protection involves using pressure-treated lumber, applying wood preservatives, and regular inspections for signs of infestation.

    How do I maintain the metal finishes in my industrial garden?

    Maintenance varies depending on the finish. Rust finishes require minimal maintenance, while galvanized steel may need occasional cleaning. Blackened steel can benefit from protective coatings to prevent rust.

    What about winterizing my industrial garden?

    Winterizing depends on your climate. This might include covering or bringing in delicate plants, protecting wooden structures with waterproof covers, and clearing away debris to prevent damage from snow or ice.

    Can I use reclaimed wood that is already weathered or showing signs of age?

    Absolutely! The weathered look of reclaimed wood is often a key element of the industrial style. Ensure the wood is structurally sound and treated appropriately for outdoor use.

    How can I incorporate sustainability into my industrial garden design?

    Use reclaimed or sustainably sourced wood, choose native plants that require less watering, and minimize the use of chemical fertilizers and pesticides. Consider using rainwater harvesting for irrigation.

  • Urban Industrial Gardens A Greener Future

    Urban Industrial Gardens A Greener Future

    Imagine a landscape transformed: rusting factory floors now vibrant with life, concrete canyons echoing with the buzz of pollinators, and the air, once thick with industrial fumes, now cleansed by the verdant expanse of an urban industrial garden. These aren’t mere fantasies; they are the burgeoning reality of a movement that cleverly intertwines ecological restoration with urban revitalization. Urban industrial gardens represent a powerful convergence of sustainability, community building, and innovative agriculture, repurposing neglected spaces into thriving ecosystems that benefit both the environment and the people who inhabit them.

    These gardens, unlike their purely aesthetic community or rooftop counterparts, often leverage the unique characteristics of industrial sites—existing infrastructure, ample sunlight in open spaces, and sometimes even readily available water sources—to cultivate food and foster biodiversity. Their historical roots trace back to wartime initiatives and post-industrial reclamation projects, evolving today into sophisticated systems employing advanced techniques like vertical farming and hydroponics.

    This exploration delves into the design, ecological impact, social benefits, and challenges inherent in establishing and maintaining these remarkable urban oases.

    Defining Urban Industrial Gardens

    Urban industrial gardens represent a fascinating intersection of ecological restoration, urban development, and community engagement. These gardens are cultivated in spaces previously occupied by or closely associated with industrial activity, transforming often-neglected or contaminated sites into vibrant, productive green spaces. They differ significantly from other types of urban gardens in their location, historical context, and the challenges they overcome.

    Urban industrial gardens are characterized by their location within or adjacent to former industrial sites, such as abandoned factories, reclaimed brownfields, or even areas surrounding active industrial facilities. This unique setting presents both opportunities and challenges. The soil may be contaminated, requiring remediation efforts before planting. The surrounding environment might include remnants of industrial infrastructure, adding a unique aesthetic to the garden.

    However, these gardens often benefit from existing infrastructure like water lines or access points, and the soil, though potentially contaminated, can sometimes be surprisingly fertile due to the historical deposition of organic materials. The gardens themselves are typically managed by a mix of community volunteers, organizations, and potentially even the industrial entities themselves, reflecting a collaborative approach to urban regeneration.

    Comparison of Urban Industrial Gardens with Other Urban Garden Types

    Urban industrial gardens differ from community gardens and rooftop gardens in several key aspects. Community gardens, usually found in residential areas, focus on providing accessible green space and fostering a sense of community. Rooftop gardens, situated on building rooftops, aim to maximize limited urban space and often incorporate sustainable practices. While sharing the common goal of urban greening, urban industrial gardens distinguish themselves by their location within or near former industrial areas, their potential for soil remediation, and the often-complex partnerships involved in their creation and maintenance.

    The scale can also vary significantly; community gardens are typically smaller and more localized, while rooftop gardens are constrained by the size of the building. In contrast, urban industrial gardens can encompass a wide range of scales, from small plots to large-scale projects revitalizing entire brownfield sites.

    Historical Context and Evolution of Urban Industrial Gardens

    The rise of urban industrial gardens is intrinsically linked to the changing landscape of industrial cities. The decline of heavy industry in many urban centers left behind vast tracts of underutilized land, often contaminated. Early examples emerged as informal efforts by local communities to reclaim these spaces, often driven by a need for food production and a desire to improve their immediate environment.

    Over time, the movement gained momentum, incorporating ecological principles and professional expertise in soil remediation and sustainable agriculture. The growing awareness of environmental issues and the benefits of urban greening further fueled the development of these gardens, transforming them from informal initiatives to more organized and sustainable projects, often supported by government agencies and non-profit organizations. A prime example is the transformation of former industrial sites in cities like Detroit, where derelict factories have been repurposed into vibrant community gardens and urban farms.

    Types of Urban Industrial Gardens Based on Location and Scale

    Urban industrial gardens vary considerably in location and scale. Small-scale gardens might be found in pockets of land within or near existing industrial complexes, often managed by employees or nearby residents. Larger-scale projects can involve the complete redevelopment of brownfield sites, transforming them into extensive urban farms or public parks incorporating garden elements. The location also influences the type of gardening practiced.

    Gardens located near active industrial sites might prioritize hardy, pollution-tolerant plants, while those on fully remediated sites may allow for a wider range of crops and horticultural practices. The management structure also varies, ranging from community-led initiatives to collaborations between community groups, local governments, and private companies. The scale and type of garden often dictate the types of crops grown, the techniques employed, and the overall impact on the surrounding community and environment.

    Design and Planning of Urban Industrial Gardens

    Urban industrial garden

    Transforming underutilized urban industrial spaces into thriving gardens requires careful design and planning. Success hinges on optimizing limited space, maximizing sunlight exposure, and selecting appropriate plant species that can tolerate the often harsh conditions of an industrial environment. This involves a multi-faceted approach encompassing site analysis, layout design, planting schemes, and construction of suitable growing structures.

    Layout Design for Space-Constrained Urban Industrial Gardens

    Effective layout design is crucial in maximizing yield within the confines of an urban industrial site. Consideration must be given to sunlight exposure, which directly influences plant growth and yield. For example, a south-facing wall in the northern hemisphere receives optimal sunlight, ideal for sun-loving vegetables like tomatoes and peppers. A possible layout could involve a tiered system utilizing vertical space on walls, incorporating trellises for climbing plants like beans or cucumbers.

    Lower areas could accommodate shade-tolerant greens like lettuce and spinach. Narrow pathways between raised beds optimize space utilization while ensuring accessibility for maintenance. Integration of water features, such as rain barrels for water harvesting, can add both aesthetic appeal and a sustainable water source. The layout should also account for easy access to each planting area for efficient harvesting and maintenance.

    Planting Plan for Diverse Species in Urban Industrial Gardens

    A diverse planting plan promotes resilience and maximizes the garden’s productivity. Selecting plants with varying sunlight requirements allows for optimal use of available space. For instance, sun-loving herbs like basil and rosemary can be placed in the sunniest areas, while shade-tolerant herbs like mint and parsley can thrive in partially shaded locations. The incorporation of nitrogen-fixing plants, such as legumes (beans, peas), enriches the soil, reducing the need for chemical fertilizers.

    Companion planting, a technique where beneficial plants are grown together, can deter pests and improve overall growth. For example, planting marigolds alongside tomatoes can repel tomato hornworms. A well-planned rotation of crops each year helps to prevent soil depletion and pest buildup. Careful consideration of plant heights and mature sizes is also vital to ensure adequate spacing and prevent overcrowding.

    Step-by-Step Guide for Building Raised Garden Beds in Industrial Settings

    Constructing raised beds offers several advantages in industrial settings, providing better soil drainage and control over soil composition, essential in potentially contaminated urban environments. The following steps Artikel the construction process:

    1. Site Preparation: Level the chosen area, removing debris and weeds. Consider using a weed barrier fabric beneath the raised bed to prevent weed growth.
    2. Frame Construction: Build a rectangular frame using pressure-treated lumber (resistant to rot and decay) or recycled materials like repurposed pallets (ensure they are free from harmful chemicals). Secure the corners using galvanized screws or bolts.
    3. Lining (Optional): Line the inside of the frame with landscape fabric to prevent soil from leaching out and to suppress weeds. This is especially important if using recycled materials.
    4. Filling: Fill the frame with a suitable growing medium. This could be a mix of topsoil, compost, and other organic matter. The depth should be at least 12 inches for most vegetables.
    5. Finishing Touches: Consider adding a layer of mulch on top to retain moisture, suppress weeds, and regulate soil temperature.

    Materials and Tools for Constructing and Maintaining an Urban Industrial Garden

    The necessary materials and tools can vary depending on the scale and complexity of the project. However, a basic list includes:

    • Materials: Pressure-treated lumber or recycled pallets, landscape fabric, topsoil, compost, mulch, seeds or seedlings, watering cans or hoses, fertilizer (organic preferred), pest control (organic options recommended).
    • Tools: Measuring tape, saw, drill, screws or bolts, shovel, rake, trowel, hand cultivator, watering can or hose, wheelbarrow (optional).

    Environmental Impact and Sustainability

    Urban industrial garden

    Urban industrial gardens, while occupying seemingly small spaces within the urban landscape, offer a surprisingly significant contribution to environmental sustainability. Their impact extends beyond the immediate aesthetic improvements, reaching into broader ecological benefits and resource conservation. By integrating agricultural practices into industrial settings, these gardens challenge traditional models of food production and offer a compelling alternative for a more environmentally responsible future.

    The environmental advantages of urban industrial gardens stem from their inherent ability to mitigate several key environmental challenges faced by densely populated areas. These benefits are interconnected and mutually reinforcing, creating a synergistic effect that amplifies their positive impact on the environment.

    Reduced Carbon Footprint

    Urban industrial gardens contribute to a reduced carbon footprint through several mechanisms. Firstly, they lessen the transportation distance of food. Locally grown produce eliminates the energy-intensive transportation associated with long-distance food supply chains, thereby reducing greenhouse gas emissions. Secondly, the incorporation of composting within these gardens reduces methane emissions, a potent greenhouse gas generated by organic waste decomposition in landfills.

    A study conducted by the University of California, Berkeley, found that composting food waste in urban settings significantly reduced overall community-level greenhouse gas emissions. Finally, the very act of growing plants sequesters carbon dioxide from the atmosphere, although the overall carbon sequestration of a single urban garden might be modest compared to large-scale forests.

    Improved Air Quality

    Plants within urban industrial gardens act as natural air filters. Through the process of photosynthesis, they absorb carbon dioxide and release oxygen, contributing to improved air quality. Furthermore, certain plants are particularly effective at absorbing pollutants like nitrogen oxides and particulate matter, common air pollutants in industrial areas. For instance, species like spider plants and snake plants are known for their air-purifying qualities.

    The presence of green spaces, even on a relatively small scale, can demonstrably improve air quality in their immediate vicinity, leading to a healthier environment for both residents and workers.

    Sustainable Water Management Practices

    Urban industrial gardens can significantly reduce water usage compared to traditional agriculture through the implementation of various sustainable water management practices. Techniques such as rainwater harvesting, drip irrigation, and the use of drought-tolerant plant varieties minimize water consumption. Rainwater harvesting systems collect rainwater for irrigation, reducing reliance on municipal water supplies. Drip irrigation delivers water directly to plant roots, minimizing water loss through evaporation.

    Selecting drought-tolerant plant species further reduces the need for frequent watering. Compared to traditional agricultural practices which often involve extensive irrigation, urban industrial gardens can achieve significantly higher water-use efficiency. A case study in Chicago showed that a community garden utilizing rainwater harvesting reduced water consumption by over 60% compared to conventionally irrigated gardens.

    Biodiversity Enhancement

    Urban industrial gardens, despite their often limited size, can play a vital role in promoting biodiversity within urban environments. The creation of green spaces provides habitat for various insects, birds, and other wildlife. The incorporation of diverse plant species, including native plants, attracts a wider range of pollinators and beneficial insects. Furthermore, the use of organic gardening practices avoids the use of harmful pesticides, protecting beneficial insects and other wildlife.

    The presence of these gardens contributes to a more resilient and biodiverse urban ecosystem, which is crucial for maintaining ecological balance and promoting urban resilience. For example, the inclusion of flowering plants can attract pollinators such as bees, supporting both the garden’s productivity and the broader urban ecosystem’s health.

    Social and Economic Aspects

    Urban industrial gardens, beyond their environmental benefits, offer significant social and economic advantages to urban communities. These spaces act as catalysts for community development, enhance food security, and stimulate local economies, creating a ripple effect of positive change within the urban landscape. The following sections detail these multifaceted contributions.

    Community Building and Social Cohesion

    Urban industrial gardens foster a strong sense of community by providing shared spaces where residents can connect, collaborate, and learn from one another. The shared activity of cultivating food fosters interaction and builds social capital. For instance, community gardening initiatives often involve workshops, educational programs, and social events, strengthening community bonds and creating a shared sense of ownership and pride.

    This collaborative environment can be particularly valuable in areas experiencing social isolation or lacking community resources. The shared experience of growing and harvesting food transcends age, cultural, and socioeconomic differences, creating a more inclusive and connected community. Studies have shown a direct correlation between participation in community gardening and improved mental and physical well-being, contributing to a healthier and happier community.

    Enhanced Food Access and Security

    Urban industrial gardens contribute directly to improving food access, especially in food deserts—areas with limited access to affordable and nutritious food. By producing fresh fruits, vegetables, and herbs locally, these gardens offer a reliable source of healthy food for residents. This is particularly important for low-income communities who may rely on less nutritious and more expensive processed foods. The direct access to fresh produce reduces reliance on supermarkets and increases the consumption of healthy foods, contributing to better dietary habits and overall health outcomes.

    Moreover, many urban industrial gardens incorporate community-supported agriculture (CSA) models, allowing residents to purchase fresh produce directly from the growers, further strengthening the local food system.

    Economic Opportunities and Job Creation

    Urban industrial gardens create economic opportunities at multiple levels. The gardens themselves can generate income through the sale of produce at farmers’ markets or directly to consumers. Furthermore, these initiatives often create employment opportunities, ranging from gardeners and farm managers to educators and workshop instructors. The development and maintenance of the gardens also stimulate local businesses through the purchase of supplies, tools, and other resources.

    Successful urban industrial garden projects demonstrate the potential for these initiatives to generate sustainable livelihoods and contribute to local economic development. For example, the Brooklyn Grange in New York City, which operates rooftop farms, employs numerous individuals and provides training programs in sustainable agriculture.

    Examples of Successful Initiatives and Their Impact

    The success of urban industrial gardens is evident in numerous initiatives worldwide. The Pasona Group’s rooftop farms in Tokyo, Japan, demonstrate the potential for high-density urban agriculture, providing fresh produce and green spaces in a densely populated city. Similarly, the Detroit Black Community Food Security Network has played a crucial role in revitalizing neighborhoods through community gardens, offering food access and creating employment opportunities in a city struggling with economic hardship.

    These examples illustrate how urban industrial gardens can serve as powerful tools for community development and economic empowerment. These gardens often act as catalysts for broader neighborhood revitalization efforts, attracting investment and fostering a sense of hope and resilience.

    Challenges and Opportunities

    Urban industrial gardens, while offering significant environmental, social, and economic benefits, face considerable hurdles in their establishment and long-term success. Overcoming these challenges requires innovative solutions, strategic planning, and the harnessing of technological advancements. The opportunities presented by successfully navigating these obstacles are substantial, promising a more sustainable and resilient urban future.

    Land Access and Resource Management

    Securing suitable land within densely populated urban areas is a primary challenge. Many potential sites are privately owned, contaminated, or located in areas with limited access to water and other essential resources. Furthermore, effective resource management, including water usage, waste disposal, and nutrient cycling, is crucial for the long-term viability of these gardens. Efficient irrigation systems, composting strategies, and integrated pest management are vital components of sustainable resource management.

    For instance, the use of greywater recycling systems can significantly reduce water consumption, while vermicomposting can transform organic waste into valuable fertilizer. Innovative approaches like rooftop gardens and vertical farming can also help overcome land scarcity.

    Technological Advancements in Urban Industrial Gardening

    Technological advancements play a pivotal role in addressing the challenges of urban industrial gardening. Precision agriculture techniques, such as sensor-based monitoring of soil conditions, nutrient levels, and environmental factors, enable optimized resource utilization and improved crop yields. Hydroponic and aeroponic systems offer alternatives to traditional soil-based cultivation, allowing for increased production in limited spaces and reducing water consumption.

    Furthermore, the use of drones for monitoring crop health and applying targeted treatments can significantly enhance efficiency and reduce the environmental impact of pesticide use. For example, a project in Singapore uses sensors and data analytics to optimize irrigation in vertical farms, reducing water usage by up to 40%.

    Innovative Approaches to Overcome Obstacles

    Several innovative approaches are being implemented to overcome the obstacles associated with urban industrial gardening. Community-based initiatives foster collaboration and shared responsibility for land management and resource allocation. Partnerships between urban farmers, local businesses, and government agencies can provide access to resources and expertise. The creation of urban food hubs can streamline the distribution of produce, connecting growers directly to consumers.

    Furthermore, repurposing abandoned or underutilized industrial sites can transform brownfields into productive green spaces, addressing both land scarcity and environmental remediation. A notable example is the transformation of former railway lands in New York City into community gardens, providing fresh produce and green spaces in underserved neighborhoods. These initiatives demonstrate the power of collaborative efforts and creative problem-solving in creating thriving urban industrial gardens.

    Illustrative Examples

    Garden urban ideas edible gardening climate tackle crisis struggle global we

    Urban industrial gardens, while diverse in their implementation, share common threads of repurposing underutilized spaces and fostering community engagement. Examining specific examples illuminates the practical applications and challenges inherent in this innovative approach to urban agriculture. We will explore both a real-world example and a hypothetical scenario, highlighting design considerations, plant selection, and community impact.

    The Brooklyn Grange Rooftop Farm

    The Brooklyn Grange, situated atop a former industrial building in New York City, serves as a compelling example of a successful urban industrial garden. This expansive rooftop farm utilizes a sophisticated hydroponic and soil-based system to cultivate a wide variety of crops, including leafy greens, herbs, flowers, and even mushrooms. The design incorporates raised beds, trellises, and other structures to maximize space and optimize plant growth.

    Community involvement is a cornerstone of the Brooklyn Grange’s operations, with educational programs, workshops, and volunteer opportunities offered to the local community. The farm also hosts events, creating a vibrant social hub. The success of the Brooklyn Grange highlights the potential for urban industrial gardens to contribute to food security, environmental sustainability, and community building.

    Plant Type Planting Date Expected Harvest Time Notes
    Lettuce April June-July Multiple sowings for continuous harvest.
    Tomatoes May August-October Requires staking or caging.
    Basil June July-September Regular harvesting promotes growth.
    Strawberries March (starter plants) June-August Requires good drainage.

    Hypothetical Repurposed Factory Garden

    Imagine a former textile factory, its vast, high-ceilinged space now transformed into a vibrant urban industrial garden. The original brick walls, now painted in calming earth tones, provide a rustic backdrop for rows of vertical hydroponic systems and raised beds filled with herbs, vegetables, and flowering plants. Sunlight streams through large, newly installed skylights, illuminating the space. Challenges would include managing temperature and humidity fluctuations, potentially exacerbated by the factory’s original industrial insulation (or lack thereof).

    Soil remediation might be necessary, depending on the previous factory use. The design would incorporate efficient water management systems, including rainwater harvesting, to minimize water waste. Community involvement could focus on workshops teaching urban farming techniques and the history of the factory, connecting the garden to the site’s past. The space could also host community events, transforming the former factory into a thriving community hub.

    Vertical Gardening System in an Urban Industrial Setting

    Envision a multi-tiered vertical gardening system, constructed from repurposed metal scaffolding and adorned with vibrant climbing plants. This system, integrated into a larger urban industrial garden, utilizes a drip irrigation system for efficient water delivery. The scaffolding’s sturdy structure supports hanging baskets overflowing with herbs and trailing strawberries, while climbing beans and tomatoes twine upwards, maximizing space utilization.

    The aesthetic appeal is undeniable: a blend of industrial grit and natural beauty. The functionality is equally impressive: the vertical design optimizes sunlight exposure for all plants, even in densely populated areas, and the modular nature of the system allows for easy expansion and customization to suit the available space and crop choices. This visual integration of nature and industrial architecture creates a striking and productive element within the garden.

    Last Point

    Urban industrial garden

    The rise of urban industrial gardens signifies a profound shift in our relationship with the urban environment. By transforming forgotten industrial sites into productive and vibrant spaces, we not only address crucial issues like food security and environmental degradation but also foster stronger communities and create novel economic opportunities. The challenges remain—securing land access, managing resources effectively, and overcoming logistical hurdles—but the innovative solutions and community spirit driving this movement demonstrate its immense potential to reshape our cities into more sustainable, resilient, and food-secure ecosystems.

    The future of urban food production may well be rooted in the fertile ground of these repurposed industrial landscapes.

    Query Resolution

    What are the potential health risks associated with growing food in formerly industrial areas?

    Soil testing is crucial before planting. Contamination from heavy metals or other toxins can occur. Careful site assessment and remediation, often involving professional soil analysis and potentially phytoremediation (using plants to remove contaminants), are essential to mitigate risks.

    How can I get involved in an urban industrial garden project?

    Many urban industrial gardens welcome volunteers. Search online for local initiatives or contact community organizations involved in urban farming. Some projects offer workshops or training programs.

    What are the legal considerations for establishing an urban industrial garden?

    Land ownership and zoning regulations vary widely. Securing necessary permits and approvals from local authorities is vital. Consult with legal professionals or local government officials to navigate the legal landscape.

    What types of plants are best suited for urban industrial gardens?

    Hardy, adaptable species that tolerate varied soil conditions and potential sunlight fluctuations are ideal. Consider native plants for increased biodiversity and reduced water needs. Consult local agricultural extension services for region-specific recommendations.

    How can I ensure the long-term sustainability of an urban industrial garden?

    Sustainable practices are key. This includes water conservation techniques (e.g., rainwater harvesting, drip irrigation), composting, pest control methods that minimize chemical use, and community engagement to ensure ongoing maintenance and support.

  • Rustic Industrial Living Room Decor A Design Guide

    Rustic Industrial Living Room Decor A Design Guide

    Rustic industrial living room decor masterfully blends the warmth of reclaimed materials with the cool sophistication of industrial design elements. This unique aesthetic, characterized by a juxtaposition of raw textures and refined finishes, creates a space that is both inviting and visually striking. The marriage of aged wood, exposed brick, and metallic accents results in a captivating ambiance, one that whispers tales of history while embracing modern functionality.

    Understanding the principles of this style—from furniture selection to lighting and accessory choices—is key to achieving a truly cohesive and impactful design.

    This exploration delves into the core components of rustic industrial living room design, examining the specific materials, color palettes, and furniture styles that define this trend. We’ll investigate the science of light and shadow in creating ambiance, the impact of texture on visual perception, and the principles of balance in interior design. Through detailed examples and practical advice, we aim to equip readers with the knowledge and inspiration to craft their own unique rustic industrial haven.

    Defining Rustic Industrial Style

    Industrial living room hot look

    Rustic industrial design is a captivating blend of contrasting aesthetics, merging the raw, utilitarian elements of industrial design with the warmth and natural textures of rustic style. This unique combination creates spaces that are both visually striking and surprisingly comfortable, reflecting a modern appreciation for reclaimed materials and honest craftsmanship.Rustic industrial design is characterized by its juxtaposition of contrasting textures and materials, creating a space that is both rugged and refined.

    The style avoids sterile minimalism, embracing instead a layered aesthetic with a sense of history and lived-in comfort.

    Material Composition in Rustic Industrial Design

    The materials employed in rustic industrial design are key to achieving its signature look. The inherent properties of these materials—their textures, colors, and inherent strength—contribute significantly to the overall aesthetic. The careful selection and combination of these materials are crucial in establishing the desired balance between the rugged and the refined.

    • Wood: Reclaimed wood, with its visible grain, knots, and signs of age, is a cornerstone of this style. The imperfections inherent in reclaimed wood add character and authenticity, conveying a sense of history and durability. Examples include aged barn wood beams, repurposed pallets, or antique wood flooring. The wood’s natural tones – ranging from warm browns to deep grays – contribute to the overall warmth of the space.

    • Metal: Unrefined or minimally treated metals like steel, iron, and copper are frequently used. Exposed pipes, metal shelving units, and industrial-style lighting fixtures contribute to the raw, utilitarian feel. The cool tones of the metal contrast beautifully with the warmth of the wood, creating visual interest and depth.
    • Brick: Exposed brick walls, often left in their natural, slightly weathered state, add a sense of history and texture. The rough texture of the brick provides a strong counterpoint to the smoother surfaces of wood and metal, adding visual complexity to the space. The color of the brick, ranging from deep reds to muted browns and grays, further contributes to the overall palette.

    Color Palettes in Rustic Industrial Living Rooms

    The color palettes typically associated with rustic industrial living rooms are grounded in earth tones and neutrals, with occasional pops of color to provide visual contrast and accentuate specific design elements. The overall effect is one of understated elegance, balancing the warmth of the rustic elements with the cool neutrality of the industrial components.

    • Neutral Base: A neutral base of grays, browns, and creams provides a versatile backdrop for the other design elements. These colors allow the textures and patterns of the wood, metal, and brick to stand out, becoming focal points of the design.
    • Accent Colors: Pops of color are strategically introduced to enhance the design. Deep blues, greens, or even rusty reds can be used in upholstery, artwork, or accessories to add visual interest and personality. These colors are usually chosen to complement the existing materials and to add depth and richness to the overall aesthetic.

    Furniture Pieces Embodying Rustic Industrial Style

    Furniture choices are crucial in achieving the rustic industrial look. The pieces should reflect the style’s core principles—a blend of raw materials and functionality with a touch of refined design.

    • Reclaimed Wood Coffee Table: A coffee table constructed from reclaimed wood, possibly featuring metal legs or accents, embodies the style perfectly. The visible imperfections in the wood add character and tell a story, while the metal legs provide a contrast in texture and material.
    • Leather Sofa: A leather sofa, in a neutral color like brown or gray, adds a touch of sophistication and durability. The leather’s natural aging process contributes to the lived-in feel, enhancing the overall aesthetic.
    • Metal Shelving Unit: A metal shelving unit, perhaps with a rustic wood top, offers both functionality and visual interest. The shelving unit provides a practical solution for storage while also contributing to the industrial aesthetic.

    Furniture Selection for a Rustic Industrial Living Room

    Creating a truly authentic rustic industrial living room requires careful consideration of the furniture. The key is to balance the raw, unfinished elements of rustic design with the clean lines and functionality of industrial style. This blend creates a space that feels both lived-in and sophisticated, comfortable yet stylish. The selection of materials and the overall layout play crucial roles in achieving this aesthetic harmony.

    Living Room Layout and Furniture Placement

    A well-designed layout maximizes space and flow, enhancing the overall aesthetic appeal. The following table illustrates a possible arrangement for a medium-sized living room, demonstrating the interplay between rustic and industrial elements. Remember that adaptability is key; adjust this layout to fit your specific space and preferences.

    Area Furniture Piece Material/Finish Description
    Focal Point Reclaimed Wood Sofa Dark stained wood, exposed grain A large sofa anchors the space, its worn texture adding character. The dark stain complements the industrial elements.
    Conversation Area Metal and Wood Coffee Table Steel frame, reclaimed wood top This piece combines the strength of steel with the warmth of wood, a hallmark of the rustic industrial style.
    Seating Area Two Industrial Metal Armchairs Dark metal, leather upholstery These chairs provide additional seating and add to the industrial aesthetic with their simple, strong lines. The leather adds a touch of rustic texture.
    Storage & Display Metal Shelving Unit Black metal, open shelving This unit offers practical storage and displays decorative items, creating visual interest.

    Essential Furniture Pieces for a Rustic Industrial Living Room

    The foundation of a successful rustic industrial living room lies in selecting the right furniture. These pieces form the core of the space, providing both functionality and aesthetic appeal. The choice of materials and finishes is paramount in achieving the desired balance between rustic charm and industrial strength.

    A well-curated selection typically includes:

    • A substantial sofa, ideally with a worn or distressed finish.
    • A coffee table that combines metal and wood, or a repurposed piece.
    • Armchairs or accent chairs, possibly in metal or leather.
    • A storage solution, such as a shelving unit or industrial-style cabinet.
    • A rug to add warmth and texture, softening the industrial elements.

    Materials and Finishes for Rustic Industrial Furniture

    The materials used significantly impact the overall aesthetic. The inherent properties of each material contribute to the unique character of the style.

    Common materials include:

    • Reclaimed wood: Offers a unique patina and texture, showcasing the history of the wood. The variations in color and grain create visual interest. The use of reclaimed wood also aligns with sustainable design principles.
    • Metal: Steel, iron, and other metals are common, often left with a raw, unfinished look or painted in dark, muted colors. The metal’s durability reflects the industrial aspect of the style.
    • Leather: Adds a touch of rustic warmth and texture, complementing the harder materials. Its aging process further contributes to the lived-in feel.

    Sofa Styles for a Rustic Industrial Living Room

    The sofa is the centerpiece of the living room. The choice of style significantly influences the overall ambiance.

    Several styles are particularly suitable:

    • Chesterfield sofa (modified): A classic design, but with a rustic twist – perhaps in reclaimed wood or with distressed leather upholstery. The button tufting can be retained, adding a touch of elegance.
    • Mid-century modern sofa (reimagined): Simple lines and a streamlined design, but in materials like reclaimed wood or with metal legs, to fit the industrial aesthetic. This style offers a blend of classic simplicity and industrial ruggedness.
    • Modular sofa: Provides flexibility in arrangement, allowing you to adapt the seating configuration to your needs. Choosing a modular sofa with industrial-style elements such as metal legs or a dark wood frame maintains the overall design cohesion.

    Incorporating Lighting and Accessories

    The successful integration of lighting and accessories is paramount in achieving a truly authentic rustic industrial living room. These elements not only illuminate the space but also contribute significantly to its overall texture, mood, and visual appeal, enriching the interplay of raw materials and refined design that defines the style. Careful consideration of both the functional and aesthetic aspects is crucial to creating a cohesive and inviting atmosphere.

    Lighting Schemes for a Rustic Industrial Living Room

    Effective lighting in a rustic industrial setting balances functionality with ambiance. The correct lighting scheme can dramatically alter the perceived size and warmth of a room. We will explore three distinct approaches, each leveraging the unique qualities of different light sources.

    Scheme 1: Warmth and Intimacy This scheme prioritizes warm, inviting light. Imagine a central pendant light, perhaps a large caged industrial-style fixture with Edison bulbs, casting a soft, yellowish glow. This is complemented by strategically placed wall sconces with similarly styled bulbs, providing task lighting and accentuating architectural features. Finally, a selection of smaller table lamps with metal bases and linen shades adds localized illumination and a touch of refined elegance.

    The overall effect is cozy and inviting, perfect for evenings spent relaxing.

    Scheme 2: Industrial Chic with High Contrast This option embraces the stark contrast inherent in the style. A single, large industrial pendant light, possibly featuring exposed wiring and a minimalist metal shade, acts as a dramatic focal point. This is juxtaposed with smaller, more refined sources like a sleek metal floor lamp with a directional head, useful for reading, and perhaps some strategically placed LED strip lighting hidden within shelving units, creating a subtle, modern accent.

    The overall effect is sophisticated and edgy.

    Scheme 3: Layered Lighting for Versatility This scheme emphasizes versatility through layered lighting. A combination of ambient, task, and accent lighting is used. Ambient lighting might consist of recessed spotlights in the ceiling, providing even illumination. Task lighting is handled by adjustable swing-arm wall lamps above reading nooks or work areas. Accent lighting is achieved with strategically placed track lighting highlighting artwork or architectural details.

    This scheme allows for flexibility, adapting to various moods and activities throughout the day.

    Decorative Accessories for a Rustic Industrial Living Room

    The right accessories are crucial in grounding the industrial elements and adding personality to the space. They act as the finishing touches, transforming a functional space into a comfortable and stylish home.The selection of accessories should reflect the rustic industrial aesthetic. Think textured throw pillows in burlap, linen, or leather, adding warmth and tactile interest. A rug with a distressed or vintage appearance, perhaps incorporating jute or wool, can anchor the seating area and soften the hard surfaces.

    Artwork should reflect the industrial theme, perhaps featuring vintage blueprints, architectural drawings, or abstract metallic prints. Consider incorporating reclaimed wood elements, such as a coffee table made from repurposed pallets or shelves crafted from reclaimed barn wood. These details add layers of visual richness and depth.

    Incorporating Metallic Accents Effectively

    Metallic accents, such as copper, brass, or iron, are integral to the rustic industrial style. However, overuse can lead to a cluttered or overwhelming effect. The key is balance and thoughtful placement. Introduce metals strategically – perhaps a copper lamp, a brass picture frame, or iron shelving brackets. These accents should complement, not compete with, the existing elements.

    Avoid using too many different metallic finishes in one space; stick to one or two dominant metals for a cohesive look. Consider the interplay of textures; a brushed metal finish will appear different from a polished one, allowing for subtle variations within a consistent palette.

    Using Different Types of Lighting Fixtures to Create Ambiance

    Different lighting fixtures contribute uniquely to the ambiance of a rustic industrial living room. Pendant lights, often featuring exposed bulbs and metal cages, create a dramatic focal point, offering both ambient and statement lighting. Floor lamps, especially those with adjustable arms and metallic bases, provide task lighting and add to the industrial aesthetic. Wall sconces, strategically placed, illuminate specific areas and enhance the architectural details of the room.

    The interplay of these different fixtures, each contributing its own character and intensity, is key to creating a multi-layered and inviting lighting scheme.

    Wall Treatments and Flooring Options

    Farmhouse neutral

    The successful execution of a rustic industrial living room design hinges critically on the careful selection of wall treatments and flooring. These elements not only contribute to the overall aesthetic but also significantly impact the room’s acoustics, thermal properties, and even the perception of space. The interplay between these two design aspects is key to achieving a balanced and visually appealing interior.

    Wall Treatments for Rustic Industrial Style

    The inherent textures and materials associated with rustic industrial design offer a diverse range of wall treatment options. Exposed brick, a hallmark of industrial spaces, provides a raw, authentic feel. Its inherent irregularities and variations in color create visual interest and a sense of history. Conversely, wood paneling, often reclaimed from older structures, adds warmth and a tactile dimension, softening the potentially harsh aspects of the industrial aesthetic.

    The choice between these two, or a combination, depends largely on the desired level of visual intensity and the existing architectural features of the room. Finally, painted walls, particularly in muted earth tones or deep, saturated colors, can serve as a unifying element, connecting the other textural elements and providing a neutral backdrop for furniture and accessories. The color choice itself can impact the perceived size and warmth of the space; lighter colors tend to enlarge the room while darker ones create a more intimate atmosphere.

    For example, a deep charcoal grey can create a dramatic and sophisticated backdrop for exposed brickwork, while a warm, creamy beige can complement the natural tones of reclaimed wood paneling.

    Flooring Options for Rustic Industrial Living Rooms

    Hardwood flooring, particularly reclaimed or wide-plank varieties, offers a classic and timeless option, introducing natural warmth and texture. Its durability aligns well with the robust nature of industrial design. Concrete flooring, on the other hand, provides a stark contrast, embodying the raw, utilitarian spirit of industrial spaces. Its inherent coolness can be balanced with the introduction of rugs, which not only add warmth and comfort but also introduce pattern and color.

    The choice between hardwood and concrete is a matter of balancing desired aesthetics with practical considerations such as maintenance and cost. Concrete, while durable, can be more challenging to maintain than hardwood. Rugs, regardless of the underlying flooring, offer a crucial opportunity to layer texture and color, anchoring furniture groups and softening the overall feel of the space. For instance, a large, distressed rug in a neutral color can unify a concrete floor with wooden furniture, creating a cohesive and inviting space.

    A patterned rug can add visual interest and complexity, breaking up the monotony of a large expanse of concrete or hardwood.

    Creating Visual Balance with Wall Treatments and Flooring

    The key to achieving visual balance lies in considering the interplay between textures, colors, and patterns. If the walls feature a busy texture like exposed brick, a simpler flooring choice like a solid-colored concrete floor or a uniform hardwood floor can create equilibrium. Conversely, if the flooring incorporates a strong pattern or texture, such as a richly patterned rug on a hardwood floor, simpler wall treatments, such as a single, neutral-toned painted wall, can prevent visual overload.

    The principle of visual weight should guide this selection. Darker colors and bolder textures tend to carry more visual weight than lighter colors and simpler textures. Consider, for example, a room with dark wood paneling on one wall balanced by a light-colored concrete floor and a large, light-colored rug. This strategic distribution of visual weight prevents any single element from dominating the space.

    Wall Decor Ideas for a Rustic Industrial Living Room

    Reclaimed wood art pieces, reflecting the history and texture of the style, can add character and visual interest. Metal signs, vintage or custom-made, inject a touch of industrial grit and provide opportunities for personalized expression. These elements, when carefully selected and strategically placed, can contribute significantly to the overall aesthetic cohesion. A large-scale reclaimed wood piece, for example, could serve as a focal point above a fireplace, while smaller metal signs could be interspersed amongst shelves or hung on walls to create visual rhythm and depth.

    The careful curation of wall decor items is crucial to maintaining a balanced and cohesive design; overcrowding can negate the intended effect.

    Creating a Cohesive Design

    Achieving a cohesive rustic industrial living room requires a nuanced understanding of the interplay between contrasting elements. The inherent tension between the rough-hewn textures of rustic design and the clean lines of industrial aesthetics presents a unique opportunity to create a space that is both visually stimulating and comfortably lived-in. Success lies in carefully balancing these opposing styles, creating a harmonious blend rather than a jarring juxtaposition.The key to a successful rustic industrial design lies in the strategic selection and arrangement of materials, textures, and colors.

    This involves understanding the principles of visual weight and balance, ensuring that no single element overpowers the overall aesthetic. The goal is to create a space that feels both authentic and sophisticated, reflecting the character of both styles without feeling chaotic or incomplete.

    Material and Texture Harmony

    Harmonious blending of textures is crucial. The tactile nature of rustic elements—think exposed wood beams with their naturally varied grain, the rough weave of a wool rug, or the uneven surface of a reclaimed wood coffee table—needs to be balanced by the smoother, often metallic, surfaces typical of industrial design. This contrast can be managed effectively by strategically placing these elements.

    For instance, the smooth, cool surface of a metal pendant lamp might hang above a rustic wooden coffee table, the contrast highlighting the unique qualities of each. Similarly, the rough texture of a brick wall could be softened by the plush texture of a leather sofa, creating a visually and tactilely pleasing balance. The interplay between these opposing textures creates depth and visual interest, preventing the space from feeling monotonous.

    Balancing Rustic and Industrial Elements

    Balancing rustic and industrial elements involves careful consideration of proportions and placement. Too many rustic elements might create a cluttered, overly-folksy feel, while an overabundance of industrial elements could result in a cold, sterile atmosphere. A successful design incorporates both styles equally, using them to complement rather than compete with each other. For example, a large, exposed brick wall (industrial) could be softened by a large, intricately woven rug (rustic), creating a balance between the starkness of the brick and the warmth of the rug.

    Similarly, a vintage metal shelving unit (industrial) could be styled with rustic wooden crates and baskets (rustic), showcasing the complementary nature of both styles. This careful balance prevents either style from dominating, resulting in a space that feels both inviting and stylish.

    Creating a Comfortable and Inviting Atmosphere

    Comfort is paramount in any living room. While the raw materials of rustic industrial design might initially seem stark, careful consideration of textiles and furnishings can transform the space into a warm and welcoming haven. Layering textiles—such as incorporating chunky knit throws over leather sofas, adding plush rugs over concrete floors, or using linen curtains—introduces warmth and softness, counteracting the potentially harsh elements of industrial design.

    The strategic use of lighting is also crucial; warm, ambient lighting can soften the sharp lines of metal fixtures and create a more relaxed mood. Finally, incorporating personal touches—family photographs, cherished books, or plants—adds character and personality, making the space feel genuinely lived-in and welcoming. The combination of these elements transforms a potentially austere space into a comfortable and inviting haven, where the raw aesthetic is enhanced by the warmth of personal touches.

    Visual Representation

    The successful execution of a rustic industrial living room hinges on a carefully orchestrated interplay of textures, colors, and carefully chosen elements. Understanding the visual impact of each material and its contribution to the overall aesthetic is crucial in achieving the desired atmosphere of raw, yet refined, living space.

    A rustic industrial living room is a study in contrasts, where the rough-hewn texture of reclaimed wood meets the smooth, cool surfaces of metal. The color palette typically leans towards warm, earthy tones, punctuated by the cool grays and blacks of metal accents. This juxtaposition creates a dynamic and visually engaging space.

    Rustic Industrial Living Room Description

    Imagine a living room bathed in the warm glow of Edison-style bulbs hanging from exposed, blackened steel pipes affixed to a high, aged-wood beam ceiling. The walls, painted a deep, charcoal gray, provide a dramatic backdrop to the room’s focal point: a large, reclaimed wood coffee table with a visibly distressed surface, showcasing its history through knots, cracks, and variations in wood grain.

    The coffee table sits on a worn, oversized Persian rug, its rich, faded colors adding a layer of warmth and texture. A worn leather Chesterfield sofa, its patina a testament to time, anchors one end of the room, complemented by two armchairs upholstered in a durable, textured fabric with a subtle industrial-inspired pattern. Metal accents, such as the legs of the chairs and the frames of framed industrial blueprints, provide a counterpoint to the organic textures of the wood and leather.

    The overall effect is one of controlled chaos, a balance between ruggedness and sophistication.

    Reclaimed Wood’s Visual Impact

    Reclaimed wood, often sourced from old barns, factories, or railway sleepers, is a cornerstone of the rustic industrial aesthetic. Its visual impact stems from its inherent imperfections. The wood’s surface often displays a rich tapestry of textures, from the smooth, worn patina of heavily used surfaces to the rough, uneven grain of less-touched areas. The color variations are equally striking, ranging from deep browns and warm honey tones to grayed-out, almost charcoal hues, reflecting the wood’s exposure to the elements and the passage of time.

    These natural variations create a unique and visually compelling surface that speaks to the history and character of the material. The presence of knots, wormholes, and other imperfections adds to the wood’s charm, emphasizing its authenticity and contributing to the overall lived-in feel of the space. For example, a coffee table constructed from reclaimed barn wood might display the ghostly imprint of old nails, adding a layer of narrative to its visual appeal.

    Visual Impact of Metal Accents

    Metal accents are essential in achieving the industrial aesthetic. These elements, often in the form of exposed pipes, gears, or metal shelving units, introduce a contrasting coolness to the warmth of the wood. The visual impact of metal is multifaceted. The reflective quality of polished metal surfaces creates interesting plays of light, while the matte finish of rusted or blackened steel contributes to a more aged and rugged look.

    The precise lines and geometric forms of metal components offer a counterpoint to the organic shapes and textures of the wood. For instance, a light fixture made from repurposed pipes and vintage Edison bulbs provides both functionality and visual interest, showcasing the industrial aesthetic while providing a warm, ambient light. Similarly, the inclusion of gears, perhaps mounted on a wall as art, adds a touch of mechanical intrigue, further enhancing the industrial theme.

    The combination of textures and finishes – the smoothness of polished steel against the roughness of rusted iron, for example – adds another layer of visual complexity and depth to the overall design.

    Last Recap

    Creating a rustic industrial living room is a journey of thoughtful curation, a balancing act between raw and refined. By carefully selecting materials – from the weathered wood of a reclaimed coffee table to the sleek metal of industrial-style pendant lights – you can craft a space that reflects your personal style while adhering to the core tenets of the design.

    The resulting atmosphere is one of comfortable sophistication, a blend of rugged charm and modern elegance that speaks volumes about your appreciation for both history and contemporary design. Remember, the key is balance – a harmonious blend of textures, colors, and lighting schemes that creates a space that is both visually stunning and deeply inviting.

    Common Queries

    What are some budget-friendly ways to incorporate rustic industrial elements?

    Repurposing existing furniture with a distressed paint finish or adding industrial-style hardware can be cost-effective. Thrift stores and flea markets are excellent sources for affordable reclaimed wood and metal pieces. DIY projects, such as creating your own metal wall art or repurposing old pallets, can significantly reduce costs.

    How can I prevent a rustic industrial space from feeling too cold or sterile?

    Introduce warmth through textiles like plush rugs, cozy throws, and textured cushions. Incorporate natural elements like plants to soften the hard surfaces. Warm lighting, such as Edison bulbs or table lamps with warm-toned shades, will also enhance the inviting quality of the room.

    How much natural light is ideal for a rustic industrial living room?

    While rustic industrial design often incorporates darker elements, sufficient natural light is crucial. Maximize natural light sources with sheer curtains or blinds to avoid blocking it completely. Strategic placement of mirrors can also help to reflect and amplify existing light.

    What are some common mistakes to avoid when designing a rustic industrial living room?

    Overdoing the industrial elements can lead to a cold, uninviting space. Insufficient lighting can make the room feel dark and gloomy. Ignoring the importance of texture and layering can result in a visually flat and uninteresting room. A lack of comfortable seating can negate the goal of creating a relaxing and inviting atmosphere.

  • Vintage Industrial Living Room Furniture A Design Guide

    Vintage Industrial Living Room Furniture A Design Guide

    Step into a world where raw industrial aesthetics meet the comfort of home. Vintage industrial living room furniture, a captivating blend of repurposed materials and robust design, offers a unique opportunity to craft a space that is both stylish and steeped in history. This style, born from the repurposing of factory and warehouse elements, transcends mere decoration; it’s a narrative woven into the very fabric of your living space.

    The inherent stories within each piece – the patina of aged metal, the grain of reclaimed wood – contribute to a rich tapestry of textures and tones, creating an atmosphere both rugged and refined.

    This exploration delves into the defining characteristics of vintage industrial furniture, examining the materials, design elements, and sourcing of authentic pieces. We’ll navigate the nuances of integrating this bold style into a contemporary setting, balancing its inherent strength with elements of warmth and comfort. From selecting the perfect sofa to understanding the art of restoration, this guide provides a comprehensive overview of creating a living room that reflects a unique blend of history and modern living.

    Defining “Vintage Industrial Living Room Furniture”

    Vintage industrial living room furniture represents a unique blend of aesthetics, merging the rugged charm of industrial design with the timeworn patina of vintage pieces. This style evokes a sense of history and repurposing, reflecting a design philosophy that values functionality and raw materials over ornamentation. The overall effect is a space that feels both lived-in and sophisticated, blending the past with contemporary living.The key characteristics of vintage industrial living room furniture stem from its historical roots in factories and workshops of the late 19th and early 20th centuries.

    This era saw the rise of mass production and the use of durable, readily available materials. The style’s enduring appeal lies in its ability to seamlessly integrate functionality with a unique aesthetic.

    Materials Commonly Used in Vintage Industrial Furniture

    The materials used significantly contribute to the distinctive character of vintage industrial furniture. The emphasis is on robust, long-lasting materials that reflect the utilitarian origins of the style. Metal, particularly steel and iron, forms a cornerstone of this aesthetic. These metals often exhibit signs of wear, such as rust or patina, adding to the furniture’s character and history.

    Wood, frequently reclaimed or repurposed, plays a complementary role. The wood might show signs of age, including scratches, dents, and variations in color, adding to the overall vintage appeal. Leather, another common material, often appears as upholstery on sofas, chairs, or ottomans, providing a luxurious contrast to the harder materials. Concrete, while less frequently used in furniture itself, might appear as a decorative element, such as in coffee tables or side tables, further reinforcing the industrial aesthetic.

    Design Elements Distinguishing Vintage Industrial Style

    Several design elements clearly distinguish vintage industrial furniture from other interior design styles. The use of exposed metal framing, for example, is a hallmark of this aesthetic. Think of metal legs on coffee tables, or the visible framework of a shelving unit. This contrasts sharply with the smoother lines and often concealed structural elements found in other styles, such as mid-century modern or minimalist designs.

    The integration of functionality into the design is also crucial. Pieces are often designed to serve a specific purpose, with little superfluous decoration. This practicality is reflected in the sturdy construction and straightforward lines. Furthermore, the color palette is generally muted, often featuring neutral tones such as greys, blacks, browns, and muted greens. This palette reinforces the raw, industrial feel, avoiding the brighter, more saturated colors common in other styles.

    The incorporation of vintage elements, such as distressed finishes or antique hardware, further distinguishes this style, adding layers of texture and visual interest. The overall effect is a balance between ruggedness and refinement, creating a space that feels both functional and stylish.

    Popular Pieces of Vintage Industrial Living Room Furniture

    The enduring appeal of vintage industrial style lies in its ability to seamlessly blend rugged functionality with refined aesthetics. This aesthetic, born from the repurposing of factory and warehouse elements, translates into a unique living room experience characterized by exposed metal, reclaimed wood, and a distinct sense of history. Understanding the key furniture pieces that define this style is crucial to achieving the desired look and feel.

    Five common furniture pieces found in vintage industrial living rooms are sofas, coffee tables, armchairs, shelving units, and lighting fixtures. These elements work in concert to create a space that is both visually striking and comfortably lived-in.

    Vintage Industrial Sofa Characteristics

    The vintage industrial sofa stands as a cornerstone of this design aesthetic. Its defining features often include a robust frame constructed from materials like steel or cast iron, paired with upholstery chosen for its durability and textural appeal. Leather, particularly distressed leather, is a popular choice, reflecting the style’s inherent connection to aged materials. However, other durable fabrics like canvas or heavy-duty linen can also be incorporated.

    Dimensions typically range from 72 to 96 inches in length, 30 to 36 inches in depth, and 30 to 36 inches in height, though variations exist depending on the specific design and manufacturer. These dimensions reflect the need for comfortable seating while maintaining a substantial visual presence. The sofa’s legs are often exposed and may be made from the same metal as the frame, adding to the industrial feel.

    Welded seams and rivets, often left visible, emphasize the handcrafted nature of the piece.

    Vintage Industrial Coffee Table Design Variations

    Vintage industrial coffee tables showcase a diversity of designs, reflecting the repurposing of materials and the creative spirit of the style. Three distinct designs illustrate this variety:

    Material Size (Approximate) Key Features Image Description
    Reclaimed Wood & Metal 48″ L x 24″ W x 18″ H Thick, rustic wood top; exposed metal legs or frame; possibly incorporating industrial casters for mobility; potentially featuring visible wood grain and imperfections. A rectangular table with a dark brown, heavily textured wooden top showcasing knots and variations in grain. The legs are made of thick, dark metal pipes, connected to the tabletop with visible rivets. The overall look is robust and aged.
    Steel & Glass 36″ Diameter x 16″ H Sleek, circular steel frame; clear or tinted glass top; minimalist design; potentially featuring a polished or brushed steel finish. A round table with a clear glass top supported by a slender, chrome-like steel frame. The frame is simple and geometric, creating a contrast between the industrial metal and the delicate glass.
    Metal Toolbox Conversion Variable, depending on toolbox size; approximately 24″-36″ L x 18″-24″ W x 18″-24″ H Upcycled metal toolbox; often featuring drawers or compartments; vintage paint or patina; may retain original hardware. A rectangular table made from a repurposed metal toolbox. The surface shows signs of wear and tear, with scratches and fading paint, adding to its character. Drawers and latches are still functional.

    Sourcing and Authenticity of Vintage Industrial Furniture

    The allure of vintage industrial furniture lies not only in its aesthetic appeal but also in its history and craftsmanship. Acquiring authentic pieces requires diligence and a keen eye, as the market is flooded with reproductions. Understanding where to source these pieces and how to distinguish genuine articles from imitations is crucial for any discerning collector or homeowner. This section details the provenance of authentic vintage industrial furniture and provides guidance on verification and preservation.The provenance of a piece significantly impacts its value and authenticity.

    Understanding the history of a piece, including its manufacturer, age, and previous owners, is crucial.

    Sources of Authentic Vintage Industrial Furniture

    Locating genuine vintage industrial furniture often requires exploring beyond typical retail channels. Success depends on persistence and a willingness to investigate diverse avenues.

    • Antique shops and flea markets: These locations offer a treasure trove of forgotten items, often including unique industrial pieces that have been overlooked. Careful examination is essential, as some antique shops may unknowingly sell reproductions.
    • Auction houses: Auction houses frequently feature industrial items, ranging from factory carts to heavy machinery components repurposed as furniture. Detailed descriptions and provenance information are usually provided, but independent verification remains important. The competitive bidding process can drive up prices, however.
    • Estate sales and barn finds: These unpredictable sources offer the chance to discover unique pieces with intriguing histories. Estate sales often showcase the accumulated possessions of a lifetime, potentially revealing hidden gems. Barn finds, while requiring more effort, can yield remarkable discoveries of forgotten industrial equipment suitable for repurposing.
    • Online marketplaces: Websites specializing in vintage and antique furniture offer a broader reach, but require careful scrutiny to identify authentic pieces and reputable sellers. High-resolution images and detailed descriptions are vital. Beware of sellers with limited feedback or inconsistent descriptions.
    • Industrial salvage yards: These yards contain a wealth of raw materials and equipment. With patience and a keen eye, you can find original parts to create custom pieces or restore existing ones. Safety precautions are crucial when visiting these locations.

    Identifying Genuine Vintage Industrial Furniture

    Distinguishing authentic vintage industrial pieces from modern reproductions requires a multifaceted approach. Attention to detail and an understanding of construction techniques are crucial.

    • Construction techniques: Authentic pieces often exhibit hand-crafted details, imperfections, and signs of age, such as wear and tear consistent with their age and use. Reproductions frequently employ modern manufacturing techniques, resulting in a more uniform and flawless finish.
    • Materials: Examine the materials used. Genuine vintage industrial furniture often utilizes heavy-duty materials like cast iron, steel, and solid wood. Reproductions may use lighter, less durable materials to reduce costs.
    • Hardware and markings: Original hardware, such as rivets, bolts, and hinges, will often show signs of age and wear. Look for manufacturer’s marks, stamps, or labels that can help verify authenticity. Reproductions may mimic these markings, but often lack the same level of detail or age-related wear.
    • Patina and wear: Genuine vintage pieces will have a unique patina developed over time, showing signs of wear consistent with their age and use. Reproductions may attempt to artificially age the piece, but the patina will usually lack the depth and authenticity of naturally aged materials.

    Restoring and Preserving Vintage Industrial Furniture

    Restoring vintage industrial furniture requires a delicate balance between preserving its original character and addressing any damage or deterioration.The process involves careful cleaning, repair, and potentially refinishing. Cleaning should be gentle, using appropriate cleaning agents to avoid damaging the finish or materials. Repairs should focus on maintaining the integrity of the original structure, using materials and techniques consistent with the piece’s age and origin.

    Refinishing should be minimal, aiming to enhance the natural patina rather than completely altering the appearance. Protecting the restored piece with appropriate sealant or wax will help preserve its condition for years to come. For example, a rusted metal piece might be cleaned with a wire brush and treated with a rust inhibitor before being sealed with a clear coat.

    Wooden elements might require gentle sanding and the application of a suitable wood oil.

    Integrating Vintage Industrial Furniture into a Modern Living Room

    Loft

    The juxtaposition of vintage industrial aesthetics with contemporary living spaces presents a unique design challenge. Successfully integrating these elements requires a careful consideration of scale, color palettes, and the strategic introduction of contrasting textures to create a harmonious and visually appealing environment. This involves understanding the inherent characteristics of both styles and employing design principles to bridge the gap between the rugged charm of industrial design and the clean lines of modern interiors.

    Living Room Layout Incorporating Vintage Industrial Furniture

    A thoughtfully designed living room can showcase the beauty of vintage industrial pieces while maintaining a modern feel. Imagine a space anchored by a reclaimed wood coffee table, its aged surface bearing the marks of time, positioned centrally in the room. Flanking the coffee table are two vintage industrial armchairs, perhaps made of metal with leather upholstery. Their robust construction and simple lines provide a grounding element.

    The chairs are placed to encourage conversation, facing each other slightly angled toward a focal point – a large, modern artwork with clean lines and bold colors, perhaps an abstract piece that contrasts the earthy tones of the wood and metal. This artwork provides a visual counterpoint, preventing the space from feeling overly industrial and adding a touch of contemporary flair.

    The walls could be painted a neutral shade, such as a soft grey or warm white, to create a backdrop that allows the furniture and artwork to stand out. A plush, textured rug in a neutral color, perhaps a wool or jute rug, would add warmth and soften the industrial elements, creating a comfortable and inviting atmosphere.

    Comparison of Vintage Industrial Furniture with Other Design Styles

    Vintage industrial furniture contrasts sharply with minimalist design. Minimalism prioritizes simplicity, clean lines, and a lack of clutter, often featuring neutral colors and a limited number of carefully chosen pieces. Vintage industrial, conversely, embraces a sense of history and texture, incorporating elements of repurposed materials and a more rugged aesthetic. While both styles can value functionality, they achieve it through different means.

    Minimalism seeks functionality through streamlined design, whereas vintage industrial often finds it in the robust construction and adaptable nature of repurposed items. In contrast to bohemian design, which is characterized by eclecticism, layers of textiles, and a relaxed, free-flowing atmosphere, vintage industrial offers a more structured and defined aesthetic. Bohemian design embraces a maximalist approach, layering textures and patterns, while vintage industrial typically employs a more restrained palette and focuses on the inherent beauty of the materials.

    The key difference lies in the overall feeling: bohemian is free-spirited and layered, while vintage industrial is more grounded and purposeful.

    Balancing Industrial Aesthetic with Comfort and Warmth

    The inherent coolness of metal and the sometimes stark lines of industrial design can be countered with the strategic incorporation of warm, inviting elements. Textiles play a crucial role in achieving this balance. Soft, plush cushions and throws in rich textures like velvet or wool can be added to the vintage industrial armchairs, softening their edges and adding a layer of comfort.

    A chunky knit throw draped over the reclaimed wood coffee table introduces visual warmth and texture. Lighting is another critical factor. While industrial spaces often feature exposed bulbs, incorporating softer lighting sources, such as table lamps with warm-toned shades or strategically placed floor lamps, can significantly enhance the ambiance, creating a more welcoming and intimate setting. The inclusion of houseplants, particularly those with lush foliage, can add a touch of nature and soften the industrial feel, introducing organic shapes and textures that contrast beautifully with the hard lines of the furniture.

    These additions not only enhance comfort but also create a visually richer and more balanced living space.

    The Impact of Color and Texture in Vintage Industrial Design

    The aesthetic appeal of vintage industrial living room furniture hinges significantly on the interplay of color and texture. These elements, far from being mere decorative choices, contribute to the overall atmosphere, evoking a sense of history, functionality, and rugged elegance. The careful selection and combination of colors and textures are crucial in creating a space that feels both lived-in and stylish.The characteristic color palettes in vintage industrial settings are generally muted and earthy, reflecting the materials and manufacturing processes of the era.

    The inherent properties of the materials themselves – the rust on steel, the patina on brass, the grain of aged wood – influence the overall color scheme. These natural color variations are often embraced rather than masked, adding to the authenticity of the style.

    Vintage Industrial Color Palettes

    The most common colors found in vintage industrial design are rooted in the materials themselves. Deep, warm browns from reclaimed wood, steel greys ranging from light pewter to dark charcoal, and muted greens and blues from aged metals are typical. Accents of warmer tones, such as burnt orange or deep reds, might be introduced through textiles or smaller decorative elements, creating contrast and visual interest.

    These color choices are not arbitrary; they are intrinsically linked to the materials used and the history of industrial production. The absence of bright, highly saturated colors is deliberate, reflecting the functional and utilitarian origins of the style.

    The Role of Texture in Vintage Industrial Aesthetics

    Texture plays a vital role in establishing the vintage industrial aesthetic. The juxtaposition of rough and smooth surfaces creates a dynamic visual experience. The rough texture of aged metal, often exhibiting signs of wear and tear like scratches and rust, contrasts sharply with the smooth, sometimes polished surfaces of wood or glass. This contrast adds depth and visual interest, while the tactile qualities of these materials enhance the overall sensory experience.

    The tactile nature of the materials is integral to the style, inviting interaction and a deeper appreciation of the craftsmanship.

    A Visual Description of a Vintage Industrial Living Room

    Imagine a living room bathed in the warm glow of Edison-style filament bulbs suspended from a high ceiling. The centerpiece is a large, reclaimed wood coffee table with a visibly distressed surface, its deep brown tones punctuated by lighter streaks of grain. A worn leather sofa, its surface softened by years of use, sits against a wall painted in a muted grey.

    A metal bookshelf, with its slightly uneven shelves and a patina of rust, displays a collection of vintage books and industrial-style decorative objects. The lighting accentuates the texture of the wood, highlighting its grain and imperfections, while casting shadows that enhance the depth of the metal surfaces. A plush, deep-red rug adds a touch of warmth and contrast to the cooler tones of the metal and wood.

    The overall effect is one of sophisticated rusticity, a blend of industrial strength and refined elegance. The room’s lighting, specifically chosen for its warm tones and ability to highlight textures, enhances the overall atmosphere.

    Care and Maintenance of Vintage Industrial Living Room Furniture

    The longevity and aesthetic appeal of vintage industrial furniture hinge critically on proper care and maintenance. Understanding the unique properties of the materials—primarily metal and wood—is paramount to preserving these pieces and preventing damage. This section details a practical approach to cleaning, protecting, and addressing common issues associated with this style of furniture.

    Cleaning and Maintaining Metal Components

    Metal components, often steel or iron, are susceptible to rust and corrosion. Regular cleaning is essential. Begin by dusting the surfaces with a soft, dry cloth or a feather duster to remove loose dirt and debris. For more stubborn grime, a damp cloth with a mild detergent solution (avoid harsh chemicals) can be used, followed by thorough drying with a clean, soft cloth.

    To prevent rust, consider applying a thin layer of paste wax or a specialized metal polish specifically designed for ferrous metals. This creates a protective barrier against moisture and environmental pollutants. For significant rust, specialized rust removers may be necessary, but always test these on an inconspicuous area first to ensure they don’t damage the finish. Remember to always wear appropriate protective gear, including gloves, when working with cleaning solutions and metal polishes.

    Cleaning and Maintaining Wooden Components

    Wooden elements, frequently reclaimed wood with unique patinas, require a gentler approach. Regular dusting with a soft cloth is crucial. For deeper cleaning, use a specialized wood cleaner designed for the type of wood (e.g., oak, pine). Always test the cleaner in an inconspicuous area first. Avoid excessive moisture, as it can damage the wood and lead to warping or cracking.

    Periodically, apply a wood conditioner or furniture polish to nourish the wood and enhance its natural beauty. This helps maintain the integrity of the wood and prevents it from drying out and cracking. Avoid placing hot objects directly on wooden surfaces to prevent heat damage.

    Preventing Damage and Extending Lifespan

    Proactive measures significantly extend the lifespan of vintage industrial furniture. Protecting surfaces from scratches and impacts is key. Use coasters under drinks and placemats under plates to avoid marking surfaces. Avoid dragging heavy objects across the furniture. For pieces with delicate finishes, consider using furniture pads or felt protectors on the legs to prevent scratching floors and furniture.

    Keep the furniture away from direct sunlight and sources of excessive heat or moisture to prevent fading, warping, and cracking. Regular inspection for any signs of damage, such as loose screws or rust, allows for prompt intervention and prevents further deterioration.

    Common Problems and Their Solutions

    The following list Artikels common issues and practical solutions:

    • Rust on Metal Components: Clean with a wire brush or specialized rust remover, followed by a protective coating of wax or metal polish.
    • Scratches on Wooden Surfaces: For minor scratches, try using a wood filler or touch-up paint that matches the wood’s color. For deeper scratches, professional restoration may be necessary.
    • Loose Joints or Screws: Tighten loose screws or bolts. If the joint is severely damaged, professional repair may be required.
    • Water Stains on Wood: Depending on the severity, a wood cleaner or a paste of baking soda and water can sometimes remove minor water stains. For significant stains, professional restoration may be necessary.
    • Fading or Discoloration: Limit exposure to direct sunlight and use UV-protective coatings if necessary. Professional cleaning or refinishing may restore the original color.

    Final Conclusion

    Industrial living room design ideas vintage rooms decor furniture designs interior dwellingdecor modern rustic inspiring stylish feel interiors fireplace digsdigs

    Ultimately, the allure of vintage industrial living room furniture lies in its ability to transform a space into a captivating blend of history and modern design. By understanding the nuances of this style – from its defining characteristics to the art of restoration and integration – you can create a living room that is not only visually stunning but also tells a story.

    The careful selection of materials, the interplay of textures, and the strategic placement of each piece contribute to an atmosphere that is both ruggedly handsome and invitingly comfortable. Embracing the imperfections and celebrating the history inherent in each piece, you can forge a living space that reflects your unique style and appreciation for enduring design.

    Quick FAQs

    What are some common misconceptions about vintage industrial furniture?

    A common misconception is that vintage industrial furniture is always dark and cold. While dark tones are prevalent, skillful integration of lighter colors, textiles, and lighting can create a warm and inviting atmosphere.

    How do I clean different materials used in vintage industrial furniture?

    Metal surfaces generally benefit from a damp cloth and mild soap. Wood surfaces should be cleaned with a specialized wood cleaner and polished regularly. Always test any cleaning solution on an inconspicuous area first.

    Where can I find affordable vintage industrial furniture?

    Explore antique shops, flea markets, online marketplaces (like eBay and Etsy), and even salvage yards for unique and budget-friendly finds. Consider repurposing existing items to create a custom piece.

    How do I prevent rust on metal furniture?

    Regularly clean and dry metal surfaces to prevent rust. Consider applying a protective sealant, especially in humid environments. Avoid leaving metal pieces exposed to excessive moisture.

    How can I determine if a piece is truly vintage or a reproduction?

    Examine the piece carefully for signs of age, such as wear and tear, patina, and construction techniques. Research the manufacturer’s marks and compare them to known vintage pieces. Consult with an antiques expert if you are unsure.

  • Industrial Chic Living Room Decor A Design Guide

    Industrial Chic Living Room Decor A Design Guide

    Industrial chic living room decor transcends mere aesthetics; it’s a journey through time, a fusion of raw, utilitarian elements with refined comfort. Born from the repurposing of factories and warehouses, this style celebrates exposed brick, metal piping, and reclaimed wood – materials that whisper tales of bygone eras. But it’s not simply about mimicking industrial spaces; it’s about carefully curating a balance between the rugged and the refined, the functional and the beautiful, creating a living space that’s both strikingly modern and remarkably warm.

    This design philosophy draws inspiration from the late 19th and early 20th centuries, a time of industrial revolution and burgeoning urban landscapes. Think lofty ceilings, exposed ductwork, and the inherent beauty found in the honest textures of aged materials. The color palette typically features muted tones of grey, charcoal, and brown, often punctuated by pops of vibrant color to add visual interest and prevent the space from feeling too austere.

    This guide will explore the key elements of industrial chic design, offering practical advice and inspiring examples to help you create your own unique industrial haven.

    Defining Industrial Chic Style

    Industrial chic, a prominent interior design style, seamlessly blends the raw aesthetics of industrial spaces with the comfort and sophistication of contemporary living. This juxtaposition creates a unique ambiance characterized by exposed elements, functional furniture, and a carefully curated blend of textures and materials. Its roots lie in the adaptive reuse of former industrial buildings, a trend that gained momentum in the late 20th century.Industrial chic’s historical influences are deeply rooted in the post-industrial era.

    The rise of loft living in repurposed factories and warehouses, particularly in cities like New York and London, played a pivotal role in popularizing the style. Architects and designers began to appreciate the inherent beauty of exposed brick, metal piping, and high ceilings, transforming these formerly utilitarian spaces into stylish residences. This movement embraced a philosophy of repurposing and celebrating the history embedded within these structures, rather than concealing their industrial past.

    Core Elements of Industrial Chic Interior Design

    The core elements of industrial chic design revolve around the strategic integration of raw, industrial materials with refined, modern accents. The overall effect is a balance between the rugged and the refined, creating a space that is both visually striking and surprisingly comfortable. This style often features exposed brick walls, which provide a textural backdrop and a nod to the style’s historical roots.

    High ceilings, a common feature in former industrial buildings, contribute to the spaciousness and grandeur of the design. Large windows, often found in these structures, allow for ample natural light, enhancing the overall aesthetic. The use of metal elements, such as exposed pipes, metal shelving, and industrial lighting fixtures, adds to the raw, industrial feel.

    Materials Commonly Used in Industrial Chic Living Rooms

    A defining characteristic of industrial chic living rooms is the strategic use of materials. Metal, in various forms, plays a significant role. Exposed steel beams, wrought iron accents, and galvanized steel pipes are frequently incorporated into the design. The metallic surfaces contribute to the raw aesthetic and provide a strong visual contrast to other elements. Wood, often reclaimed or with a distressed finish, introduces warmth and texture.

    Reclaimed wood beams, flooring, or furniture pieces add character and history to the space. Brick, often left exposed, provides a textural and visually interesting backdrop, further emphasizing the industrial heritage. Concrete, another prominent material, can be used for flooring or accent walls, adding a modern, industrial edge. Finally, the strategic use of glass, often in large windows or partitions, adds a contemporary element, contrasting with the rougher materials.

    Color Palettes Typically Associated with Industrial Chic Aesthetics

    The color palettes in industrial chic living rooms are generally characterized by a muted and neutral base, punctuated by strategic pops of color. Neutral tones, such as grays, blacks, browns, and whites, create a sophisticated backdrop. These colors are often found in the walls, flooring, and larger furniture pieces, providing a sense of calm and spaciousness. Metallic accents, such as copper, bronze, or brushed nickel, add warmth and visual interest.

    Pops of color, often in jewel tones or deep blues, greens, and reds, are strategically introduced through accessories, artwork, or smaller furniture pieces to add personality and visual excitement without overwhelming the overall neutral scheme. The overall effect is a balanced and sophisticated aesthetic, where the neutral base provides a foundation for the strategic use of color to highlight specific elements and add personality.

    Furniture Selection for an Industrial Chic Living Room

    The foundation of any successful industrial chic living room lies in the careful selection of furniture. This style, characterized by a blend of raw materials, functionality, and a touch of vintage charm, demands pieces that reflect its inherent aesthetic. The key is to strike a balance between robust, utilitarian forms and comfortable, inviting spaces. This requires understanding the properties of various materials and their integration within the overall design scheme.

    A typical industrial chic living room layout prioritizes functionality and open space. The arrangement should facilitate easy movement and conversation flow. A strategic placement of furniture pieces can define distinct zones within the room, such as a seating area, a conversation nook, and a storage area, without feeling cramped or cluttered. The careful selection of furniture pieces is paramount to achieving this balance.

    Seating Arrangements in Industrial Chic Living Rooms

    The seating arrangement is the heart of any living room. In an industrial chic setting, this often involves a statement sofa, perhaps a metal-framed piece with worn leather upholstery, or a modular sofa system allowing for flexible configurations. Additional seating can include armchairs with exposed metal legs and comfortable cushions, or even vintage industrial stools repurposed as seating.

    The materials chosen should reflect durability and a slightly aged patina. Leather, due to its strength and ability to age gracefully, is a popular choice, often exhibiting a distressed or worn appearance. Similarly, metal frames, preferably in dark greys or blacks, add to the industrial aesthetic.

    Coffee Tables and Side Tables: Materials and Design

    Coffee tables and side tables are crucial for completing the look. Reclaimed wood coffee tables, showing the natural grain and texture of the wood, are a staple of industrial chic. Their rugged character complements the overall aesthetic, offering a contrast to the smoother surfaces of other furniture pieces. Metal coffee tables, particularly those with a distressed or aged finish, also fit seamlessly into this style.

    The choice between wood and metal often depends on the existing color palette and the desired level of contrast. For instance, a dark metal coffee table might complement a lighter-colored sofa, while a reclaimed wood table could balance out a predominantly metal seating area.

    Storage Solutions: Functionality and Aesthetics

    Storage is essential in any living room, and the industrial chic style offers unique options. Metal shelving units, often with exposed brackets and a raw, unfinished look, are excellent choices. These can be used to display decorative items or store books and other belongings. Alternatively, repurposed industrial storage units, such as vintage metal cabinets or tool chests, can serve as both functional storage and eye-catching decorative elements.

    The key is to select pieces that complement the overall aesthetic while maintaining practicality. For example, a vintage metal locker can provide ample storage while adding a distinct industrial touch. Likewise, industrial-style rolling carts offer both storage and mobility, ideal for smaller spaces.

    Incorporating Vintage and Repurposed Furniture

    The integration of vintage or repurposed furniture is a hallmark of the industrial chic style. The use of older pieces with inherent character adds authenticity and depth to the design. Finding vintage factory carts, repurposing old wooden crates as coffee tables, or incorporating antique metal lockers as storage solutions are all ways to achieve this. The age and wear on these pieces add a layer of history and texture, complementing the raw materials and unpolished aesthetic of the overall style.

    Careful selection is key; the pieces should maintain structural integrity and enhance the room’s overall ambiance rather than detracting from it. For example, an old wooden workbench can be transformed into a unique dining or coffee table, its history adding a layer of narrative to the living room’s design.

    Lighting and Accessories in Industrial Chic Decor

    Industrial chic living room decor

    The successful execution of an industrial chic living room hinges not only on the furniture but also on a carefully considered lighting plan and the strategic placement of accessories. These elements work in concert to create the desired atmosphere, blending functionality with the aesthetic hallmarks of the style. Proper lighting, in particular, can dramatically alter the perception of space and enhance the textural interplay inherent in industrial design.

    Lighting design, from a scientific perspective, involves manipulating the intensity, color temperature, and direction of light to achieve specific visual effects. This is crucial in industrial chic, where the goal is often to create a balance between a raw, utilitarian feel and a comfortable, inviting ambiance.

    Ambient, Task, and Accent Lighting in Industrial Chic Interiors

    A layered lighting approach is key to achieving the desired effect in an industrial chic living room. Ambient lighting provides overall illumination, task lighting focuses light on specific areas for activities, and accent lighting highlights features and creates visual interest. For ambient lighting, consider a combination of sources to avoid harsh shadows and create a warm, inviting glow. Task lighting, positioned above reading areas or workspaces, should be bright and focused.

    Accent lighting can be used to showcase artwork or architectural details.

    Examples of Industrial-Style Lighting Fixtures

    The choice of lighting fixtures is paramount in establishing the industrial aesthetic. Metal finishes, exposed bulbs, and cage-like designs are characteristic elements. For instance, a collection of exposed-bulb pendant lights hung at varying heights above a dining table creates a visually dynamic focal point, reminiscent of factory lighting. The warm glow of Edison-style bulbs further enhances the vintage industrial feel.

    Metal floor lamps with adjustable arms, mimicking the functionality of industrial work lamps, provide task lighting while maintaining the style. Track lighting systems, often seen in industrial settings, can be used to direct light precisely where needed. Their clean lines and adjustable heads offer both practicality and aesthetic appeal.

    Mood Board: Accessory Choices for an Industrial Chic Living Room

    Accessories are crucial in adding personality and depth to the industrial chic aesthetic. A carefully curated collection of items can transform a space from merely functional to truly inviting. The interplay of textures and materials is key; think rough-hewn wood, cool metal, and warm leather.

    Imagine a mood board featuring a distressed metal clock with oversized Roman numerals, reflecting the utilitarian aspect of the style. Alongside it, a vintage-style industrial metal shelf displays a collection of glass apothecary jars filled with interesting objects, creating a display of both function and beauty. A piece of abstract artwork with a metallic finish hangs on a brick wall, contrasting the rough texture with a smooth, reflective surface.

    A leather armchair adds warmth and texture, while a plush rug softens the otherwise hard surfaces of the room. The color palette would likely include muted grays, browns, and blacks, with pops of color from carefully selected accent pieces.

    Texture and Pattern in Industrial Chic Design

    The skillful use of texture and pattern is vital for preventing an industrial-chic space from feeling cold or sterile. The juxtaposition of contrasting textures—smooth metal against rough-hewn wood, soft textiles against hard surfaces—creates visual interest and depth. Patterns should be used sparingly, and if incorporated, should complement the overall aesthetic. For instance, a geometric patterned rug can add visual interest without overwhelming the space.

    Similarly, a subtly patterned throw blanket on a leather sofa can add a touch of warmth and personality. The key is balance: avoid overwhelming the space with too many competing patterns or textures.

    Incorporating Different Elements into the Design

    Industrial living room ideas design interior style 2020 decor modern plants rustic decoracion designs instagram minimalist furniture green インテリア rug

    The inherent starkness of industrial chic design, while aesthetically appealing to many, can benefit from strategic integration of contrasting elements to create a more balanced and inviting living space. This involves carefully considering the interplay of different substyles, the introduction of natural materials, and a thoughtful approach to balancing hard and soft elements. The ultimate goal is to achieve a space that embodies the raw aesthetic of industrial design while maintaining a sense of warmth and comfort.

    Industrial Chic Substyles: A Comparative Analysis

    Different interpretations of industrial chic lead to diverse substyles, each offering a unique aesthetic. Understanding these nuances allows for a more personalized and nuanced approach to interior design. The following table compares and contrasts three prominent substyles: Rustic Industrial, Minimalist Industrial, and Urban Industrial.

    Feature Rustic Industrial Minimalist Industrial Urban Industrial
    Color Palette Warm neutrals (browns, grays, beige) accented with pops of deep reds or greens. Neutral monochrome palette (grays, blacks, whites) with occasional metallic accents. Cool grays, blacks, and whites with pops of bright, bold colors (e.g., teal, mustard yellow).
    Materials Reclaimed wood, exposed brick, aged metals, leather, natural fibers (e.g., jute, wool). Metal, concrete, glass, clean lines, simple forms, limited ornamentation. Metal, concrete, glass, brick, exposed pipes, repurposed industrial materials.
    Furniture Heavily textured furniture with visible wear and tear, often featuring distressed finishes. Sleek, minimalist furniture with clean lines and simple forms, often made from metal or wood. A mix of vintage and contemporary industrial furniture, with a focus on functionality and practicality.
    Overall Feel Warm, inviting, and slightly weathered. Clean, simple, and uncluttered. Edgy, raw, and urban.

    Incorporating Natural Elements to Soften the Aesthetic

    The inherent hardness of metal and concrete can be counterbalanced by introducing natural elements. Plants, in particular, serve as effective visual softeners, adding texture and life to the space. Large potted plants, such as fiddle-leaf figs or snake plants, add height and visual interest, while smaller succulents or trailing plants can be strategically placed on shelves or tables.

    Natural fabrics, such as linen, wool, and cotton, in throw pillows, rugs, and curtains, further contribute to a warmer, more inviting atmosphere. The scientific principle of biophilic design—incorporating natural elements into built environments—demonstrates the positive psychological and physiological effects of such integration, reducing stress and improving overall well-being. For example, studies have shown that exposure to plants can reduce cortisol levels (a stress hormone).

    Balancing Hard and Cold Elements with Warmer Features

    The contrast between hard and soft elements is key to successful industrial chic design. The cold, metallic surfaces and exposed brick can be balanced with the warmth of wood, plush textiles, and soft lighting. Warm-toned lighting, such as incandescent or Edison bulb fixtures, contributes significantly to a cozier atmosphere compared to harsh, bright fluorescent lighting. Adding a fireplace, even a decorative electric one, introduces a focal point that radiates both visual and literal warmth.

    The use of rich textures in fabrics, such as a chunky knit throw blanket or a sheepskin rug, provides tactile warmth and visual interest, creating a more inviting and comfortable space.

    Flooring Choices to Enhance the Industrial Chic Look

    Flooring plays a crucial role in establishing the industrial aesthetic. Polished concrete floors, a hallmark of industrial spaces, provide a clean, minimalist backdrop. However, their inherent coldness can be mitigated by the addition of area rugs made from natural fibers. Alternatively, hardwood floors, particularly those with a reclaimed or distressed finish, offer a warmer, more textured alternative while still maintaining a sense of industrial authenticity.

    The choice depends on the specific substyle and desired level of warmth. For instance, a minimalist industrial design might opt for polished concrete, while a rustic industrial style might favor reclaimed hardwood.

    Illustrative Examples of Industrial Chic Living Rooms

    Industrial chic living room decor

    The versatility of industrial chic style allows for diverse interpretations, ranging from minimalist spaces emphasizing clean lines to rustic settings showcasing reclaimed materials. The following examples demonstrate this adaptability, highlighting the interplay of textures, colors, and lighting to create distinct atmospheres within the industrial aesthetic.

    Minimalist Industrial Chic Living Room

    This design prioritizes functionality and clean lines, minimizing clutter and maximizing space. The color palette is predominantly neutral, utilizing shades of gray, white, and black. Furniture consists of sleek, metal-framed sofas and armchairs, perhaps upholstered in a simple, dark gray fabric. Lighting is functional and understated, featuring exposed Edison bulbs suspended from the ceiling and minimalist metal floor lamps.

    Accessories are kept to a minimum, possibly including a few carefully selected metallic sculptures or abstract art pieces. The overall effect is one of sophisticated simplicity, emphasizing the inherent beauty of the industrial elements.

    Rustic Industrial Chic Living Room

    This approach embraces the warmth and texture of reclaimed materials. The color palette incorporates richer tones, such as deep browns, muted greens, and rusty oranges. Furniture includes vintage leather armchairs and a coffee table crafted from reclaimed wood, perhaps showing signs of wear and tear, adding to the overall charm. Lighting fixtures might incorporate Edison bulbs in exposed metal cages, complemented by strategically placed table lamps with vintage-inspired bases.

    Accessories could include vintage maps, exposed brick walls, and industrial-style metal shelving displaying curated collections of books and decorative objects. The result is a lived-in, comfortable space that evokes a sense of history and craftsmanship.

    Modern Industrial Chic Living Room

    This interpretation balances industrial elements with contemporary design principles. The color palette might feature a mix of cool grays, metallic accents, and pops of vibrant color, such as teal or mustard yellow. Furniture includes clean-lined sofas and armchairs with modern silhouettes, perhaps upholstered in a textured fabric like linen or velvet. Lighting is a blend of industrial and modern, possibly incorporating sleek pendant lights alongside exposed filament bulbs.

    Accessories are carefully chosen, emphasizing geometric shapes and minimalist design. The space exudes a sense of sophisticated modernity, with industrial elements serving as textural and stylistic accents rather than the dominant focus.

    Visual Impact of Exposed Brick, Metal Shelving, and Vintage Leather

    Imagine a living room bathed in the warm glow of late afternoon sun, its light filtering through large factory-style windows. The exposed brick walls, a testament to the building’s history, provide a textured backdrop, their uneven surface catching the light and casting subtle shadows. Metal shelving units, painted a matte black, stand against the brick, their clean lines contrasting with the rough texture of the wall.

    On these shelves, carefully curated objects—vintage books, antique tools, and sculptural pieces—are artfully arranged, adding depth and visual interest. A worn leather armchair, its patina deepened by years of use, sits in a sunlit corner, its soft curves a counterpoint to the hard lines of the metal and brick. The interplay of light and shadow creates a dynamic and visually captivating space, highlighting the beauty of both the raw industrial elements and the carefully chosen furnishings.

    The shadows accentuate the texture of the brick, creating a sense of depth and history, while the light highlights the rich tones of the leather and the metallic sheen of the shelving.

    Impact of Different Window Treatments on Industrial Chic Decor

    Window treatments play a crucial role in modulating the light and overall aesthetic of an industrial chic living room. Sheer curtains, for example, allow ample natural light to filter into the space while softening the harshness of industrial elements. They add a touch of elegance and create a more intimate atmosphere. In contrast, blinds, particularly metal blinds, maintain the industrial theme, offering precise control over light and privacy.

    They enhance the minimalist and functional aspects of the style. The choice depends on the desired level of light control and the overall mood the designer aims to create. For a balance, a combination could be employed, using sheer curtains layered over blinds to offer flexibility and visual interest.

    Concluding Remarks

    Creating an industrial chic living room is about more than just selecting the right furniture; it’s about understanding the underlying principles of the style and using them to craft a space that reflects your personal style. By thoughtfully incorporating raw materials, vintage pieces, and strategic lighting, you can achieve a space that’s both stylish and surprisingly inviting. The key is to find the perfect balance between the cool, industrial elements and warmer, more comfortable accents, creating a space that’s both visually striking and incredibly livable.

    The result? A living room that’s as unique and captivating as its story.

    Frequently Asked Questions

    What are some affordable ways to incorporate industrial chic elements?

    Repurposing existing furniture is a great starting point. A simple coat of paint can transform an old wooden table into a rustic industrial piece. Thrift stores and flea markets are treasure troves of vintage finds that can add character and authenticity without breaking the bank. Consider using affordable metal shelving units for storage and incorporating inexpensive Edison-style bulbs for lighting.

    How do I prevent an industrial chic living room from feeling too cold?

    Introduce warmth through textures like plush rugs, soft throws, and comfortable cushions. Incorporate natural elements such as plants and wooden accents. Opt for warmer metallic finishes like brushed brass or copper instead of stark chrome. A strategically placed fireplace can also add a significant amount of warmth, both literally and visually.

    Can industrial chic work in a small living room?

    Absolutely! The key is to use light colors and maximize vertical space. Utilize mirrors to create an illusion of more space. Choose multi-functional furniture pieces that serve dual purposes, such as ottomans with storage. Keep the color palette light and airy, and avoid overcrowding the space.

    What type of flooring best complements industrial chic?

    Concrete flooring is a classic choice, offering a raw and authentic feel. However, polished concrete or hardwood floors can also work beautifully, adding warmth and sophistication. Consider the overall aesthetic you are aiming for when selecting your flooring; a rustic industrial design might suit concrete better, while a more modern industrial look might be enhanced by hardwood.